B
A
C
| F | E |
|
|
|
|
| D |
|
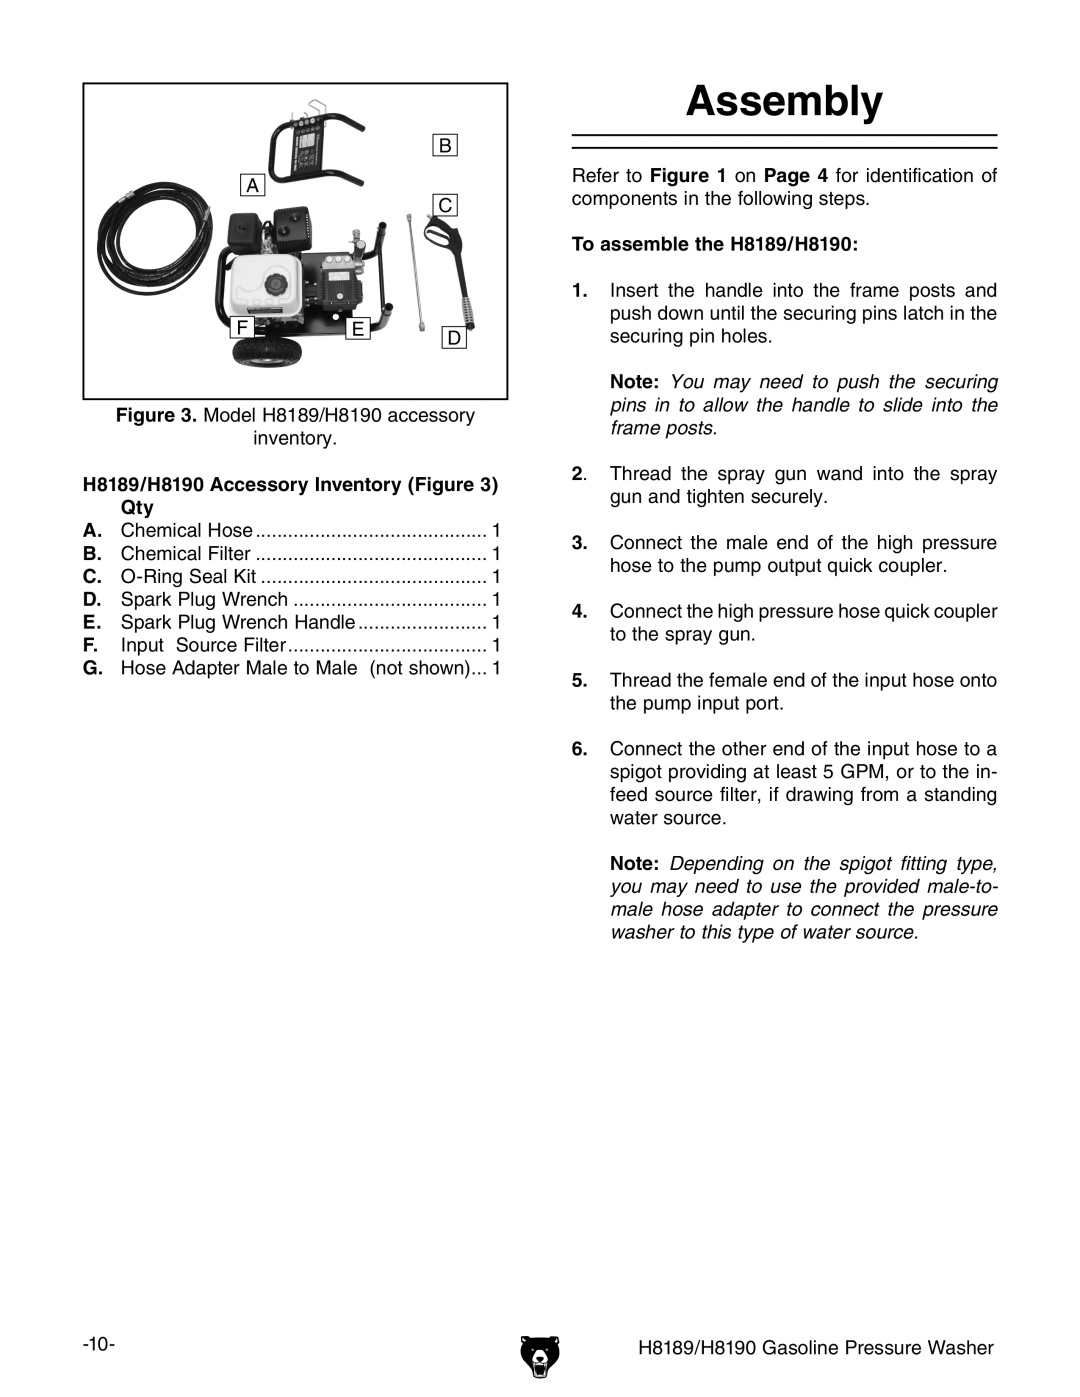
| Figure 3. Model H8189/H8190 accessory |
| ||
| inventory. |
|
|
|
H8189/H8190 Accessory Inventory (Figure 3) | ||||
| Qty |
|
|
|
A. | Chemical Hose |
| 1 | |
B. | Chemical Filter |
| 1 | |
C. |
| 1 | ||
D. | Spark Plug Wrench |
| 1 | |
E. | Spark Plug Wrench Handle | 1 | ||
F. | Input Source Filter |
| 1 | |
G. | Hose Adapter Male to Male (not shown)... | 1 | ||
Assembly
Refer to Figure 1 on Page 4 for identification of components in the following steps.
To assemble the H8189/H8190:
1.Insert the handle into the frame posts and push down until the securing pins latch in the securing pin holes.
Note: You may need to push the securing pins in to allow the handle to slide into the frame posts.
2. Thread the spray gun wand into the spray gun and tighten securely.
3.Connect the male end of the high pressure hose to the pump output quick coupler.
4.Connect the high pressure hose quick coupler to the spray gun.
5.Thread the female end of the input hose onto the pump input port.
6.Connect the other end of the input hose to a spigot providing at least 5 GPM, or to the in- feed source filter, if drawing from a standing water source.
Note: Depending on the spigot fitting type, you may need to use the provided
H8189/H8190 Gasoline Pressure Washer
