Note: You can make sure that the blade ends are even with each other by stacking them together with the teeth facing in oppo- site directions (see Figure 11), then grinding them. Regardless of the grinding angle, the blade ends will match evenly for welding.
Figure 11. Blade ends stacked with teeth facing
opposite directions.
3.Use 120-grit emery cloth or an equivalent to lightly sand the part of the blade that will contact the welder clamps. This helps ensure a good electrical contact with the blade for welding.
Note: To prevent dulling the teeth, keep the emery cloth away from them when sanding the blade surface.
Welding
1.Turn the main ON/OFF switch OFF, then
DISCONNECT WELDER FROM POWER!
2.Thoroughly clean the welding clamps to remove debris, oily substances, or flash from previous welding operations. If necessary, lightly sand them with
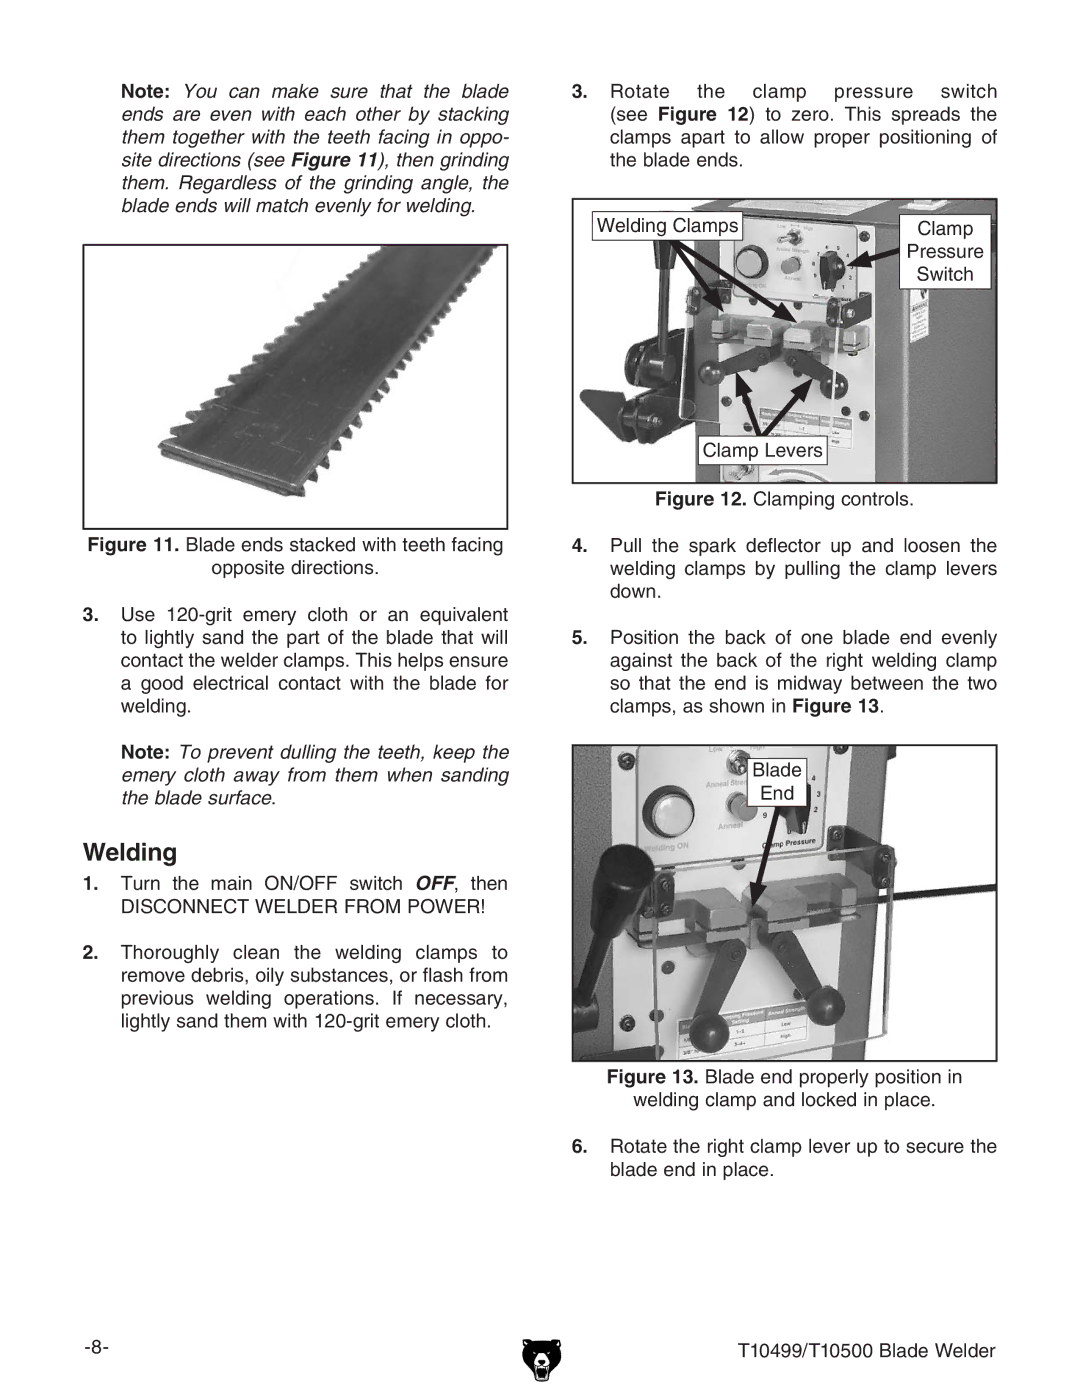
3.Rotate the clamp pressure switch (see Figure 12) to zero. This spreads the clamps apart to allow proper positioning of the blade ends.
Welding Clamps | Clamp |
| Pressure |
| Switch |
Clamp Levers |
|