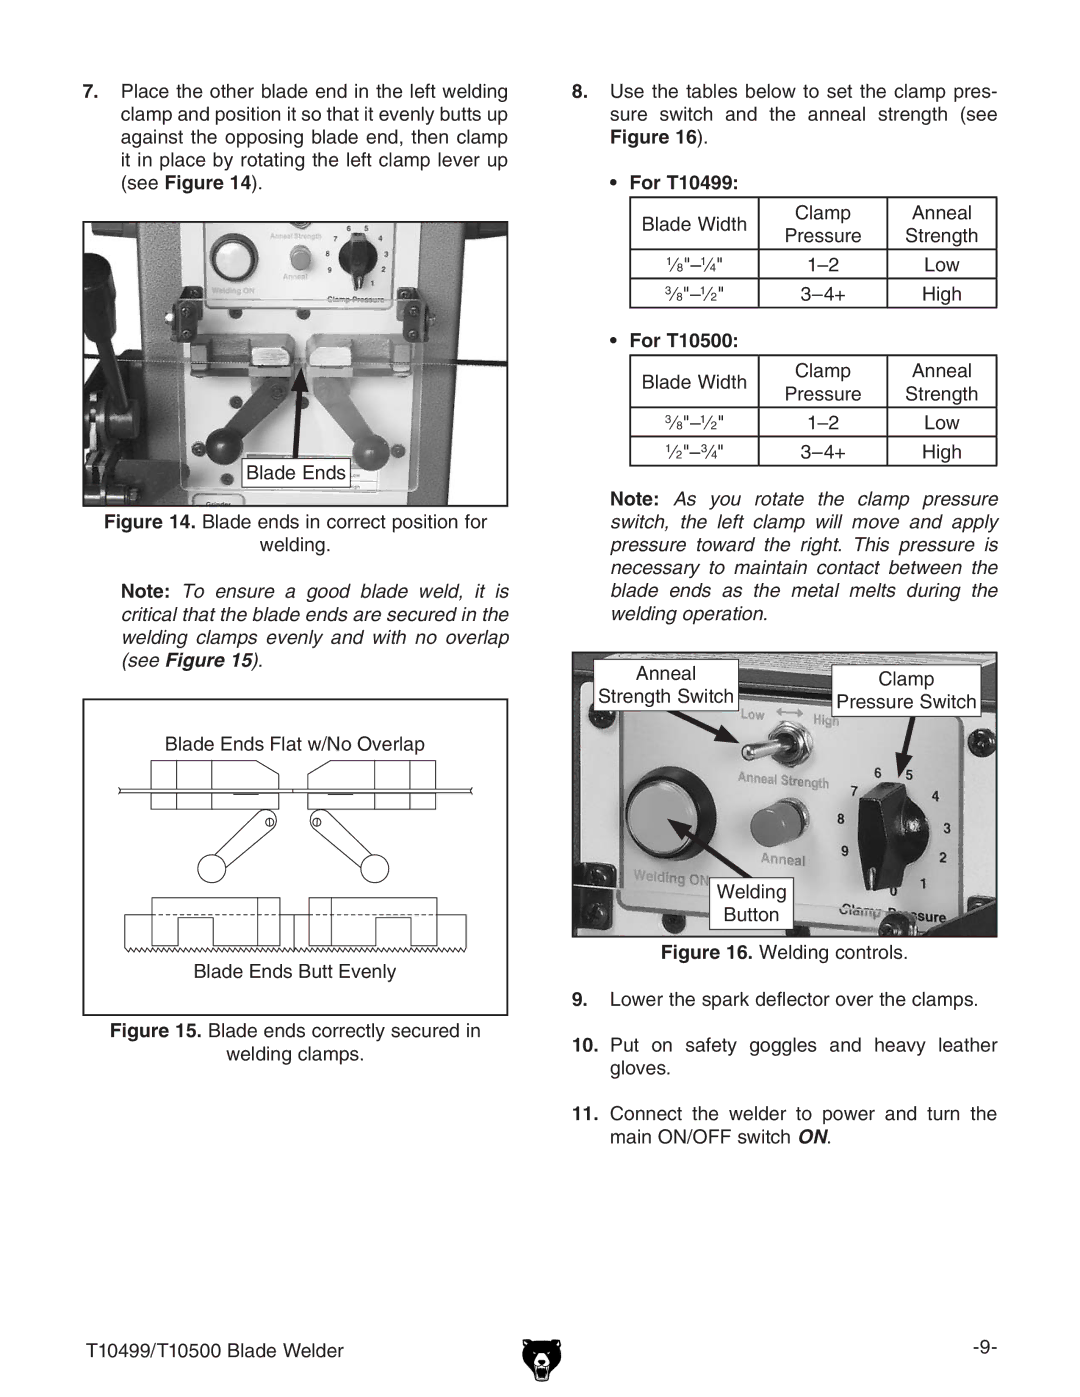
7.Place the other blade end in the left welding clamp and position it so that it evenly butts up against the opposing blade end, then clamp it in place by rotating the left clamp lever up (see Figure 14).
Blade Ends
Figure 14. Blade ends in correct position for
welding.
Note: To ensure a good blade weld, it is critical that the blade ends are secured in the welding clamps evenly and with no overlap (see Figure 15).
Blade Ends Flat w/No Overlap |
Blade Ends Butt Evenly |
Figure 15. Blade ends correctly secured in
welding clamps.
8. Use the tables below to set the clamp pres- sure switch and the anneal strength (see
Figure 16).
• For T10499:
Blade Width | Clamp | Anneal | |
Pressure | Strength | ||
| |||
|
|
| |
Low | |||
High |
• For T10500:
Blade Width | Clamp | Anneal | |
Pressure | Strength | ||
| |||
Low | |||
High |
Note: As you rotate the clamp pressure switch, the left clamp will move and apply pressure toward the right. This pressure is necessary to maintain contact between the blade ends as the metal melts during the welding operation.
Anneal | Clamp | |
Strength Switch | ||
Pressure Switch | ||
| ||
Welding |
| |
Button |
|
Figure 16. Welding controls.
9.Lower the spark deflector over the clamps.
10.Put on safety goggles and heavy leather gloves.
11.Connect the welder to power and turn the main ON/OFF switch ON.
T10499/T10500 Blade Welder |