Test Run &
Break In
To test run and break in the air com- pressor:
1.Put on safety goggles, and place the compressor on a solid, level surface.
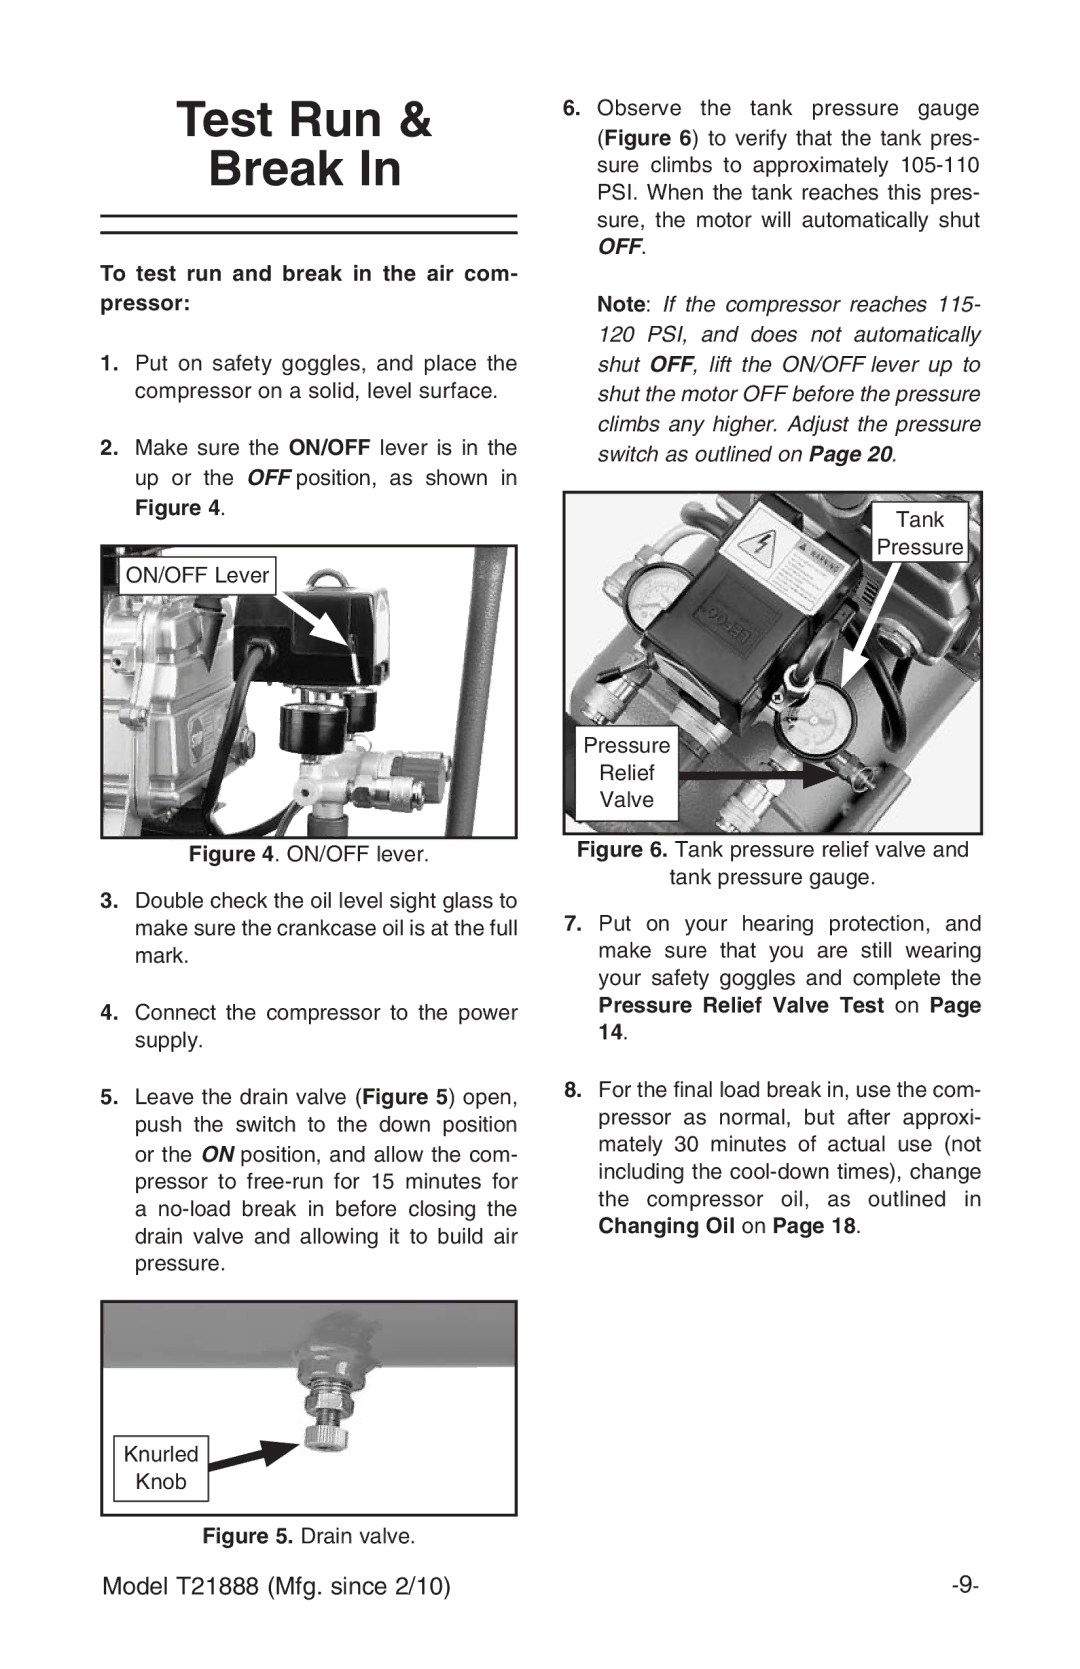
2.Make sure the ON/OFF lever is in the up or the OFF position, as shown in
Figure 4.
ON/OFF Lever
Figure 4. ON/OFF lever.
3.Double check the oil level sight glass to make sure the crankcase oil is at the full mark.
4.Connect the compressor to the power supply.
5.Leave the drain valve (Figure 5) open, push the switch to the down position or the ON position, and allow the com- pressor to free-run for 15 minutes for a no-load break in before closing the drain valve and allowing it to build air pressure.
6.Observe the tank pressure gauge (Figure 6) to verify that the tank pres- sure climbs to approximately 105-110 PSI. When the tank reaches this pres- sure, the motor will automatically shut
OFF.
Note: If the compressor reaches 115- 120 PSI, and does not automatically shut OFF, lift the ON/OFF lever up to shut the motor OFF before the pressure climbs any higher. Adjust the pressure switch as outlined on Page 20.
Tank
Pressure
Pressure
Relief ![]()
Valve
Figure 6. Tank pressure relief valve and
tank pressure gauge.
7.Put on your hearing protection, and make sure that you are still wearing your safety goggles and complete the
Pressure Relief Valve Test on Page 14.
8.For the final load break in, use the com- pressor as normal, but after approxi- mately 30 minutes of actual use (not including the
Changing Oil on Page 18.
Knurled
Knob
Figure 5. Drain valve.
Model T21888 (Mfg. since 2/10) |
