3.Move the cup lock lever against the vacuum hose connection to release the pressure between the cup hooks and
4.Fill the fluid cup with the desired mate- rial, then place it on a flat, stable sur- face.
5.Move the lock lever against the vacuum relief hose connection, then place the cup lid and gun body assembly on the cup
6.Engage the cup pins with the hooks, then rotate the lock lever clockwise until the lid is firmly secured.
To ensure the fluid cup does not leak or spill material during the spraying operation, always make sure the cup is securely sealed to the lid with both pins fully engaged with the hooks.
7.Set the inlet air pressure (the air com- ing to the spray gun) to the lowest operating air pressure recommended in the Tool Data Sheet on Page 3 or to the material manufacturer's recom- mendations.
8.Connect the spray gun to the com- pressed air.
9.Adjust the atomizing cap to vertical or horizontal. See Atomizing Cap Adjustment on Page 8 for a further explanation.
Note: Trial and error are necessary to achieve the results you want along with a fair amount of practice. Test your material flow and spray pattern on a piece of cardboard or some scrap of material similar to your project.
Model T23092
10.Adjust the fluid control knob to start with a low volume of material and keep the atomization as low as possible. You will need to use a combination of fluid control, inlet air pressure, air flow control and stroke speed to achieve the results you want. Spray so the material wets out nicely without running or sag- ging.
11.Use the pattern control knob to adjust the spray fan to your desired pattern.
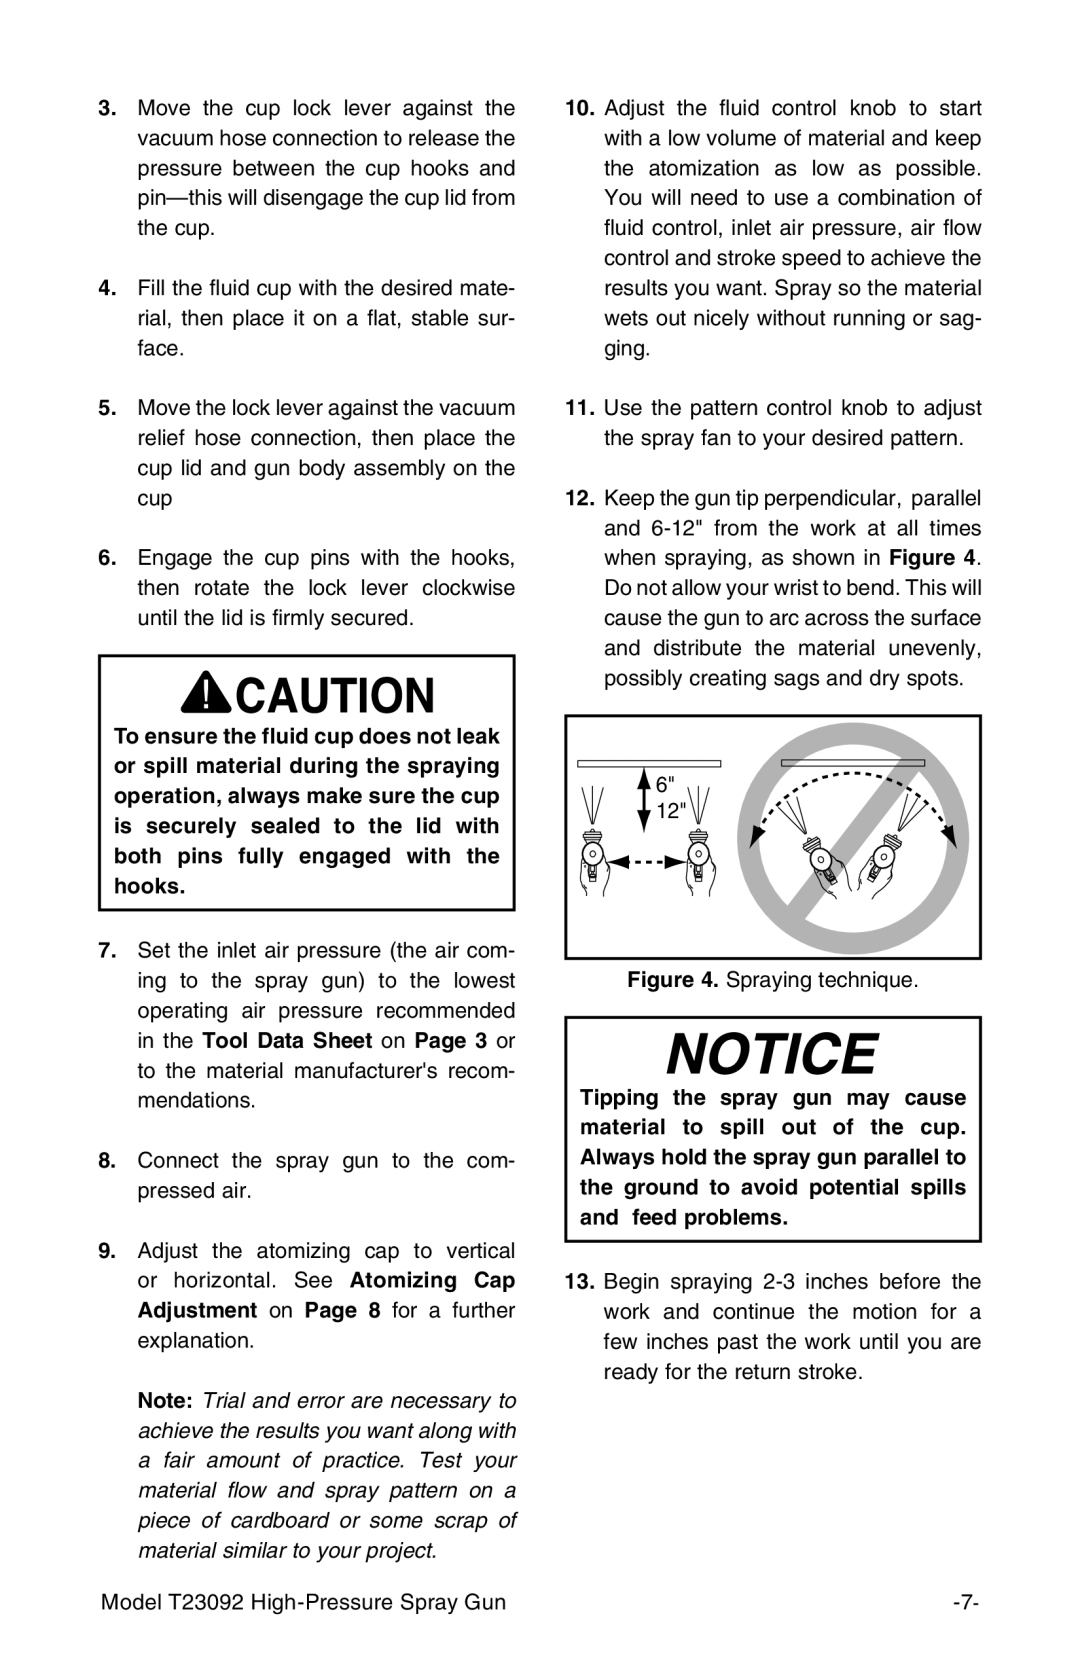
12.Keep the gun tip perpendicular, parallel and
6" |
12" |
Figure 4. Spraying technique.
Tipping the spray gun may cause material to spill out of the cup. Always hold the spray gun parallel to the ground to avoid potential spills and feed problems.
13.Begin spraying