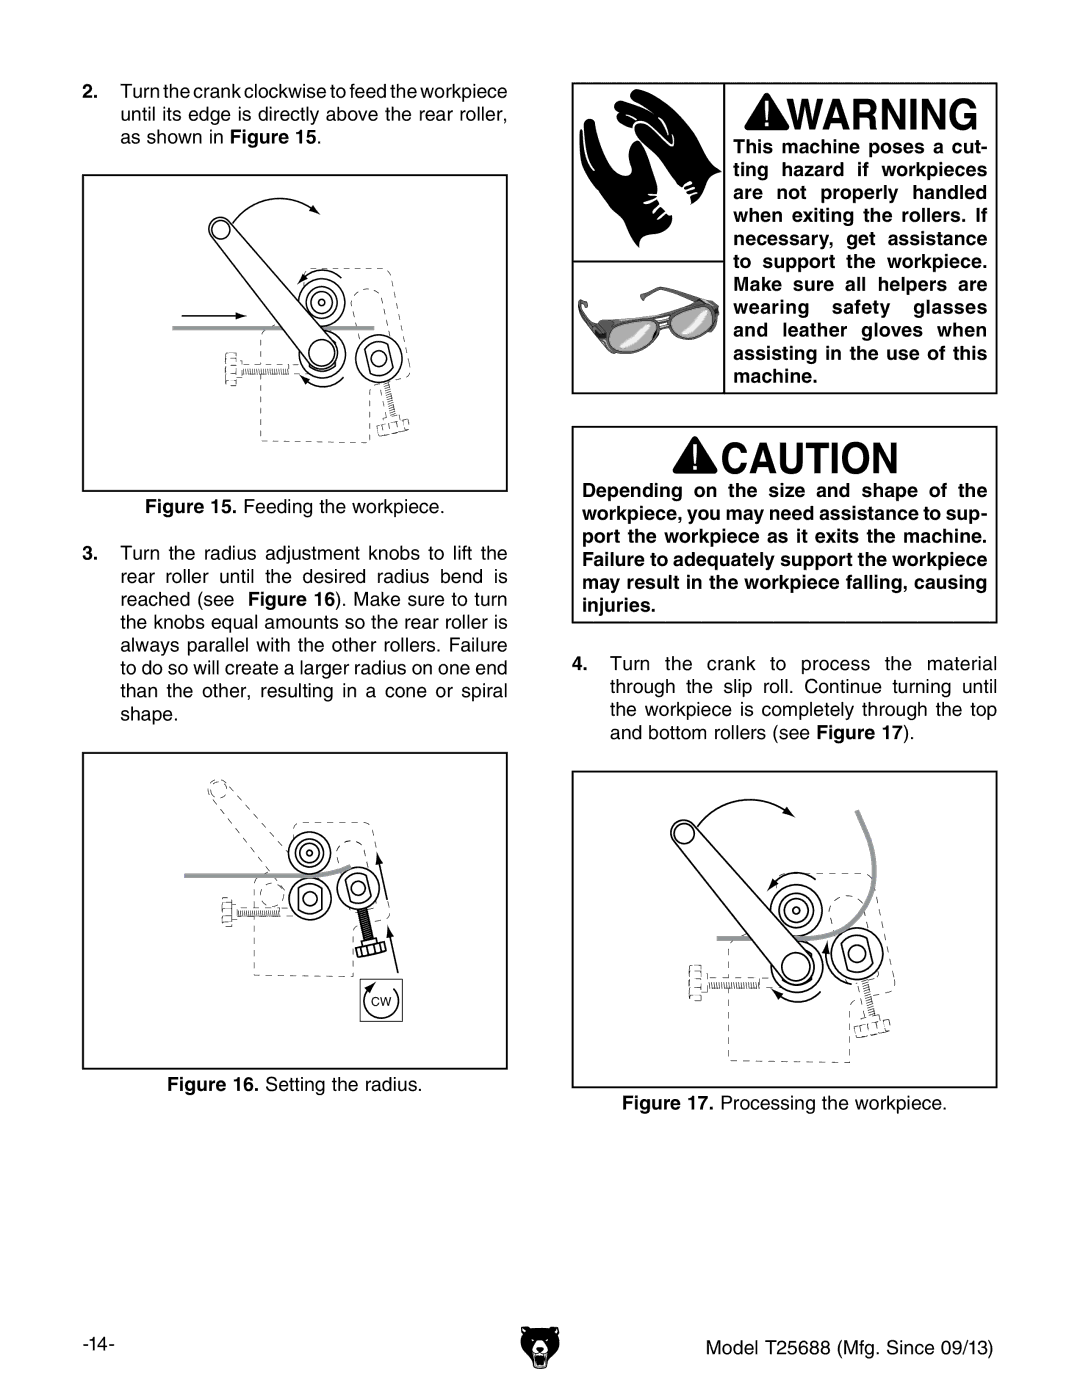
2.Turn the crank clockwise to feed the workpiece until its edge is directly above the rear roller, as shown in Figure 15.
This machine poses a cut- ting hazard if workpieces are not properly handled when exiting the rollers. If necessary, get assistance to support the workpiece. Make sure all helpers are wearing safety glasses and leather gloves when assisting in the use of this machine.
Figure 15. Feeding the workpiece.
3.Turn the radius adjustment knobs to lift the rear roller until the desired radius bend is reached (see Figure 16). Make sure to turn the knobs equal amounts so the rear roller is always parallel with the other rollers. Failure to do so will create a larger radius on one end than the other, resulting in a cone or spiral shape.
Depending on the size and shape of the workpiece, you may need assistance to sup- port the workpiece as it exits the machine. Failure to adequately support the workpiece may result in the workpiece falling, causing injuries.
4.Turn the crank to process the material through the slip roll. Continue turning until the workpiece is completely through the top and bottom rollers (see Figure 17).
CW
Figure 16. Setting the radius.
Figure 17. Processing the workpiece.
Model T25688 (Mfg. Since 09/13) |