YB500 specifications
The Grundig YB500 is a portable radio that has garnered attention for its combination of performance, portability, and user-friendly features. Designed primarily for radio enthusiasts and travelers, the YB500 offers access to a wide range of radio bands, including AM, FM, and shortwave, making it a versatile choice for those looking to stay connected to the airwaves, regardless of location.One of the standout features of the Grundig YB500 is its impressive reception capabilities. Equipped with a high-sensitivity tuner and a built-in telescopic antenna, the YB500 excels in capturing distant signals, ensuring users can access a diverse array of stations. This is particularly beneficial for travelers who may find themselves in remote areas where local stations are sparse. The radio is also designed to reduce interference, enhancing clarity and providing a more enjoyable listening experience.
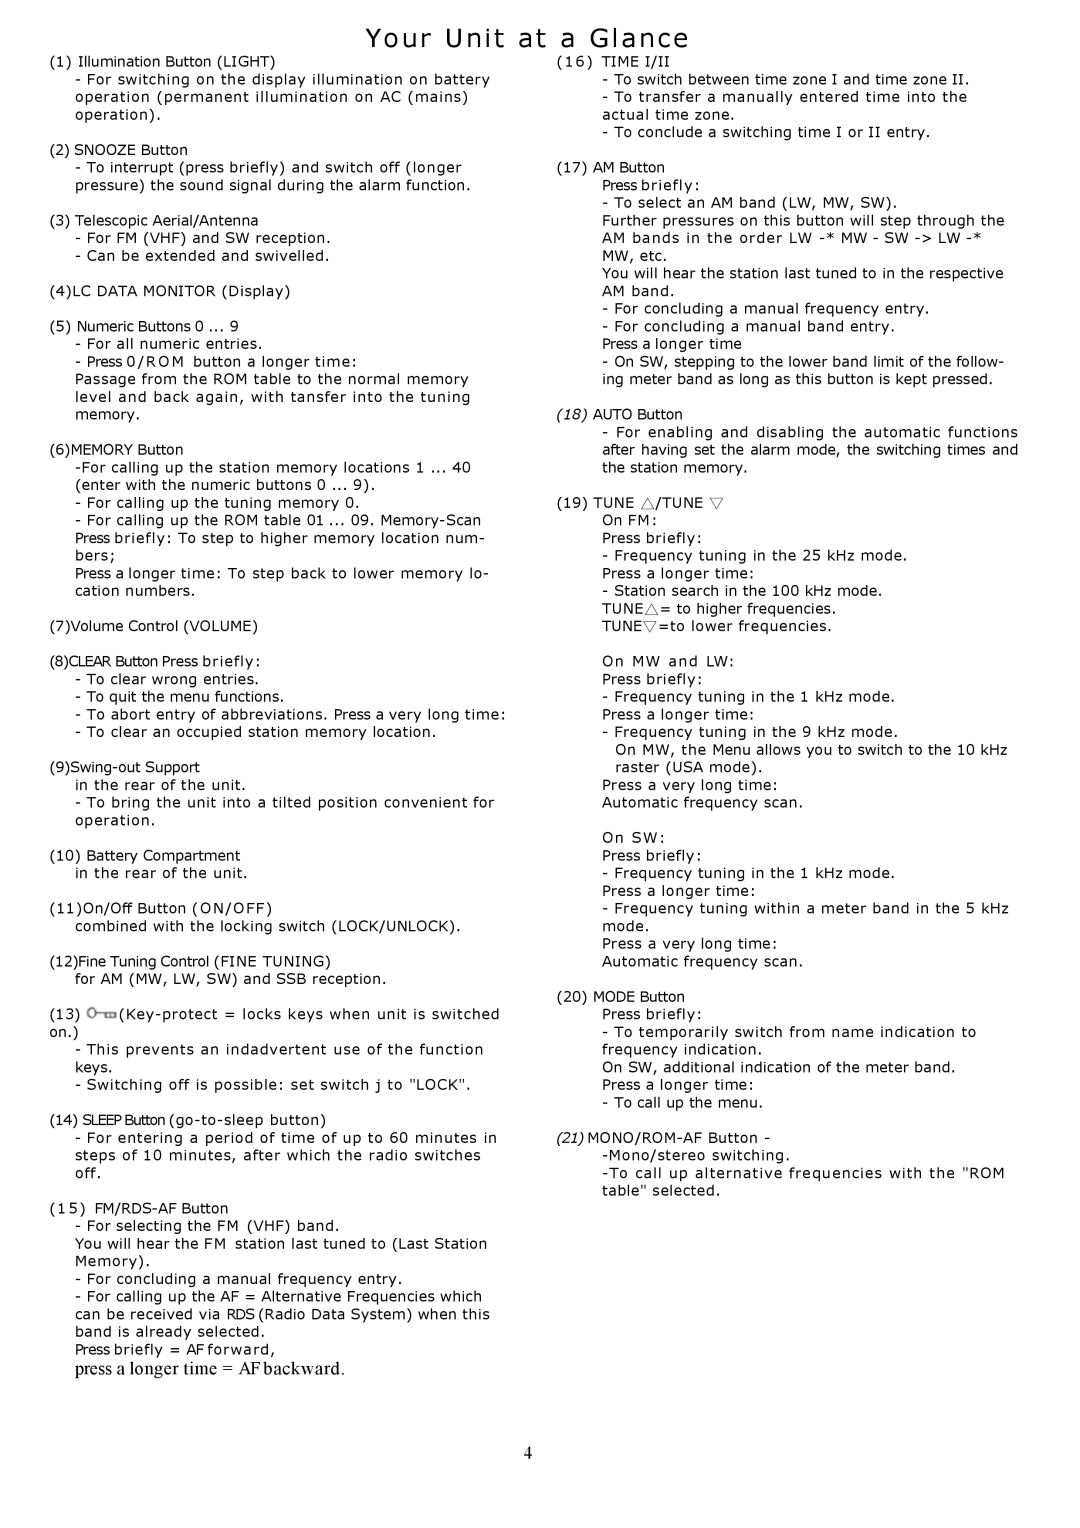
The YB500 boasts an easy-to-read LCD display that shows essential information, including the frequency, selected band, and time. The intuitive interface allows users to switch between bands effortlessly, making it suitable for both novices and seasoned radio enthusiasts. Additionally, the radio has a large control knob and clearly labeled buttons, ensuring that operation is straightforward, even in low-light conditions.
Another notable feature of the Grundig YB500 is its durability and portability. The compact, lightweight design makes it easy to carry, whether for outdoor activities, leisure, or emergency situations. The radio is powered by both mains electricity and batteries, offering flexibility and ensuring that users can enjoy their favorite stations without being tethered to a power source.
Furthermore, the YB500 includes advanced audio technologies that enhance sound quality. Its built-in speaker delivers clear and powerful audio, with options for headphone output, providing a private listening experience when desired. With adjustable volume and tone controls, users can tailor their audio experience to meet their preferences.
In conclusion, the Grundig YB500 combines advanced reception technology with an intuitive interface, durability, and excellent sound quality. Its versatility makes it an excellent choice for radio enthusiasts and casual listeners alike. Whether used at home or on the go, the YB500 is designed to deliver a superior listening experience, ensuring users stay connected to the world through the power of radio.