

 Installation Sequences
 Installation Sequences
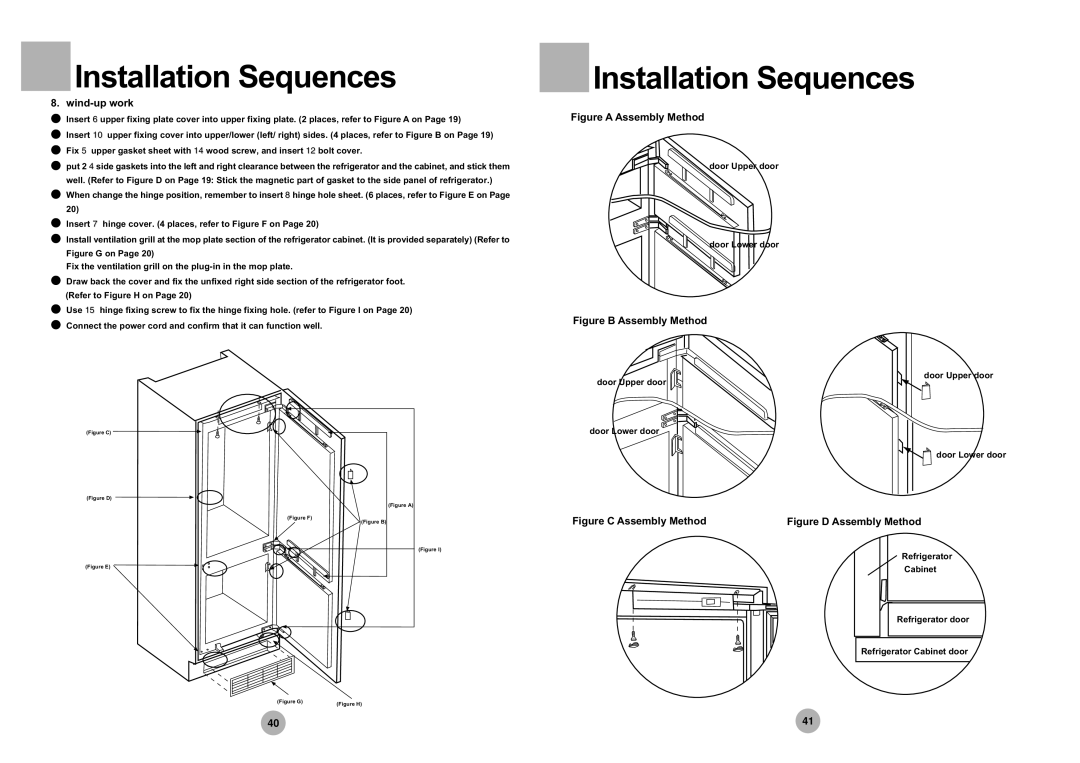
HRF-305 specifications
The Haier HRF-305 is an impressive refrigerator that stands out in the competitive market of home appliances. This model combines functionality and modern design, making it an ideal choice for a variety of households. With a sleek finish and thoughtful layout, the HRF-305 is not just a refrigerator but a stylish addition to any kitchen.One of the main features of the Haier HRF-305 is its spacious capacity. With a total volume that comfortably accommodates the needs of a medium to large family, it includes well-organized shelves and drawers to help maximize storage efficiency. The interior features adjustable shelves, allowing users to customize the space according to their preferences, whether for tall bottles or various food items.
In terms of technology, the HRF-305 is equipped with an energy-efficient cooling system that ensures optimal temperature control, preserving the freshness of food for longer periods. The inverter compressor technology used in this model not only maintains consistent cooling but also reduces energy consumption. This makes the HRF-305 an eco-friendly choice for those looking to minimize their carbon footprint while enjoying modern conveniences.
Another notable characteristic of the Haier HRF-305 is its advanced air circulation system. This feature helps eliminate hot spots and ensures an even temperature throughout the refrigerator. As a result, fruits, vegetables, and other perishables remain fresh and nutritious for longer. Additionally, the antibacterial technology integrated into the design helps inhibit the growth of bacteria, ensuring that the food stored within is safe and healthy.
The HRF-305 also offers a user-friendly digital control panel, making it easy to adjust settings according to personal preferences. Whether you need to quickly change the temperature or activate the quick freeze function, the intuitive interface allows for seamless operation.
Moreover, the model is designed with a whisper-quiet operation, making it suitable even for open-concept living spaces. This ensures that everyday kitchen activities are not interrupted by unnecessary noise.
With its blend of modern features, efficient technology, and stylish design, the Haier HRF-305 is an excellent choice for consumers seeking a reliable and attractive refrigeration solution for their home. Whether for storing groceries or preparing meals, this refrigerator meets the demands of contemporary living while ensuring energy efficiency and food preservation.