Operation
Timer On-Off Operation
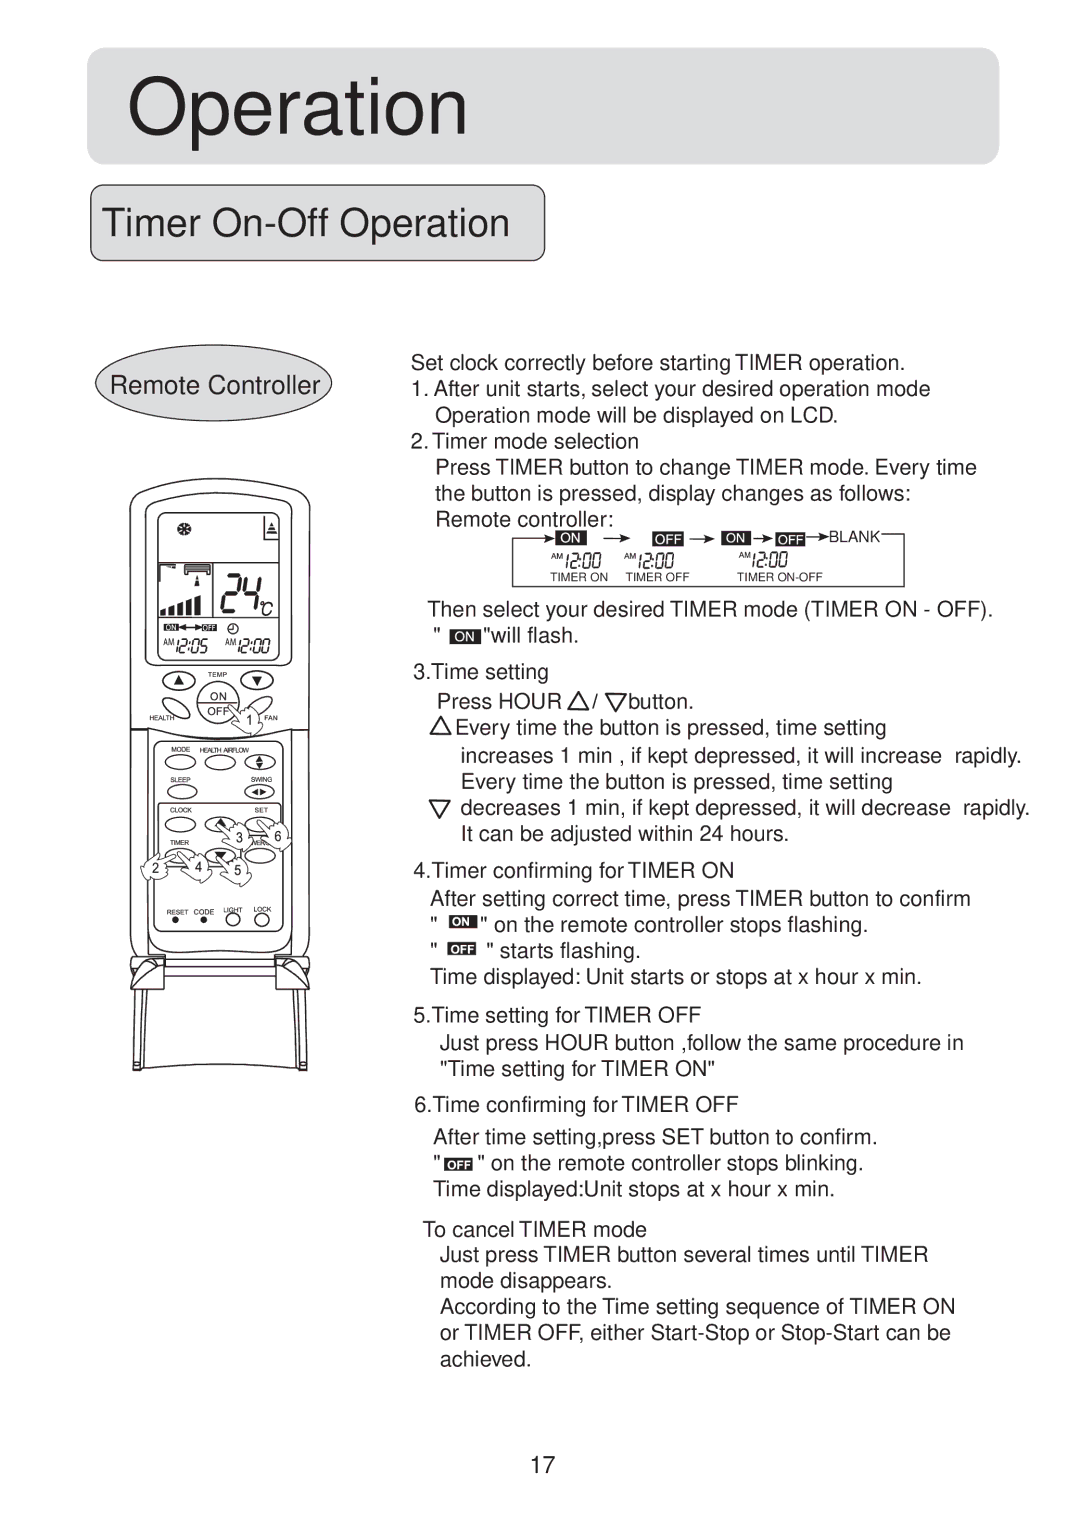
Remote Controller | Set clock correctly before starting TIMER operation. |
| |||
1. After unit starts, select your desired operation mode |
| ||||
| Operation mode will be displayed on LCD. |
| |||
| 2. Timer mode selection |
|
| ||
| Press TIMER button to change TIMER mode. Every time | ||||
| the button is pressed, display changes as follows: |
| |||
| Remote controller: |
| BLANK |
| |
|
|
|
|
| |
|
| TIMER ON | TIMER OFF | TIMER |
|
| Then select your desired TIMER mode (TIMER ON - OFF). | ||||
| " | "will flash. |
|
|
|
| 3.Time setting |
|
|
| |
| Press HOUR | button. |
|
| |
|
| Every time the button is pressed, time setting |
| ||
|
| increases 1 min , if kept depressed, it will increase | rapidly. | ||
|
| Every time the button is pressed, time setting |
| ||
|
| decreases 1 min, if kept depressed, it will decrease | rapidly. | ||
|
| It can be adjusted within 24 hours. |
| ||
| 4.Timer confirming for TIMER ON |
|
| ||
| After setting correct time, press TIMER button to confirm | ||||
| " | " on the remote controller stops flashing. |
| ||
| " | " starts flashing. |
|
| |
| Time displayed: Unit starts or stops at x hour x min. |
| |||
| 5.Time setting for TIMER OFF |
|
| ||
| Just press HOUR button ,follow the same procedure in | ||||
| "Time setting for TIMER ON" |
|
| ||
6.Time confirming for TIMER OFF
After time setting,press SET button to confirm. " ![]() " on the remote controller stops blinking. Time displayed:Unit stops at x hour x min.
" on the remote controller stops blinking. Time displayed:Unit stops at x hour x min.
To cancel TIMER mode
Just press TIMER button several times until TIMER mode disappears.
According to the Time setting sequence of TIMER ON or TIMER OFF, either
17
