External Equipment Connections
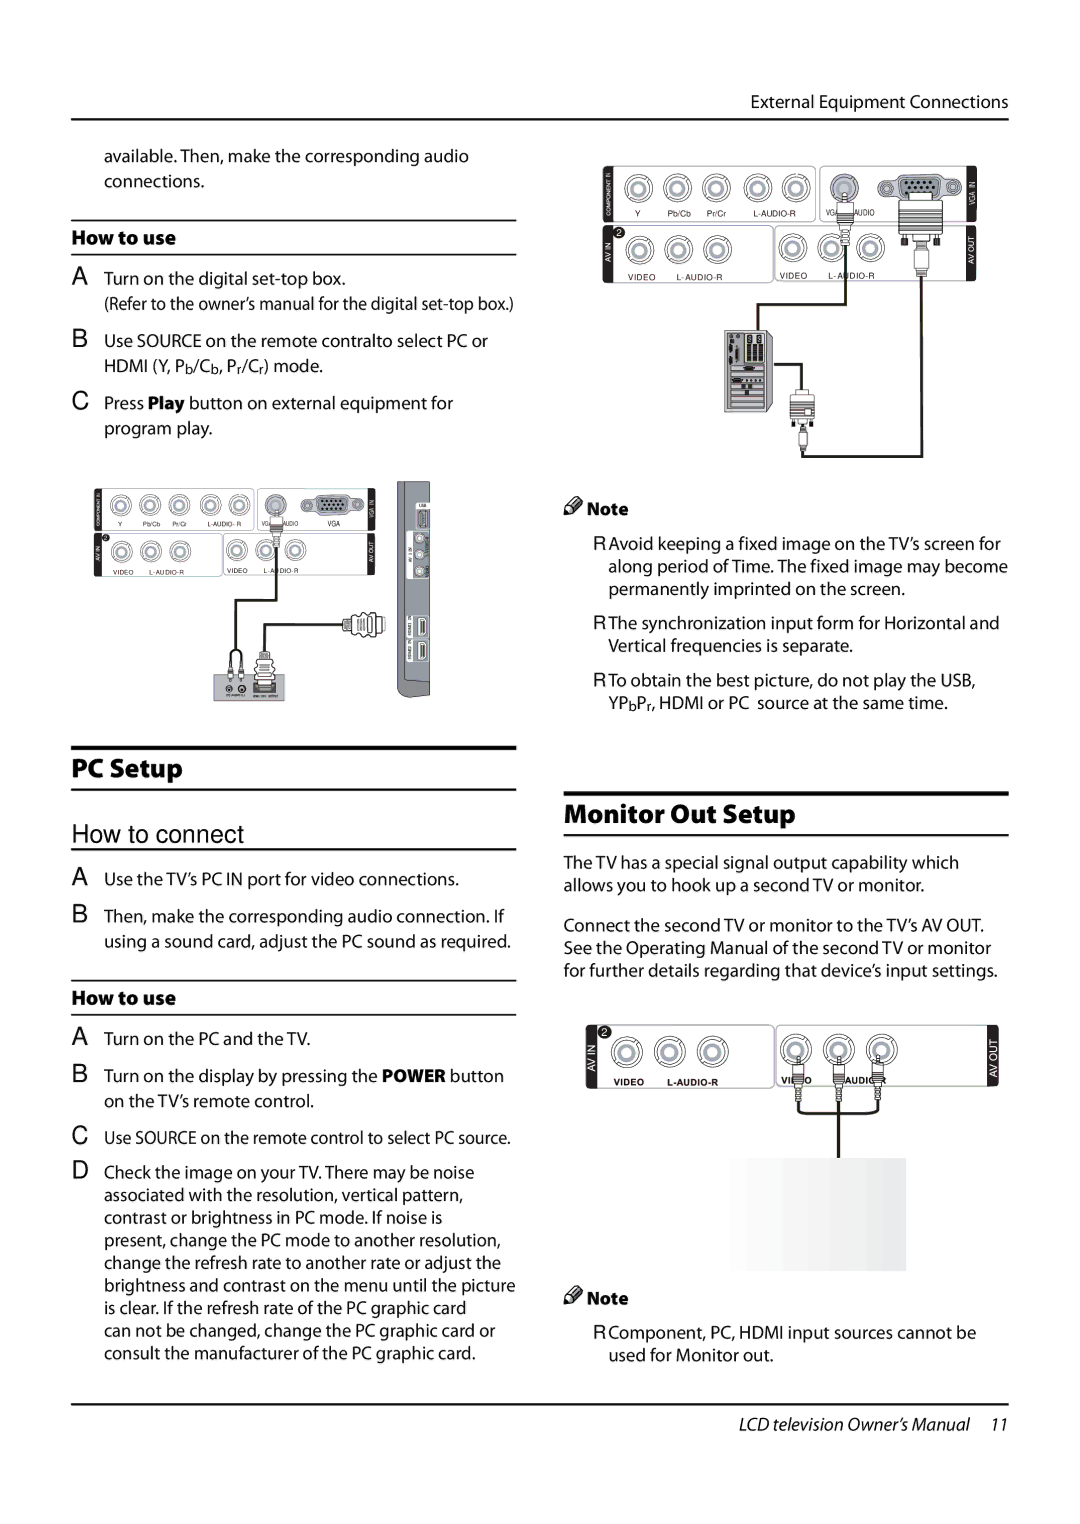
available. Then, make the corresponding audio connections.
How to use
ATurn on the digital
(Refer to the owner’s manual for the digital
BUse SOURCE on the remote contralto select PC or HDMI (Y, Pb/Cb, Pr/Cr) mode.
CPress Play button on external equipment for program play.
IN
Y
![]()
![]() 2
2![]()
![]()
VIDEO
Pb/Cb Pr/Cr
![]()
![]()
![]() AUDIO
AUDIO
VIDEO |
VGA ![]()
![]()
VGA IN![]()
![]()
IN
Y
![]() 2
2![]()
VIDEO
VGA IN
Pb/Cb Pr/Cr | AUDIO | VGA | |
VIDEO |
|
![]()
![]() Note
Note
RR Avoid keeping a fixed image on the TV’s screen for along period of Time. The fixed image may become permanently imprinted on the screen.
RR The synchronization input form for Horizontal and Vertical frequencies is separate.
RR To obtain the best picture, do not play the USB, YPbPr, HDMI or PC source at the same time.
Monitor Out Setup
The TV has a special signal output capability which allows you to hook up a second TV or monitor.
Connect the second TV or monitor to the TV’s AV OUT. See the Operating Manual of the second TV or monitor for further details regarding that device’s input settings.
2 |
![]()
![]() Note
Note
RR Component, PC, HDMI input sources cannot be used for Monitor out.
LCD television Owner’s Manual 11
