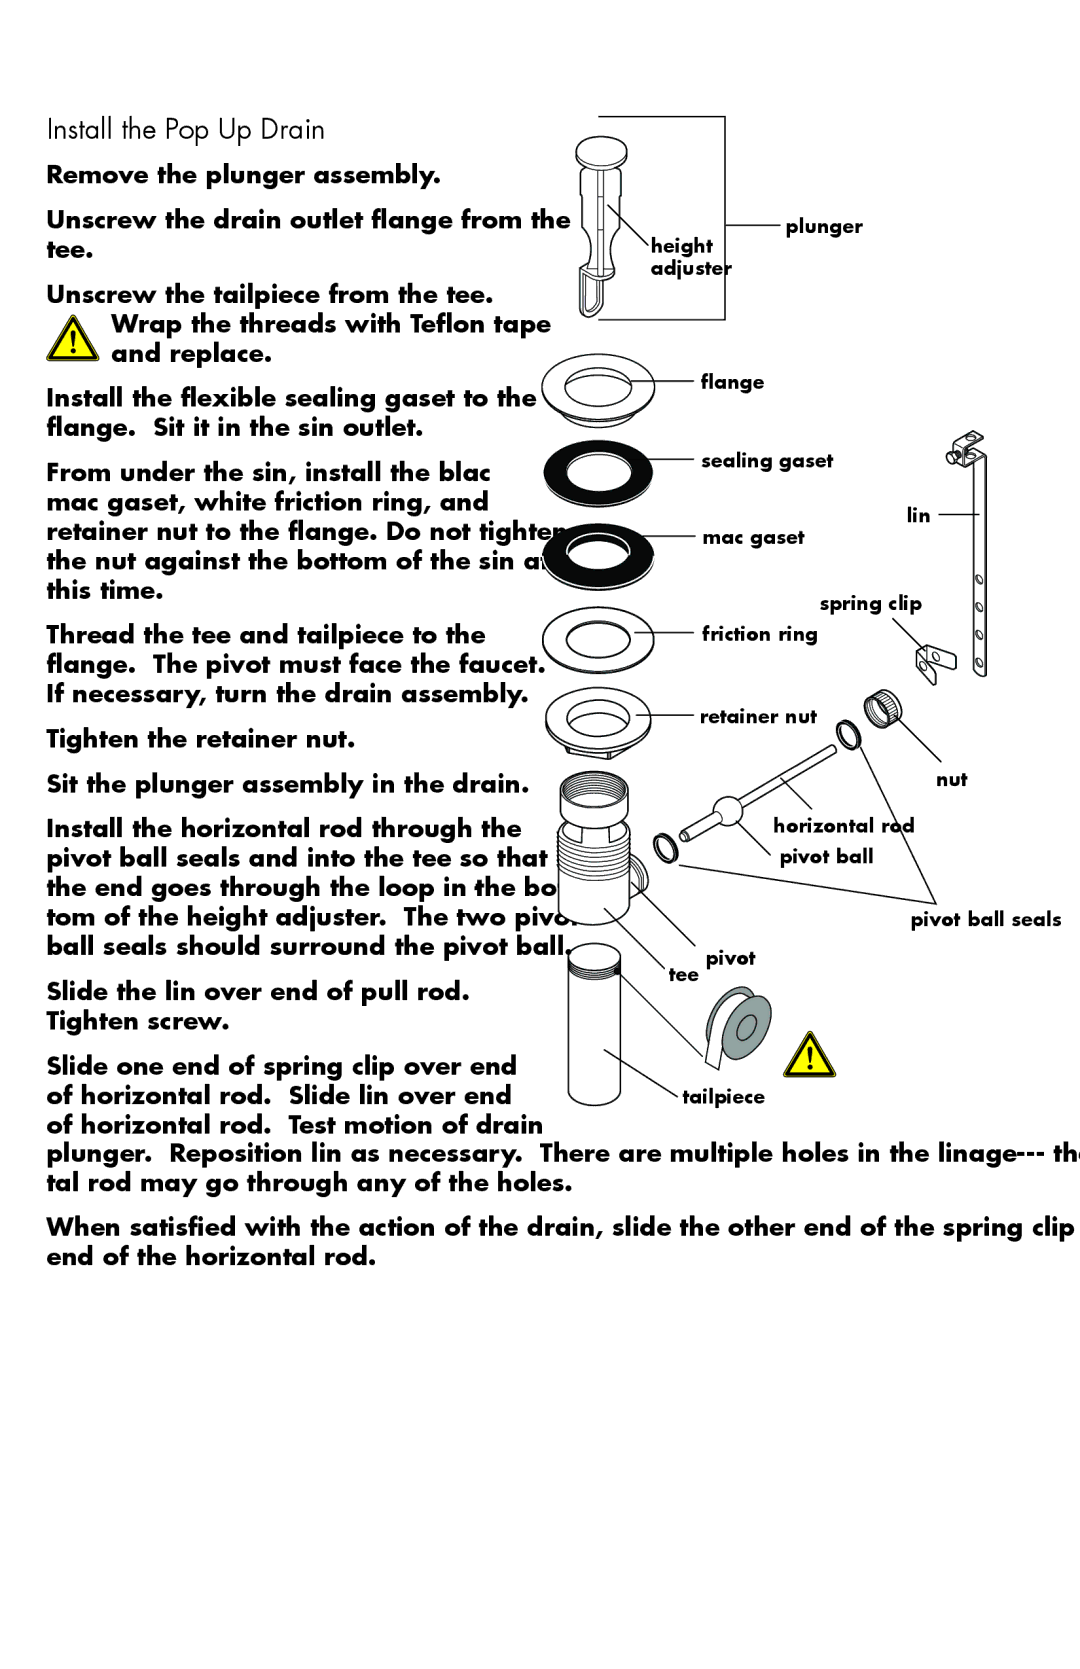
Install the Pop Up Drain
Remove the plunger assembly.
Unscrew the drain outlet flange from the tee.
Unscrew the tailpiece from the tee. Wrap the threads with Teflon tape and replace.
Install the flexible sealing gasket to the flange. Sit it in the sink outlet.
From under the sink, install the black mack gasket, white friction ring, and retainer nut to the flange. Do not tighten the nut against the bottom of the sink at this time.
Thread the tee and tailpiece to the flange. The pivot must face the faucet. If necessary, turn the drain assembly.
Tighten the retainer nut.
plunger
height adjuster
flange
![]() sealing gasket
sealing gasket
link
![]() mack gasket
mack gasket
spring clip
![]() friction ring
friction ring
retainer nut
Sit the plunger assembly in the drain.
Install the horizontal rod through the pivot ball seals and into the tee so that the end goes through the loop in the bot- tom of the height adjuster. The two pivot ball seals should surround the pivot ball.
Slide the link over end of pull rod. Tighten screw.
tee
nut
horizontal rod pivot ball
pivot ball seals
pivot
Slide one end of spring clip over end
of horizontal rod. Slide link over endtailpiece of horizontal rod. Test motion of drain
plunger. Reposition link as necessary. There are multiple holes in the linkage
When satisfied with the action of the drain, slide the other end of the spring clip over the end of the horizontal rod.