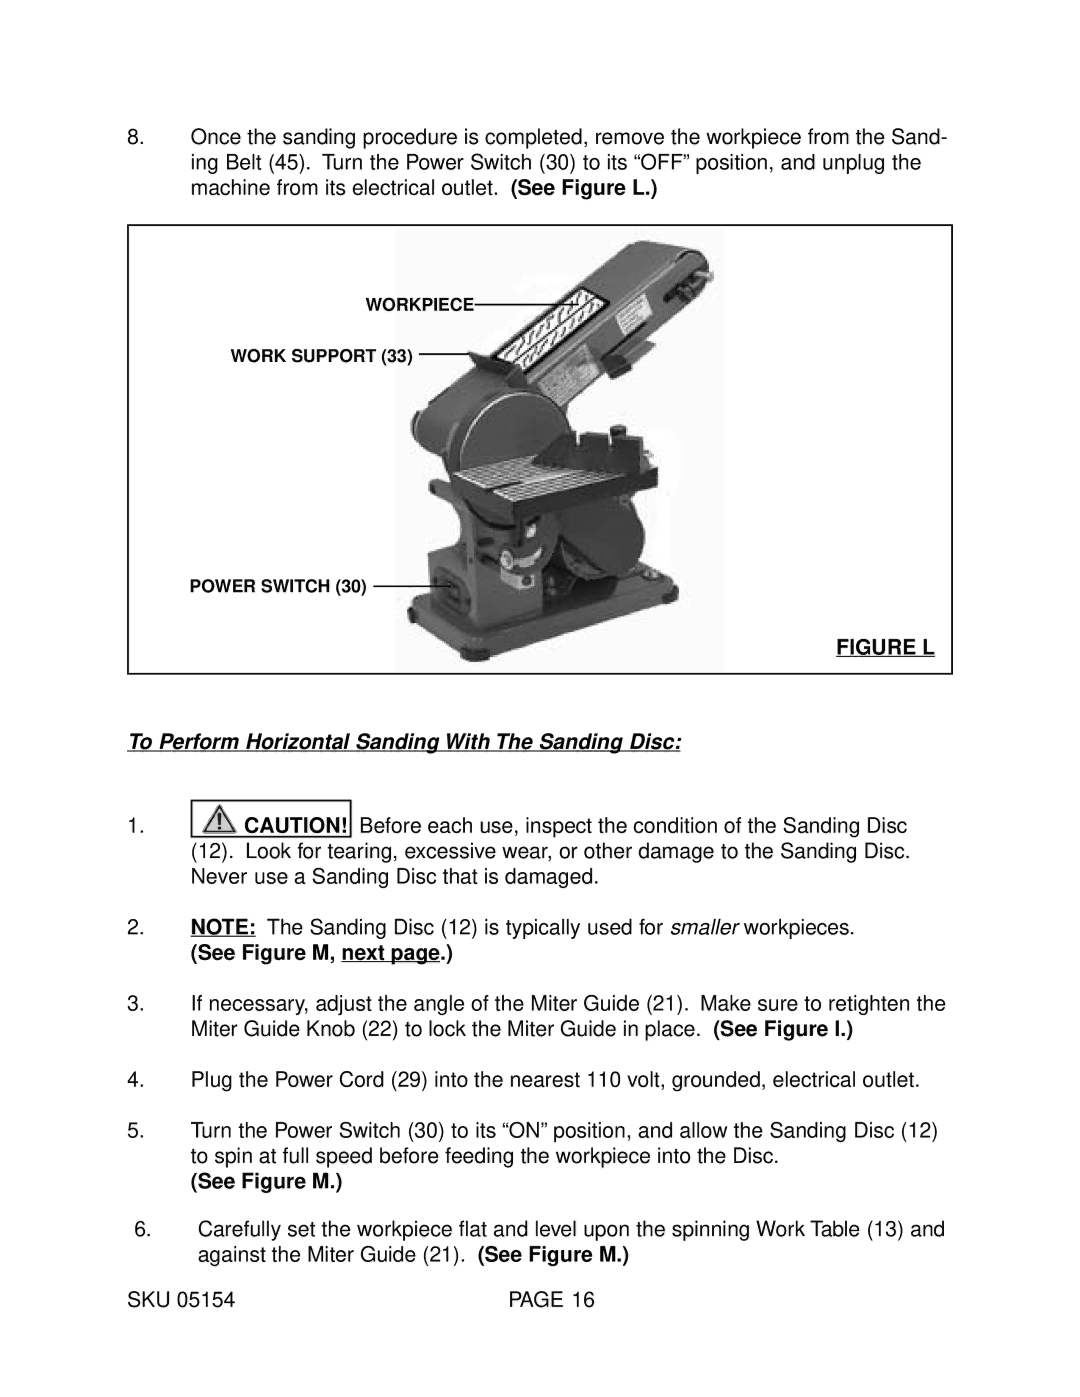
8.Once the sanding procedure is completed, remove the workpiece from the Sand- ing Belt (45). Turn the Power Switch (30) to its “OFF” position, and unplug the machine from its electrical outlet. (See Figure L.)
WORKPIECE
WORK SUPPORT (33)
POWER SWITCH (30)
FIGURE L
To Perform Horizontal Sanding With The Sanding Disc:
1.![]()
![]() CAUTION! Before each use, inspect the condition of the Sanding Disc (12). Look for tearing, excessive wear, or other damage to the Sanding Disc. Never use a Sanding Disc that is damaged.
CAUTION! Before each use, inspect the condition of the Sanding Disc (12). Look for tearing, excessive wear, or other damage to the Sanding Disc. Never use a Sanding Disc that is damaged.
2.NOTE: The Sanding Disc (12) is typically used for smaller workpieces.
(See Figure M, next page.)
3.If necessary, adjust the angle of the Miter Guide (21). Make sure to retighten the Miter Guide Knob (22) to lock the Miter Guide in place. (See Figure I.)
4.Plug the Power Cord (29) into the nearest 110 volt, grounded, electrical outlet.
5.Turn the Power Switch (30) to its “ON” position, and allow the Sanding Disc (12) to spin at full speed before feeding the workpiece into the Disc.
(See Figure M.)
6.Carefully set the workpiece flat and level upon the spinning Work Table (13) and against the Miter Guide (21). (See Figure M.)
SKU 05154 | PAGE 16 |