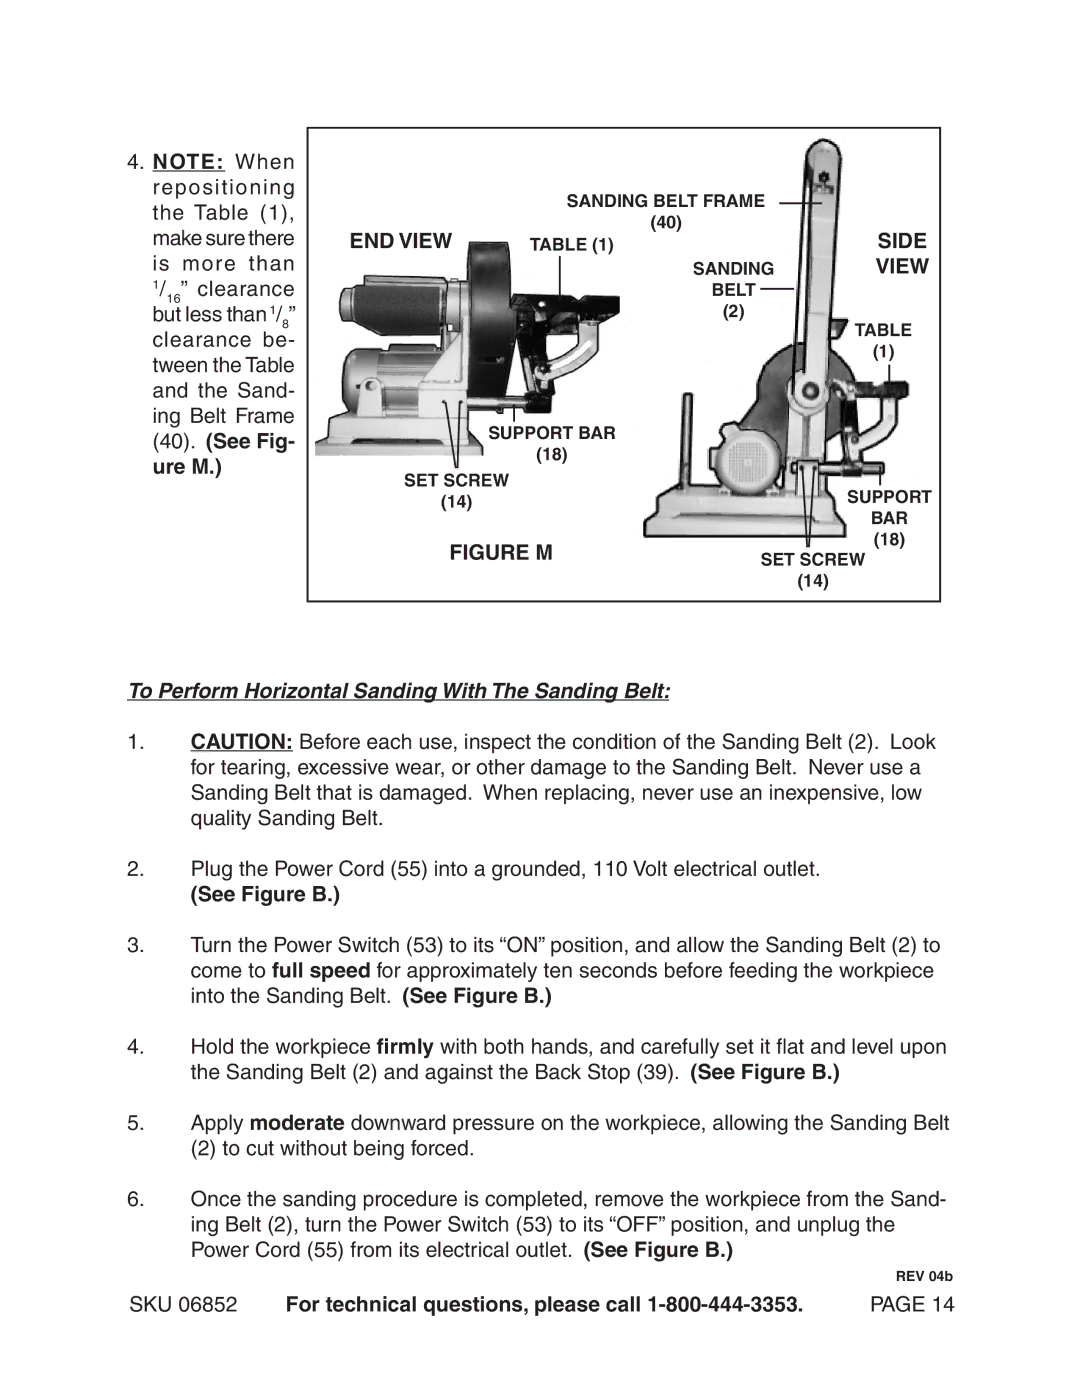
4.NOTE: When repositioning the Table (1), make sure there is more than
1/16” clearance but less than1/8” clearance be- tween the Table and the Sand- ing Belt Frame (40). (See Fig- ure M.)
SANDING BELT FRAME
(40)
END VIEW TABLE (1)SIDE
SANDINGVIEW BELT
(2)
|
| TABLE | |||
|
| (1) | |||
|
|
|
| ||
|
|
|
|
| |
|
|
|
|
| |
|
|
|
|
| |
SUPPORT BAR |
|
|
| ||
(18) |
|
|
| ||
SET SCREW |
|
|
| ||
|
|
| |||
SUPPORT | |||||
(14) |
| ||||
|
| BAR | |||
FIGURE M | (18) | ||||
SET SCREW | |||||
|
| ||||
|
| (14) |
|
| |
To Perform Horizontal Sanding With The Sanding Belt:
1.CAUTION: Before each use, inspect the condition of the Sanding Belt (2). Look for tearing, excessive wear, or other damage to the Sanding Belt. Never use a Sanding Belt that is damaged. When replacing, never use an inexpensive, low quality Sanding Belt.
2.Plug the Power Cord (55) into a grounded, 110 Volt electrical outlet.
(See Figure B.)
3.Turn the Power Switch (53) to its “ON” position, and allow the Sanding Belt (2) to come to full speed for approximately ten seconds before feeding the workpiece into the Sanding Belt. (See Figure B.)
4.Hold the workpiece firmly with both hands, and carefully set it flat and level upon the Sanding Belt (2) and against the Back Stop (39). (See Figure B.)
5.Apply moderate downward pressure on the workpiece, allowing the Sanding Belt
(2) to cut without being forced.
6.Once the sanding procedure is completed, remove the workpiece from the Sand- ing Belt (2), turn the Power Switch (53) to its “OFF” position, and unplug the Power Cord (55) from its electrical outlet. (See Figure B.)
REV 04b
SKU 06852 | For technical questions, please call | PAGE 14 |