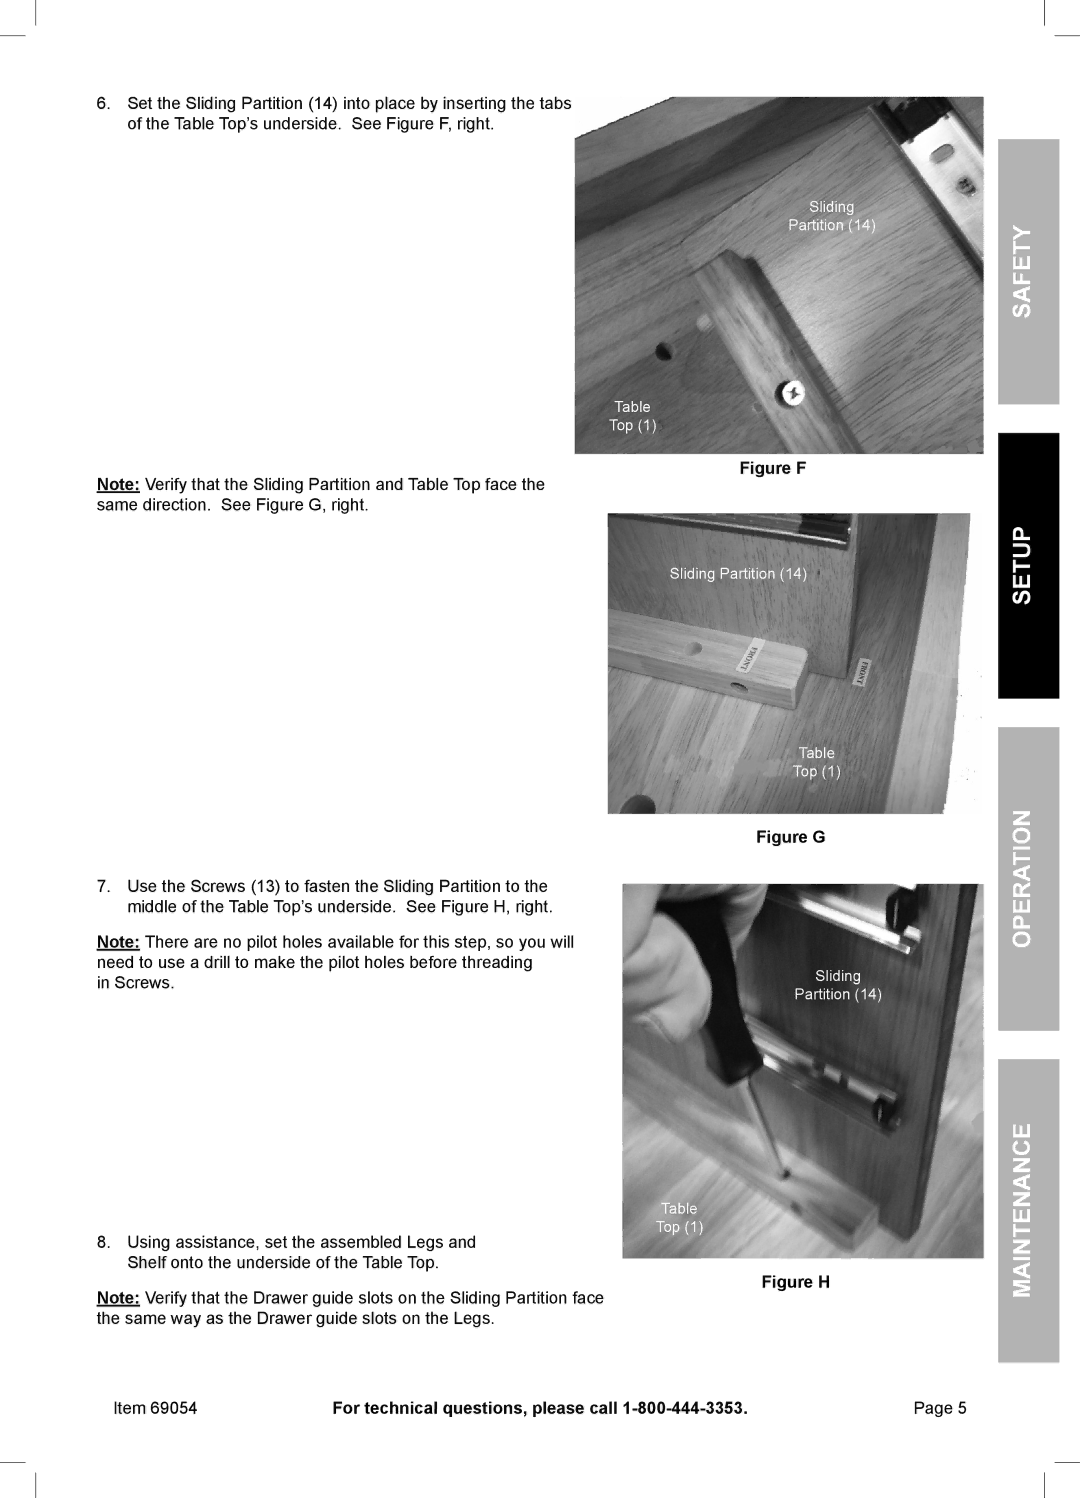
6.Set the Sliding Partition (14) into place by inserting the tabs at the end of the Partition into the holes at the center of the Table Top’s underside. See Figure F, right.
Sliding
Partition (14)
Table
Top (1)
Safety
Note: Verify that the Sliding Partition and Table Top face the same direction. See Figure G, right.
7.Use the Screws (13) to fasten the Sliding Partition to the middle of the Table Top’s underside. See Figure H, right.
Note: There are no pilot holes available for this step, so you will need to use a drill to make the pilot holes before threading
in Screws.
8.Using assistance, set the assembled Legs and Shelf onto the underside of the Table Top.
Note: Verify that the Drawer guide slots on the Sliding Partition face the same way as the Drawer guide slots on the Legs.
Figure F
Sliding Partition (14)
Table
Top (1)
Figure G
Sliding
Partition (14)
Table
Top (1)
Figure H
Setup
Operation
Maintenance
Item 69054 | For technical questions, please call | Page 5 |
