y fet Sa
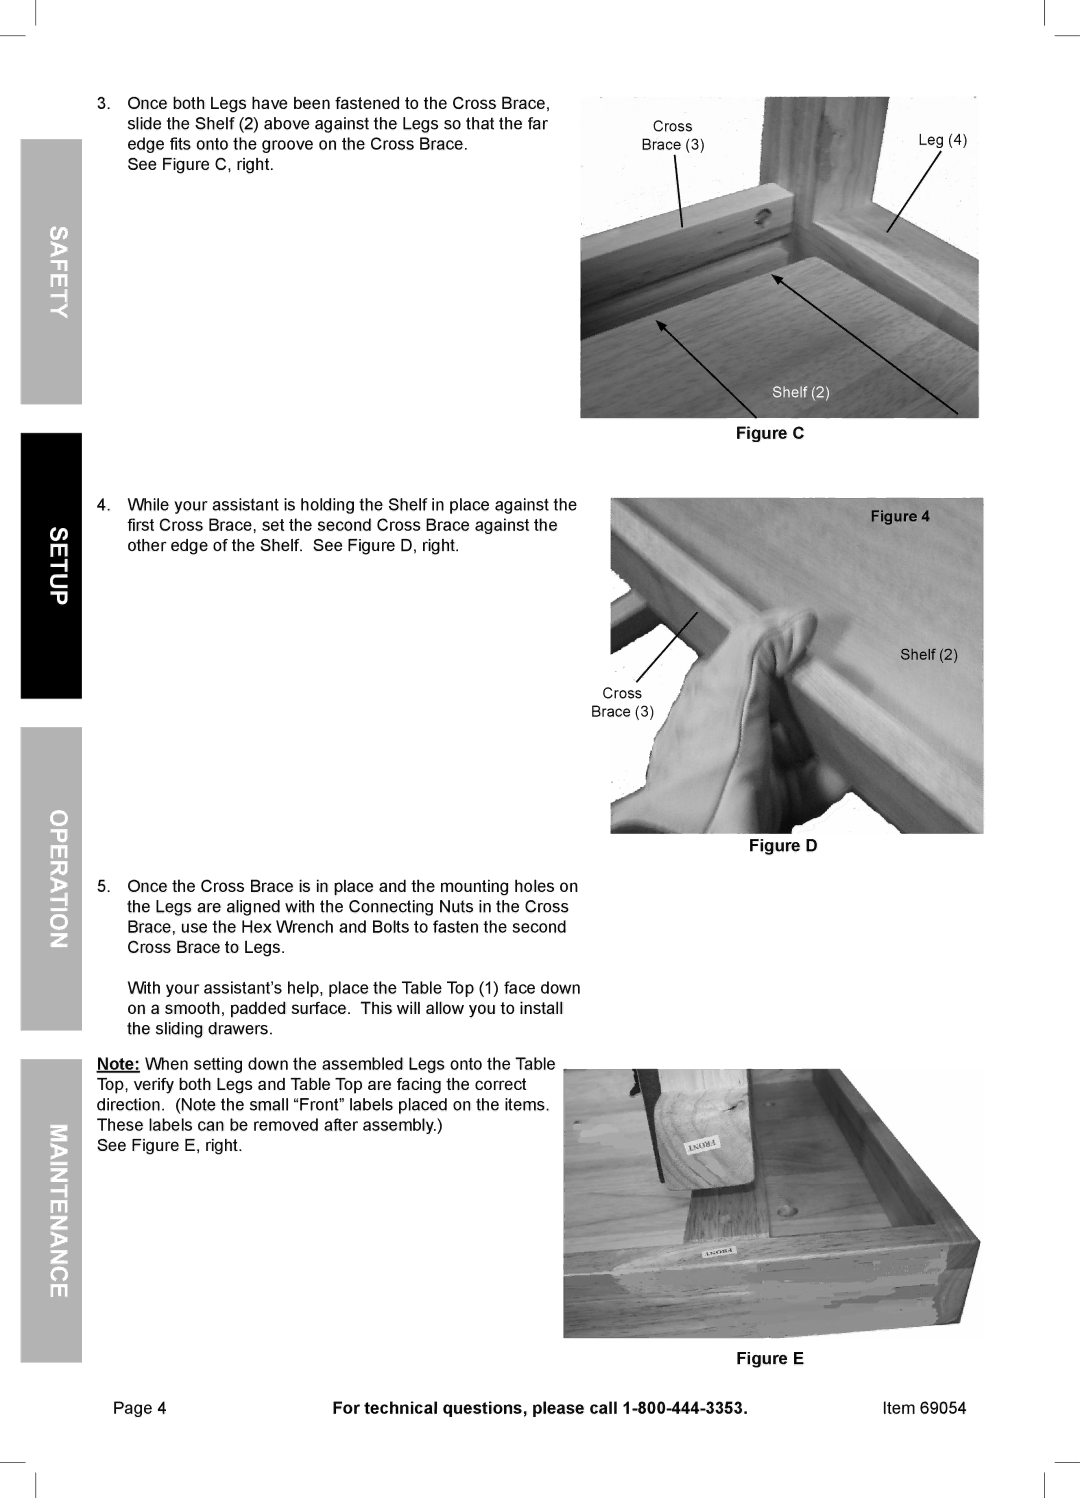
3.Once both Legs have been fastened to the Cross Brace, slide the Shelf (2) above against the Legs so that the far edge fits onto the groove on the Cross Brace.
See Figure C, right.
Cross | Leg (4) |
Brace (3) |
Shelf (2)
Setup
4.While your assistant is holding the Shelf in place against the first Cross Brace, set the second Cross Brace against the other edge of the Shelf. See Figure D, right.
Figure C
Figure 4
no rati Ope
ec
Maintenan
Cross
Brace (3)
5.Once the Cross Brace is in place and the mounting holes on the Legs are aligned with the Connecting Nuts in the Cross Brace, use the Hex Wrench and Bolts to fasten the second Cross Brace to Legs.
With your assistant’s help, place the Table Top (1) face down on a smooth, padded surface. This will allow you to install the sliding drawers.
Note: When setting down the assembled Legs onto the Table Top, verify both Legs and Table Top are facing the correct direction. (Note the small “Front” labels placed on the items. These labels can be removed after assembly.)
See Figure E, right.
Shelf (2)
Figure D
Leg (4)
Table Top (1)
Figure E
Page 4 | For technical questions, please call | Item 69054 |