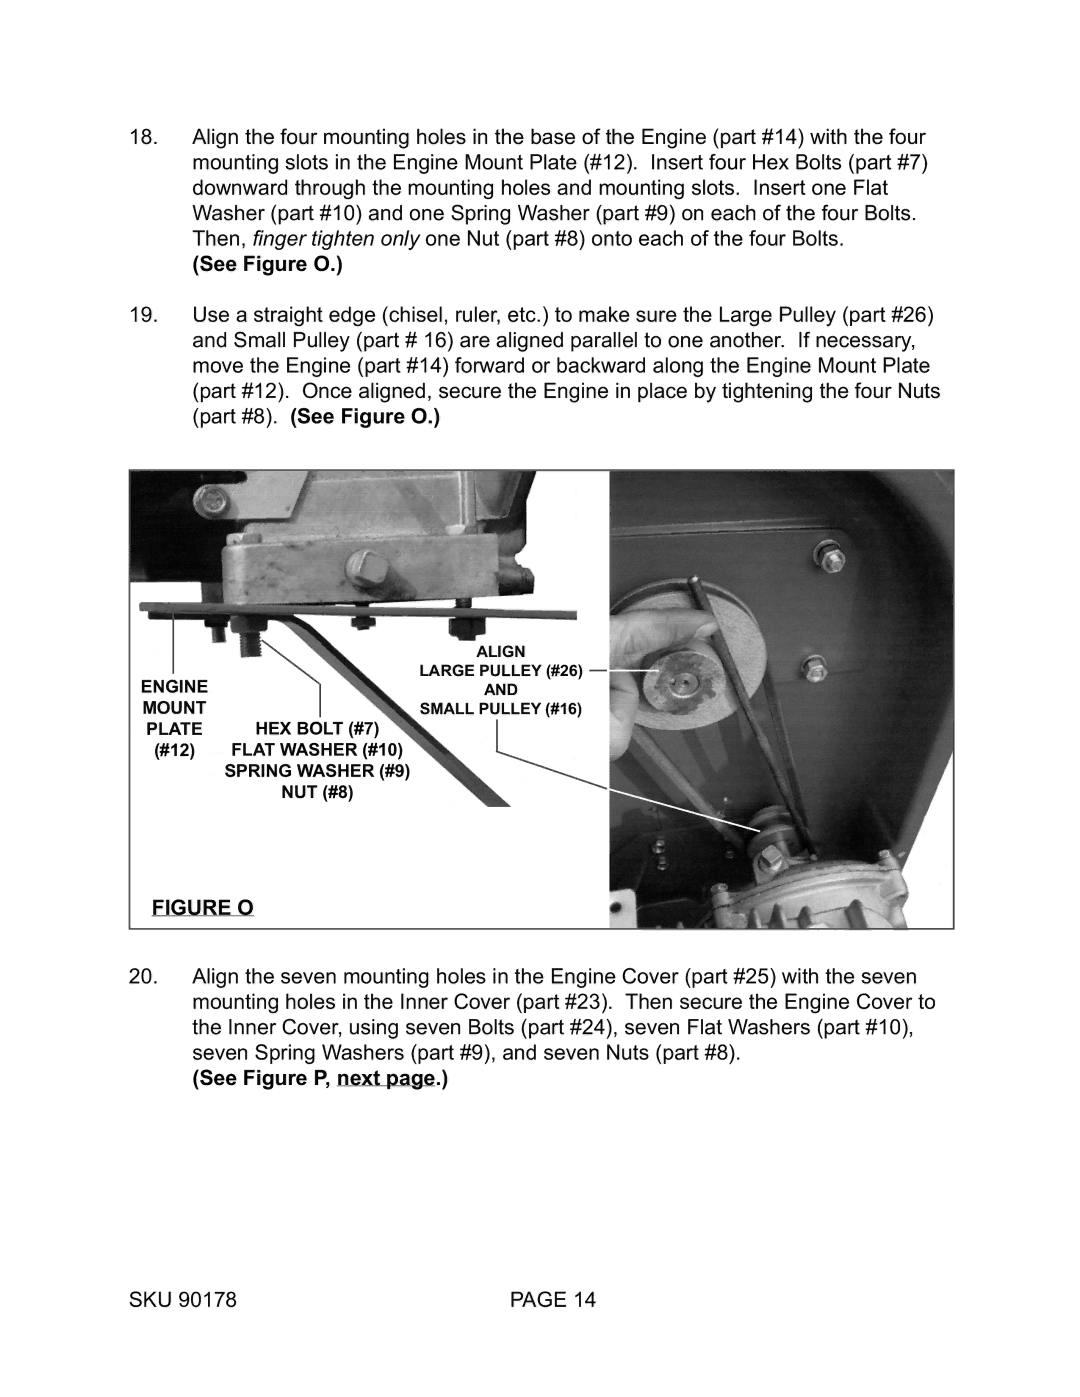
18.Align the four mounting holes in the base of the Engine (part #14) with the four mounting slots in the Engine Mount Plate (#12). Insert four Hex Bolts (part #7) downward through the mounting holes and mounting slots. Insert one Flat Washer (part #10) and one Spring Washer (part #9) on each of the four Bolts. Then, finger tighten only one Nut (part #8) onto each of the four Bolts.
(See Figure O.)
19.Use a straight edge (chisel, ruler, etc.) to make sure the Large Pulley (part #26) and Small Pulley (part # 16) are aligned parallel to one another. If necessary, move the Engine (part #14) forward or backward along the Engine Mount Plate (part #12). Once aligned, secure the Engine in place by tightening the four Nuts (part #8). (See Figure O.)
|
| ALIGN | |
|
| LARGE PULLEY (#26) | |
ENGINE | |||
AND | |||
MOUNT | SMALL PULLEY (#16) | ||
PLATE | HEX BOLT (#7) | ||
(#12) | FLAT WASHER (#10) | ||
|
| SPRING WASHER (#9) | |
|
| NUT (#8) | |
FIGURE O
20.Align the seven mounting holes in the Engine Cover (part #25) with the seven mounting holes in the Inner Cover (part #23). Then secure the Engine Cover to the Inner Cover, using seven Bolts (part #24), seven Flat Washers (part #10), seven Spring Washers (part #9), and seven Nuts (part #8).
(See Figure P, next page.)
SKU 90178 | PAGE 14 |