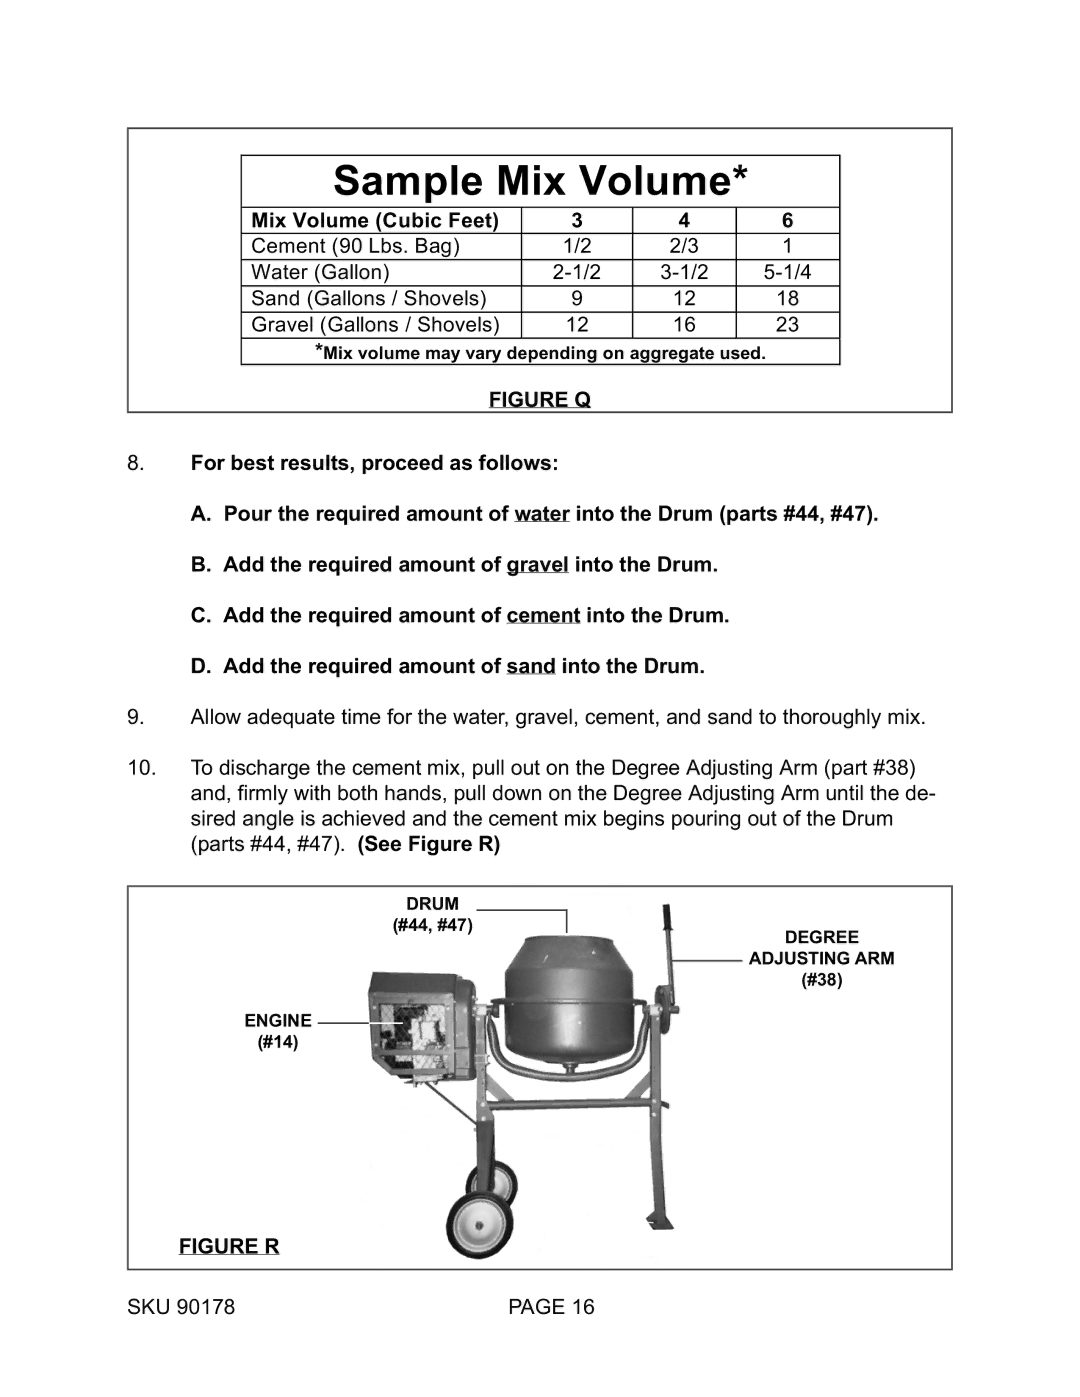
FIGURE Q
8.For best results, proceed as follows:
A.Pour the required amount of water into the Drum (parts #44, #47).
B.Add the required amount of gravel into the Drum.
C.Add the required amount of cement into the Drum.
D.Add the required amount of sand into the Drum.
9.Allow adequate time for the water, gravel, cement, and sand to thoroughly mix.
10.To discharge the cement mix, pull out on the Degree Adjusting Arm (part #38) and, firmly with both hands, pull down on the Degree Adjusting Arm until the de- sired angle is achieved and the cement mix begins pouring out of the Drum (parts #44, #47). (See Figure R)
DRUM
(#44, #47)
ENGINE
(#14)
DEGREE
ADJUSTING ARM
(#38)
FIGURE R
SKU 90178 | PAGE 16 |