UNPACKING
When unpacking, check to make sure all the parts shown on the Parts List on page 18 are included. If any parts are missing or broken, please call Harbor Freight Tools at the number shown on the cover of this manual as soon as possible.
ASSEMBLY INSTRUCTIONS
NOTE: For additional references to the parts listed in the following pages, refer to the Assembly Diagram on page 19. Assemble the Cement Mixer in a clean work area with a flat, level floor surface that is capable of supporting the weight of this product, and all required assembly tools (not included).
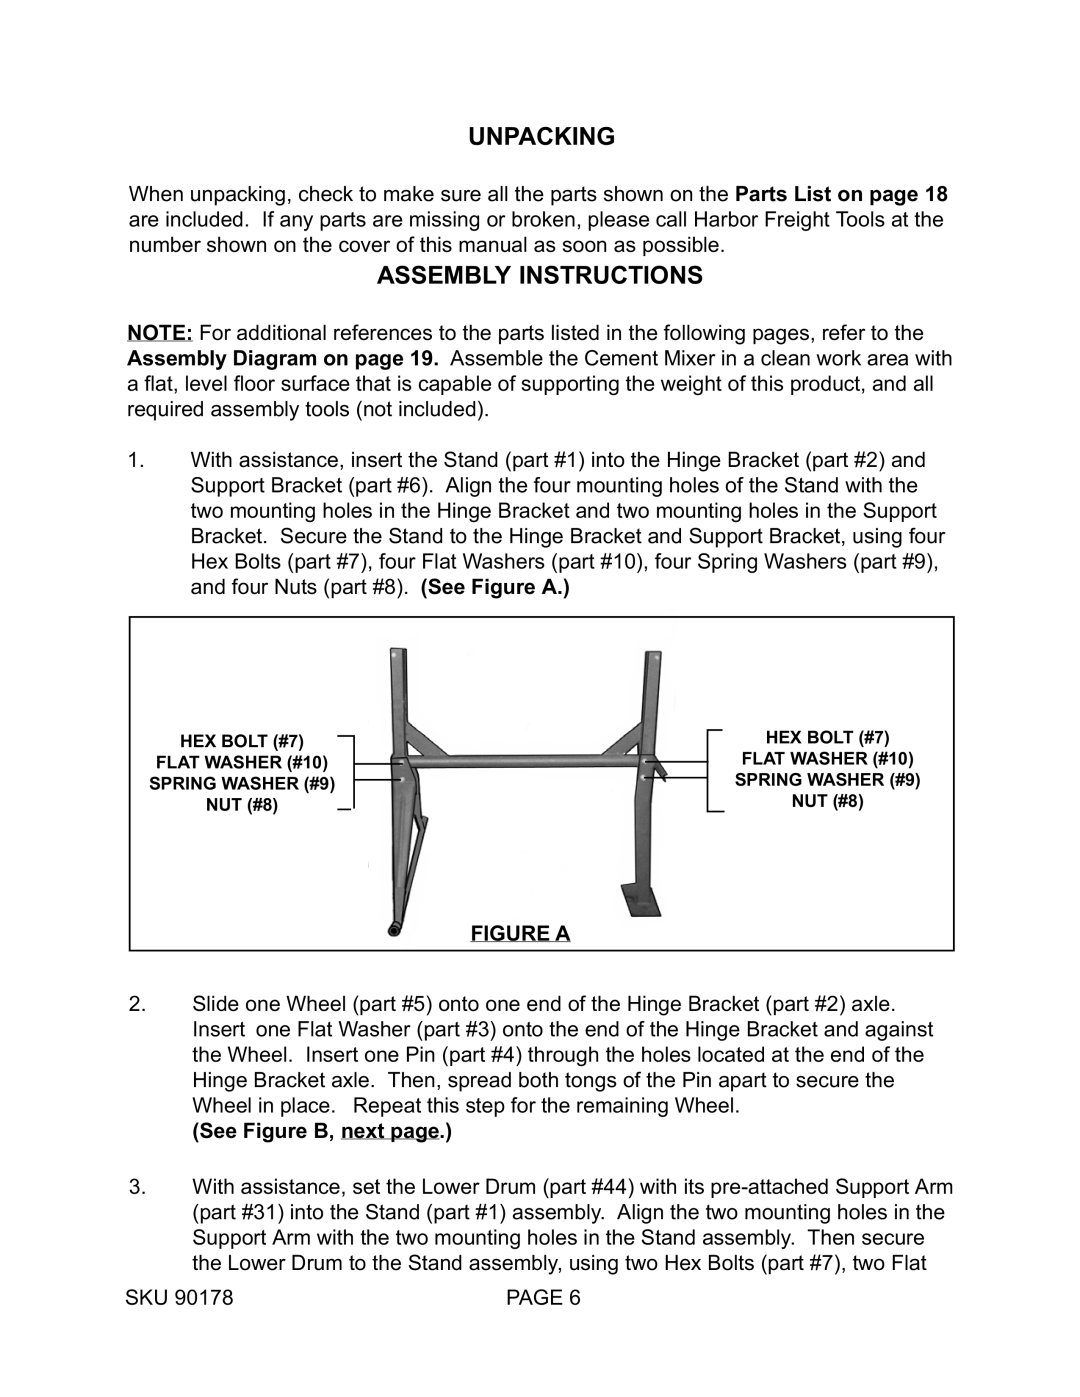
1.With assistance, insert the Stand (part #1) into the Hinge Bracket (part #2) and Support Bracket (part #6). Align the four mounting holes of the Stand with the two mounting holes in the Hinge Bracket and two mounting holes in the Support Bracket. Secure the Stand to the Hinge Bracket and Support Bracket, using four Hex Bolts (part #7), four Flat Washers (part #10), four Spring Washers (part #9), and four Nuts (part #8). (See Figure A.)
HEX BOLT (#7)
FLAT WASHER (#10)
SPRING WASHER (#9)
NUT (#8)
FIGURE A
HEX BOLT (#7)
FLAT WASHER (#10) SPRING WASHER (#9)
NUT (#8)
2.Slide one Wheel (part #5) onto one end of the Hinge Bracket (part #2) axle. Insert one Flat Washer (part #3) onto the end of the Hinge Bracket and against the Wheel. Insert one Pin (part #4) through the holes located at the end of the Hinge Bracket axle. Then, spread both tongs of the Pin apart to secure the Wheel in place. Repeat this step for the remaining Wheel.
(See Figure B, next page.)
3.With assistance, set the Lower Drum (part #44) with its
SKU 90178 | PAGE 6 |