WARNING: The warnings, cautions, and instructions discussed in this instruction manual cannot cover all possible conditions and situations that may occur. It must be understood by the operator that common sense and caution are factors which cannot be built into this product, but must be supplied by the operator.
Assembly
Your Biplane will require some assembly. It is important that you read the entire manual to become familiar with the product BEFORE you assemble and use the Biplane. Be sure that you have all parts described in the Parts List located on page 7 of this manual.
Attaching the Battery Pack
1.Turn off the power before connecting the Battery Pack to the Biplane.
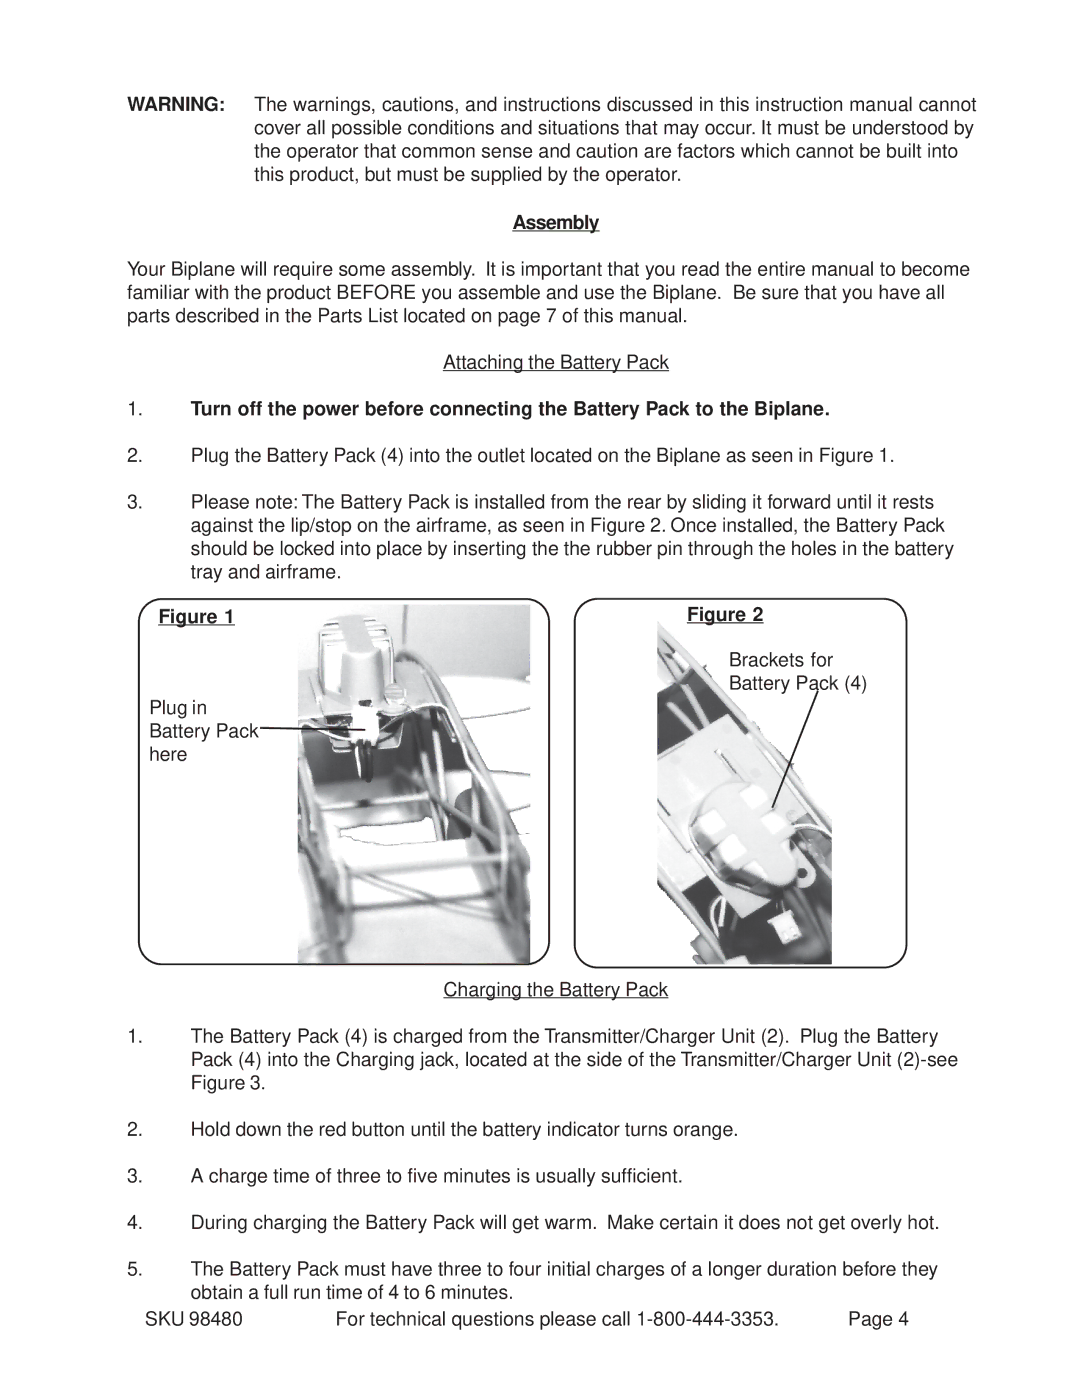
2.Plug the Battery Pack (4) into the outlet located on the Biplane as seen in Figure 1.
3.Please note: The Battery Pack is installed from the rear by sliding it forward until it rests against the lip/stop on the airframe, as seen in Figure 2. Once installed, the Battery Pack should be locked into place by inserting the the rubber pin through the holes in the battery tray and airframe.
Figure 1 | Figure 2 |
Brackets for Battery Pack (4)
Plug in Battery Pack![]() here
here
Charging the Battery Pack
1.The Battery Pack (4) is charged from the Transmitter/Charger Unit (2). Plug the Battery Pack (4) into the Charging jack, located at the side of the Transmitter/Charger Unit
2.Hold down the red button until the battery indicator turns orange.
3.A charge time of three to five minutes is usually sufficient.
4.During charging the Battery Pack will get warm. Make certain it does not get overly hot.
5.The Battery Pack must have three to four initial charges of a longer duration before they obtain a full run time of 4 to 6 minutes.
SKU 98480 | For technical questions please call | Page 4 |