CABLE ASSEMBLY
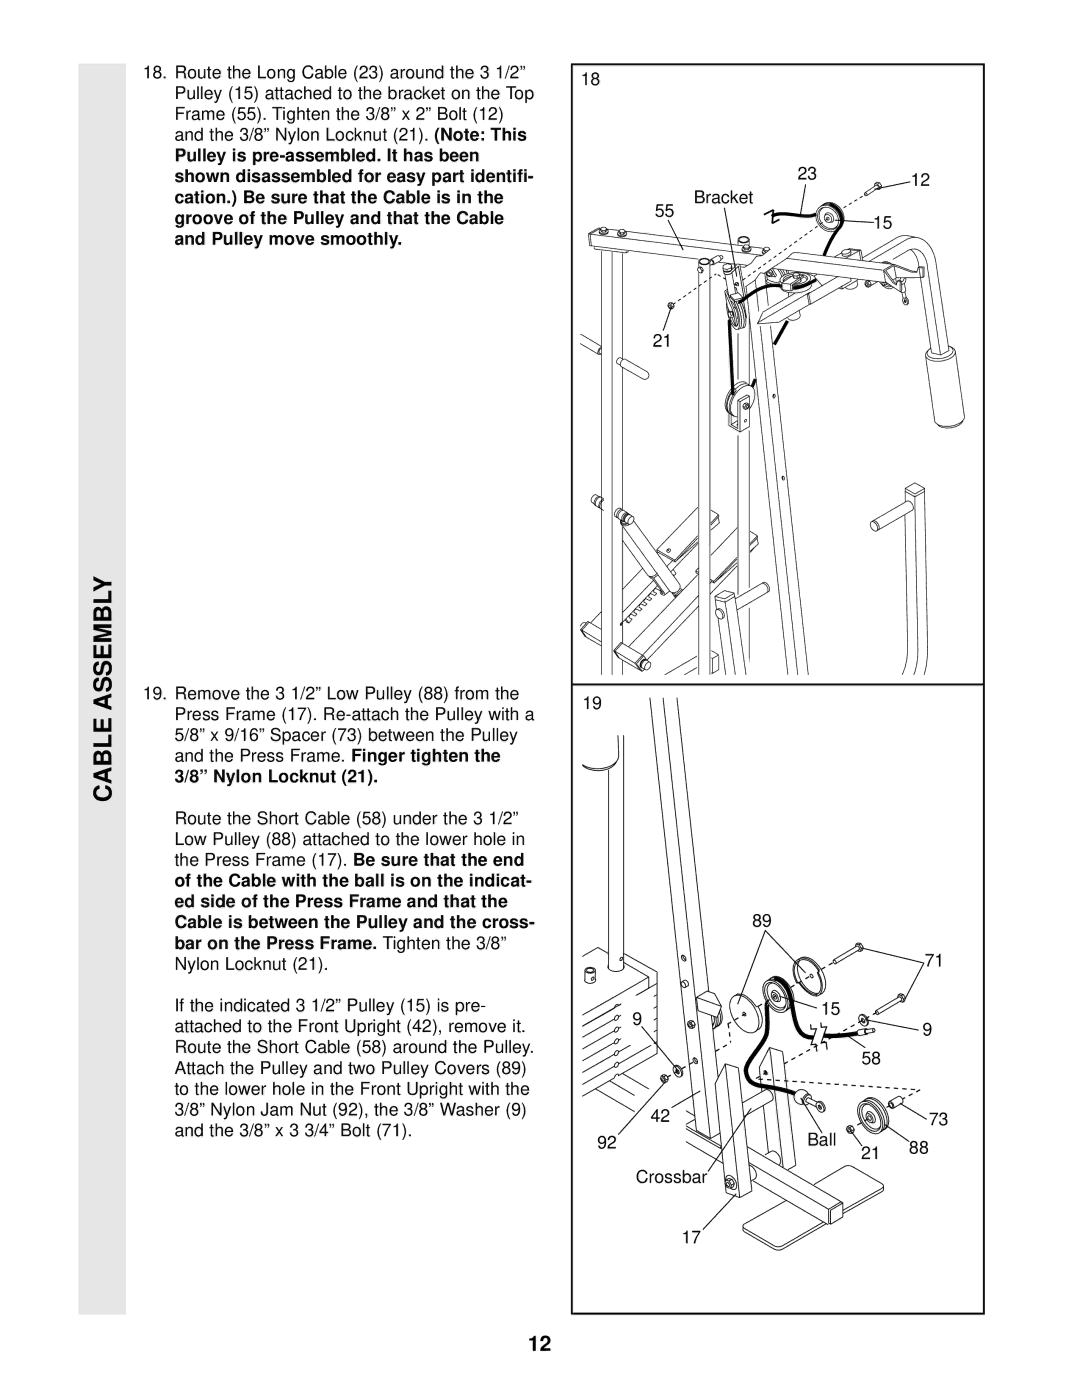
18.Route the Long Cable (23) around the 3 1/2” Pulley (15) attached to the bracket on the Top Frame (55). Tighten the 3/8” x 2” Bolt (12) and the 3/8” Nylon Locknut (21). (Note: This
Pulley is
19.Remove the 3 1/2” Low Pulley (88) from the Press Frame (17).
Route the Short Cable (58) under the 3 1/2” Low Pulley (88) attached to the lower hole in the Press Frame (17). Be sure that the end of the Cable with the ball is on the indicat- ed side of the Press Frame and that the Cable is between the Pulley and the cross- bar on the Press Frame. Tighten the 3/8” Nylon Locknut (21).
If the indicated 3 1/2” Pulley (15) is pre- attached to the Front Upright (42), remove it. Route the Short Cable (58) around the Pulley. Attach the Pulley and two Pulley Covers (89) to the lower hole in the Front Upright with the 3/8” Nylon Jam Nut (92), the 3/8” Washer (9) and the 3/8” x 3 3/4” Bolt (71).
18 |
|
|
|
|
|
| 23 |
| 12 |
| Bracket |
|
| |
|
|
|
| |
| 55 |
| 15 |
|
|
|
|
| |
| 21 |
|
|
|
19 |
|
|
|
|
| 89 |
|
|
|
|
|
|
| 71 |
| 9 | 15 |
|
|
|
|
| 9 | |
|
|
|
| |
|
|
| 58 |
|
| 42 |
|
| 73 |
92 |
| Ball | 21 | 88 |
|
|
|
| |
| Crossbar |
|
|
|
| 17 |
|
|
|
12