| Reset Button Circuit Breaker | Crank |
| (155) | |
| Handle (10) | |
|
| |
Switch Cover | Scale (103) |
|
|
| |
(162) |
|
|
Dust
Chute
(80)
Power Cord | Table (95) |
| |
(157) |
|
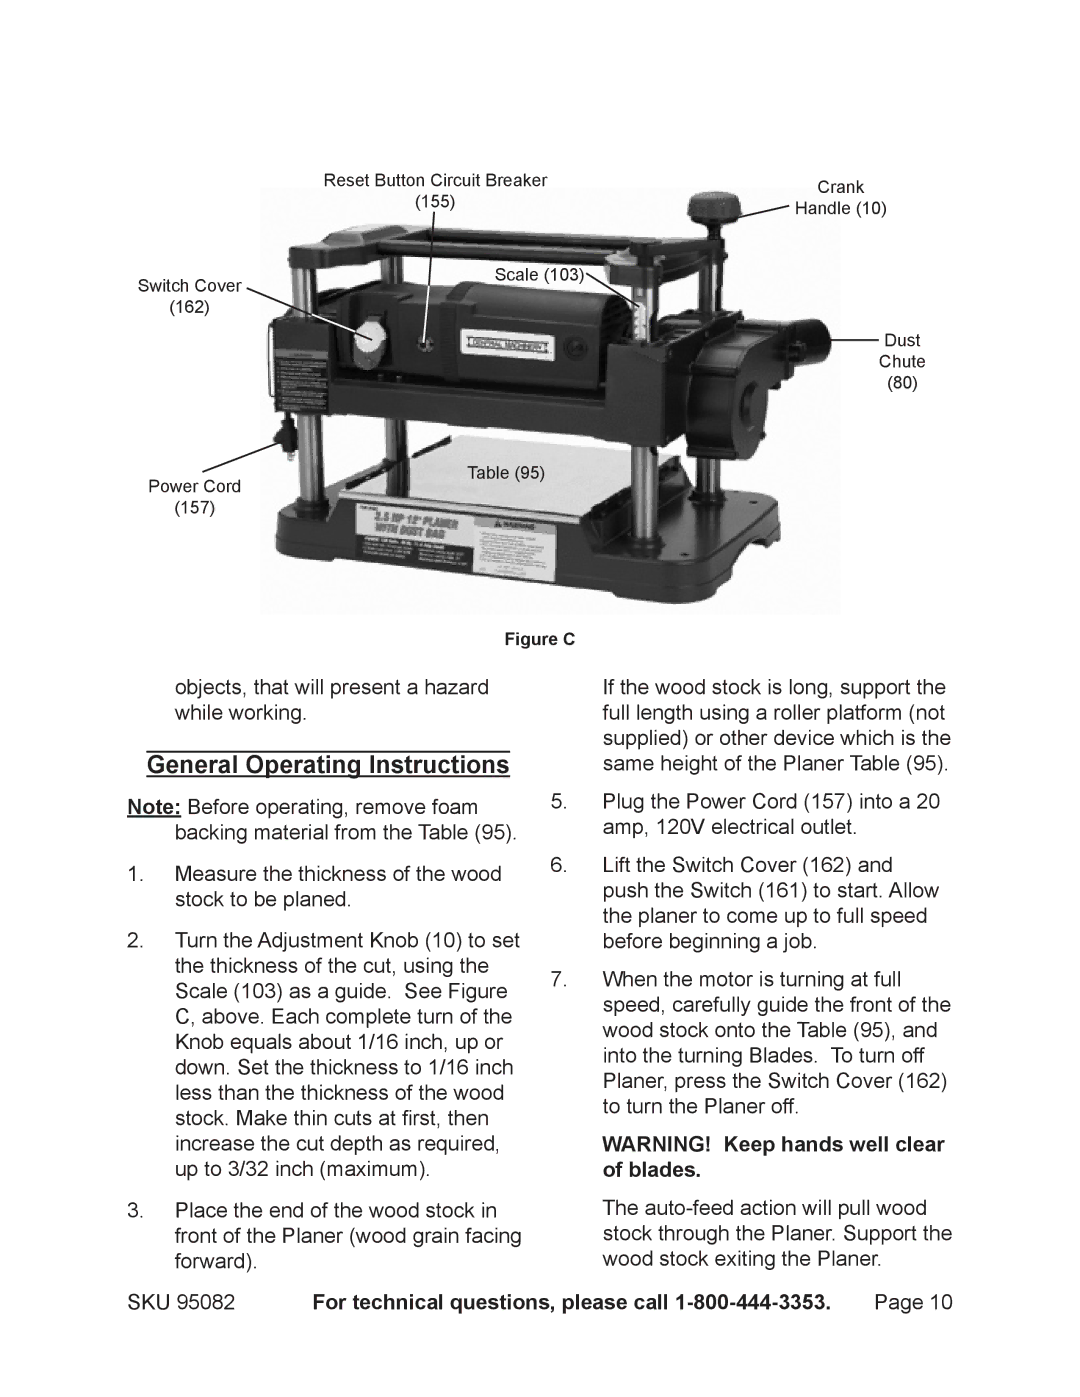
Figure C
objects, that will present a hazard while working.
General Operating Instructions
Note: Before operating, remove foam backing material from the Table (95).
1.Measure the thickness of the wood stock to be planed.
2.Turn the Adjustment Knob (10) to set the thickness of the cut, using the Scale (103) as a guide. See Figure C, above. Each complete turn of the Knob equals about 1/16 inch, up or down. Set the thickness to 1/16 inch less than the thickness of the wood stock. Make thin cuts at first, then increase the cut depth as required, up to 3/32 inch (maximum).
3.Place the end of the wood stock in front of the Planer (wood grain facing forward).
If the wood stock is long, support the full length using a roller platform (not supplied) or other device which is the same height of the Planer Table (95).
5.Plug the Power Cord (157) into a 20 amp, 120V electrical outlet.
6.Lift the Switch Cover (162) and push the Switch (161) to start. Allow the planer to come up to full speed before beginning a job.
7.When the motor is turning at full speed, carefully guide the front of the wood stock onto the Table (95), and into the turning Blades. To turn off Planer, press the Switch Cover (162) to turn the Planer off.
WARNING! Keep hands well clear of blades.
The
SKU 95082 | For technical questions, please call | Page 10 |
