BATTERY INSTALLATION
Warning: Only install batteries of the same type and charge level. Replace both batteries at once. Install batteries according to polarity markings.
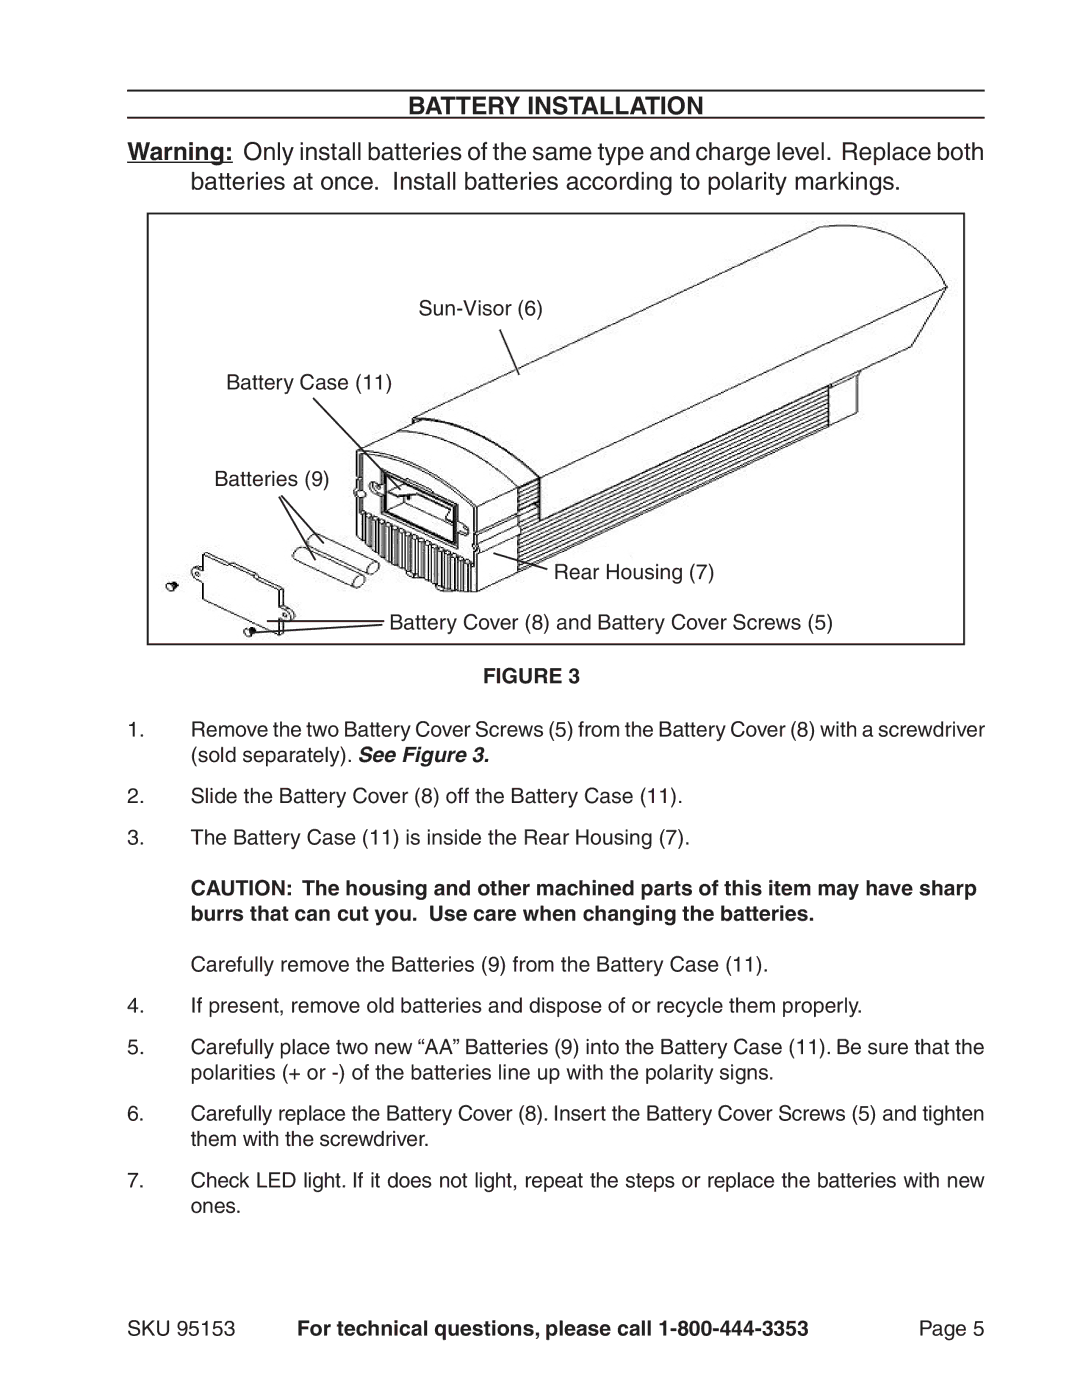
Battery Case (11)
Batteries (9)
![]() Rear Housing (7)
Rear Housing (7)
![]() Battery Cover (8) and Battery Cover Screws (5)
Battery Cover (8) and Battery Cover Screws (5)
FIGURE 3
1.Remove the two Battery Cover Screws (5) from the Battery Cover (8) with a screwdriver (sold separately). See Figure 3.
2.Slide the Battery Cover (8) off the Battery Case (11).
3.The Battery Case (11) is inside the Rear Housing (7).
CAUTION: The housing and other machined parts of this item may have sharp burrs that can cut you. Use care when changing the batteries.
Carefully remove the Batteries (9) from the Battery Case (11).
4.If present, remove old batteries and dispose of or recycle them properly.
5.Carefully place two new “AA” Batteries (9) into the Battery Case (11). Be sure that the polarities (+ or
6.Carefully replace the Battery Cover (8). Insert the Battery Cover Screws (5) and tighten them with the screwdriver.
7.Check LED light. If it does not light, repeat the steps or replace the batteries with new ones.
SKU 95153 | For technical questions, please call | Page 5 |
