size and shape of the template will not change over time.
Sandpaper
3"
Sandpaper (179)
k. After cutting the
l.Place the left side of the new sand- paper under the left Locking Block
(173) and tighten. The left side of the sandpaper must be flush with the
Drum (178) edge (not over hanging).
m.Start wrapping the sandpaper around the Drum so there are no air bubbles and no
n. When reaching the right side, move the sandpaper out of the way, and position the 4mm hex wrench into the top of the Hex Soc HD Scr.
o. Place the end of the sandpaper under the Locking Block and tighten the Hex Soc HD Scr (172).
p. If the sandpaper does not line up properly when reaching the right- hand side. unwrap and repeat.
q. Reinstall the Deflector Shield (187) and secure with the three Hex Soc HD Scr (172), and close the cover.
12.Cleaning the machine.
a.Cleanup consists of vacuuming the various exterior and interior (hidden) areas of the sander.
13.Lubrication.
a.Feed Bushings (135) need to be lu- bricated on a daily basis or with each use.
b.These bushings (135) requiring oiling are located at each end of the Feed Belt Rollers (136, 156). Also, remove the Side Cover (82) and oil the drive bushings (29) as needed.
c. Apply Lithium grease to all moving parts. This includes gears, chains, Feed Belt Rollers (136, 156) and Table’s (137) lift mechanism.
d.The moving and rotating parts of the Table’s (137) lift mechanism including its Elevating Screws (162) must be cleaned free of old grease and fresh lithium grease applied as needed.
e.Clean the teeth of the rotating helical-
cut gear (113) and add fresh lithium grease. Raising and lowering the Table (137) spreads the grease to all rubbing parts.
14.Sanding Belts.
a.Extend the life of the sand paper by using a crepe sanding pad (cleans
15.V-Belt Tensioning.
Drive
V-Belt
1/2" to 3/4" deflection
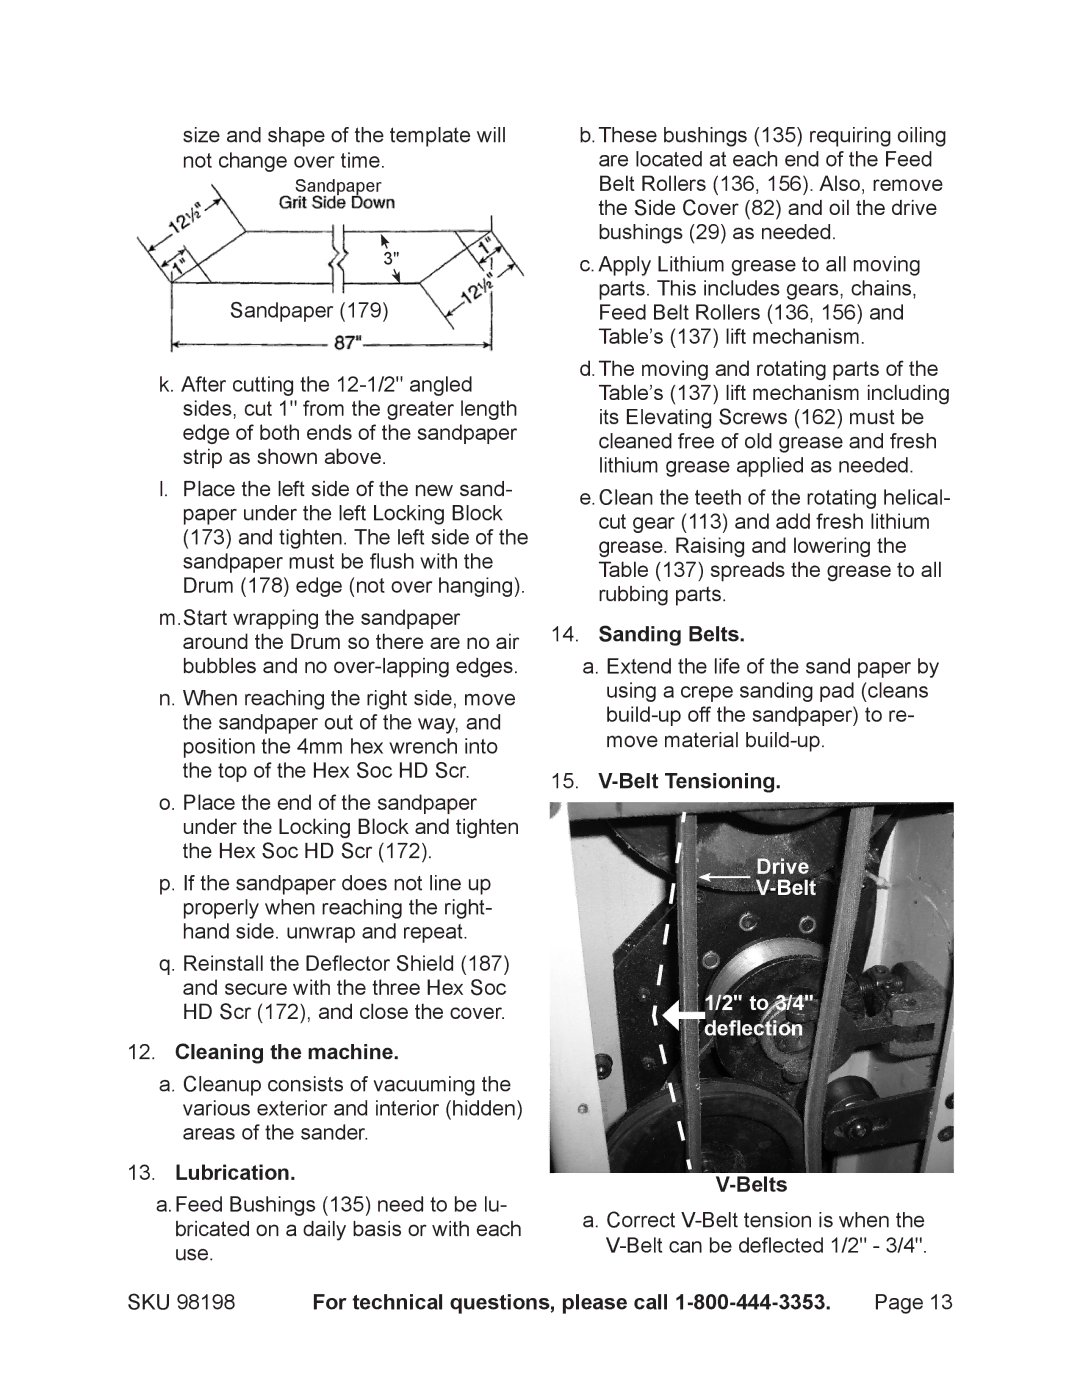
a. Correct
SKU 98198 | For technical questions, please call | Page 13 |
