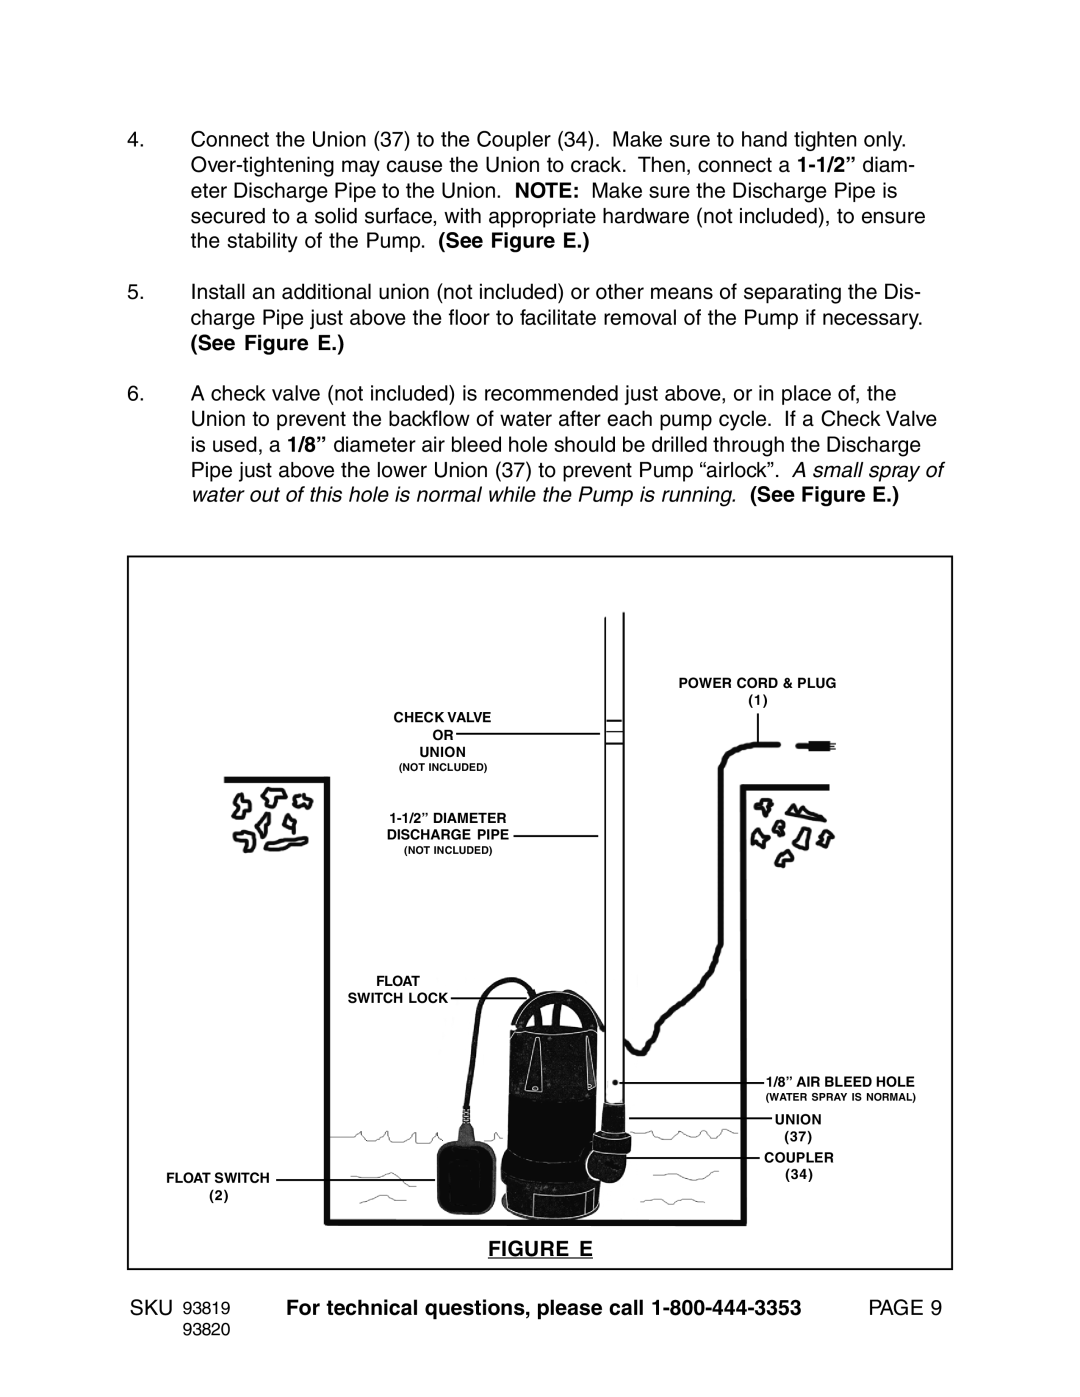
4.Connect the Union (37) to the Coupler (34). Make sure to hand tighten only.
5.Install an additional union (not included) or other means of separating the Dis- charge Pipe just above the floor to facilitate removal of the Pump if necessary.
(See Figure E.)
6.A check valve (not included) is recommended just above, or in place of, the Union to prevent the backflow of water after each pump cycle. If a Check Valve is used, a 1/8” diameter air bleed hole should be drilled through the Discharge Pipe just above the lower Union (37) to prevent Pump “airlock”. A small spray of water out of this hole is normal while the Pump is running. (See Figure E.)
POWER CORD & PLUG
(1)
CHECK VALVE
OR
UNION
(NOT INCLUDED)
(NOT INCLUDED)
FLOAT
SWITCH LOCK
|
|
|
|
|
|
| 1/8” AIR BLEED HOLE | ||
|
|
|
|
|
|
| |||
|
|
|
|
|
|
| (WATER SPRAY IS NORMAL) | ||
|
|
|
|
|
|
|
| UNION |
|
|
|
|
|
|
|
|
|
| |
| (37) |
| |||||||
|
|
|
|
|
|
| COUPLER |
| |
|
|
|
|
|
|
|
| ||
FLOAT SWITCH |
| (34) |
| ||||||
|
| ||||||||
(2) |
|
|
|
|
|
|
|
|
|
|
| FIGURE E |
| ||||||
|
|
|
|
|
|
|
|
|
|
SKU 93819 | For technical questions, please call | PAGE 9 | |||||||
93820 |
|
|
|
|
|
|
|
|
|