INSTALLATION

Figure 36 – Remote Control Battery Compartment

When using the remote, remember to point the lens toward the front panel of the AVR 154. Make sure no objects, such as furniture, are blocking the remote’s path to the receiver. Bright lights, fluorescent lights and plasma video displays may interfere with the remote’s functioning. The remote has a range of about 20 feet, depending on the lighting conditions. It may be used at an angle of up to 30 degrees to either side of the AVR.

If the remote seems to operate intermittently, or if pressing a button on the remote does not cause the AVR Selector or one of the Input Selectors to light up, then make sure the batteries have been inserted correctly, or replace all three batteries with fresh ones.

Step Eight – Program Sources Into the Remote

The AVR 154 remote not only is capable of controlling the receiver, but it may also be programmed to control many brands and models of VCRs, DVD players, CD players, cable boxes, satellite receivers, cassette decks and TVs.

It may help to think of the remote as a book with pages. Each page represents the button functions for a different device. In order to access the functions for a particular device, first turn to that page; that is, switch the remote to that device mode. This is done by pressing the AVR Button to access the codes that control the receiver, or the Input Selector buttons to access the codes for the devices programmed into the remote.

The AVR 154’s remote is factory-programmed to control many Harman Kardon DVD and CD players.

NOTE: The remote may be easily programmed to operate the DMC 1000 digital media center, using the Video 1 or any of the HDMI Input Selectors, by following the instructions below. Select the VCR/PVR/DMC device type in number 4. Enter code 003.

If you have other source devices in your system, follow these steps to program the correct codes into the remote.

1.Using the codes in Tables A10 – A16 of the Appendix, look up the product type (e.g., DVD, cable TV box) and the brand name of your source. The number(s) listed is/are potential candidates for the correct code set for your particular device.

2.Turn on your source device.

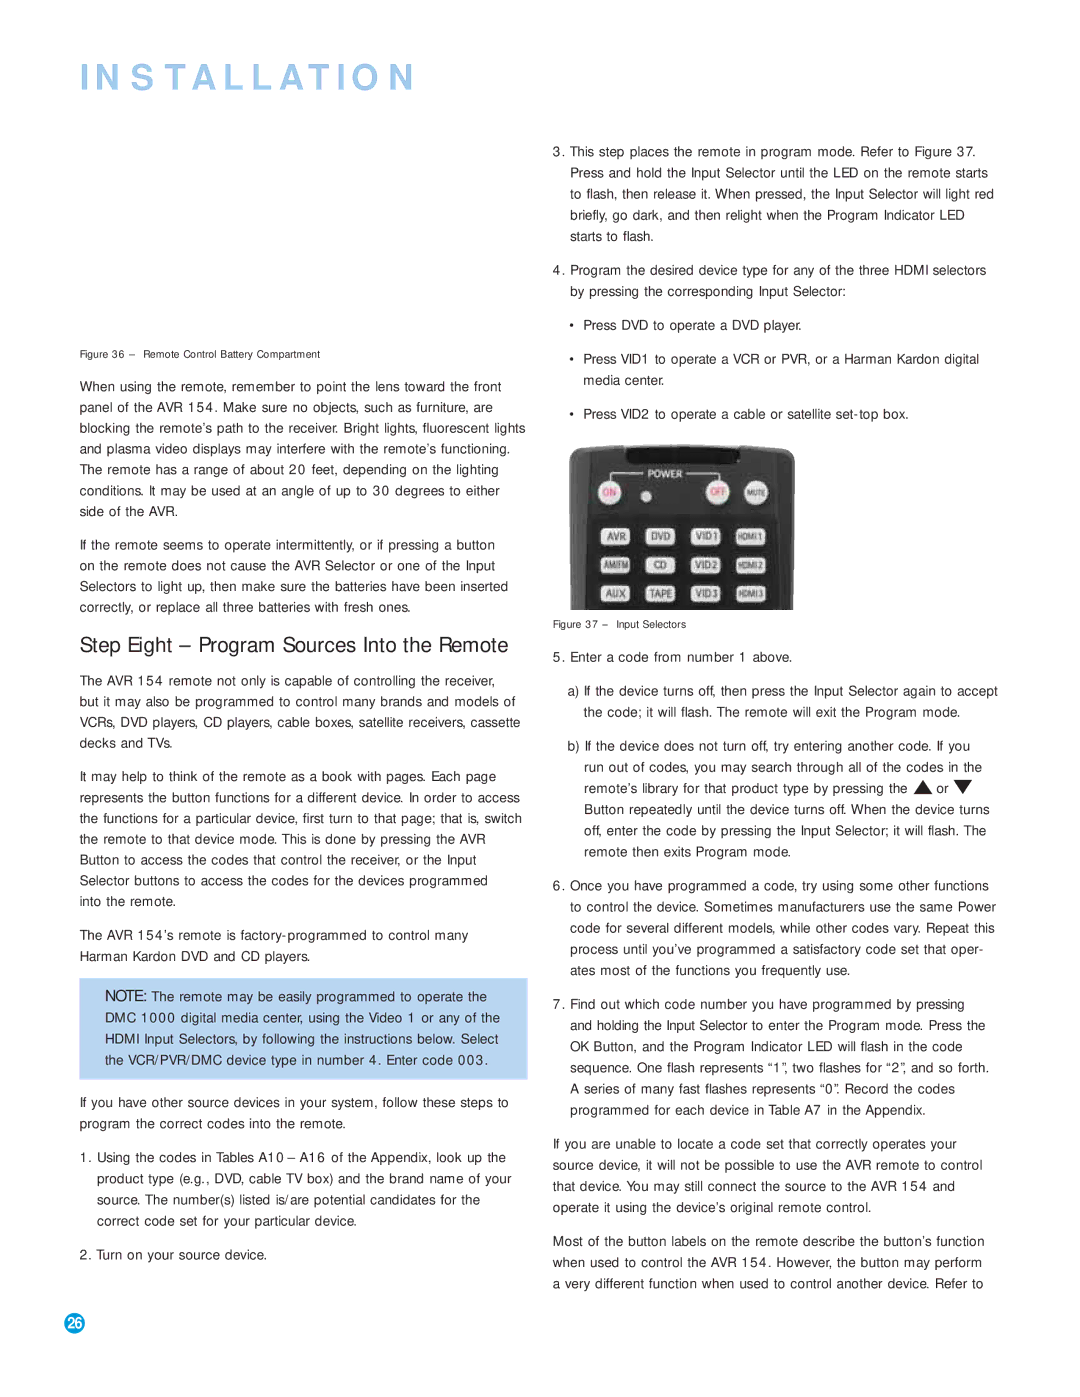
3.This step places the remote in program mode. Refer to Figure 37. Press and hold the Input Selector until the LED on the remote starts to flash, then release it. When pressed, the Input Selector will light red briefly, go dark, and then relight when the Program Indicator LED starts to flash.

4.Program the desired device type for any of the three HDMI selectors by pressing the corresponding Input Selector:

Press DVD to operate a DVD player.

Press VID1 to operate a VCR or PVR, or a Harman Kardon digital media center.

Press VID2 to operate a cable or satellite set-top box.

Figure 37 – Input Selectors

5.Enter a code from number 1 above.

a)If the device turns off, then press the Input Selector again to accept the code; it will flash. The remote will exit the Program mode.

b)If the device does not turn off, try entering another code. If you run out of codes, you may search through all of the codes in the remote’s library for that product type by pressing the or ¤ Button repeatedly until the device turns off. When the device turns off, enter the code by pressing the Input Selector; it will flash. The remote then exits Program mode.

6.Once you have programmed a code, try using some other functions to control the device. Sometimes manufacturers use the same Power code for several different models, while other codes vary. Repeat this process until you’ve programmed a satisfactory code set that oper- ates most of the functions you frequently use.

7.Find out which code number you have programmed by pressing and holding the Input Selector to enter the Program mode. Press the OK Button, and the Program Indicator LED will flash in the code sequence. One flash represents “1”, two flashes for “2”, and so forth. A series of many fast flashes represents “0”. Record the codes programmed for each device in Table A7 in the Appendix.

If you are unable to locate a code set that correctly operates your source device, it will not be possible to use the AVR remote to control that device. You may still connect the source to the AVR 154 and operate it using the device’s original remote control.

Most of the button labels on the remote describe the button’s function when used to control the AVR 154. However, the button may perform a very different function when used to control another device. Refer to

26

Page 26
Image 26
Harman-Kardon AVR 154 owner manual Turn on your source device, Enter a code from number 1 above

AVR 154 specifications

The Harman-Kardon AVR 154 is a high-performance audio-video receiver designed for home theater enthusiasts seeking an immersive audio experience. Launched as part of Harman's esteemed line of receivers, the AVR 154 combines sophisticated technology with user-friendly features to create a versatile home entertainment solution.

One of the standout features of the AVR 154 is its multi-channel amplification, delivering a robust output of 50 watts per channel. This power allows for clean and dynamic sound, making it ideal for both movies and music. The AVR 154 supports a 5.1 surround sound configuration, providing an enveloping audio experience that brings films to life. With its ability to decode various surround sound formats, including Dolby TrueHD and DTS-HD Master Audio, it ensures that users enjoy high-quality audio without compromise.

Connectivity is a key aspect of the AVR 154, which offers multiple HDMI inputs, allowing for easy connection to various sources like Blu-ray players, gaming consoles, and streaming devices. With three HDMI inputs and one HDMI output, users have the flexibility to connect multiple devices while enabling audio and video pass-through. The receiver is also equipped with optical and coaxial digital inputs, ensuring compatibility with older audio sources.

Another important feature is the built-in FM/AM tuner, allowing users to access their favorite radio stations without the need for an external receiver. For those who prioritize convenience, the AVR 154 includes an intuitive on-screen display, guiding users through setup and configuration seamlessly. Additionally, the remote control provides easy access to all functions, making operation straightforward.

In terms of design, the Harman-Kardon AVR 154 boasts a sleek aesthetic with a brushed aluminum front panel. The distinctive look, combined with an easy-to-navigate interface, makes it an attractive addition to any home entertainment setup.

Overall, the Harman-Kardon AVR 154 stands out as a reliable and feature-rich AV receiver. With its impressive audio performance, extensive connectivity options, and user-friendly design, it caters to the needs of home theater enthusiasts who seek impactful sound and ultimate flexibility for their entertainment needs. Whether you’re enjoying a thrilling movie or listening to your favorite music, the AVR 154 promises to deliver an exceptional auditory experience.