ADVANCED FUNCTIONS

Step Four – Setting Channel Output Levels Manually

For a conventional 2-channel receiver, the balance control affects the stereo imaging by adjusting the relative loudness of the left and right channels.

With up to seven main channels, plus a subwoofer, imaging becomes both more critical and more complex. The goal is to ensure that each channel is heard at the listening position with equal loudness.

EzSet/EQ calibration can handle this critical task for you, simply and automatically. However, the AVR’s Adjust Speaker Levels menu allows you to calibrate the levels manually, either using the system’s test tone or while playing source material.

1.Make sure all speakers have been placed and connected correctly.

2.Adjust the number of speakers, crossover, distance and sub mode for each speaker in your system, as described in Step Three.

3.Measure the channel levels in one of these ways, and adjust the channel levels using the Adjust Speaker Levels menu:

a)Preferably, use a handheld SPL meter set to the C-Weighting, Slow scale. Adjust each channel so that the meter reads 75dB.

b)By ear. Adjust the levels so that all channels sound equally loud.

c)If you are using a handheld SPL meter with source material, such as a test disc or an audio selection, play it and adjust the AVR’s master volume control until the meter measures 75dB.

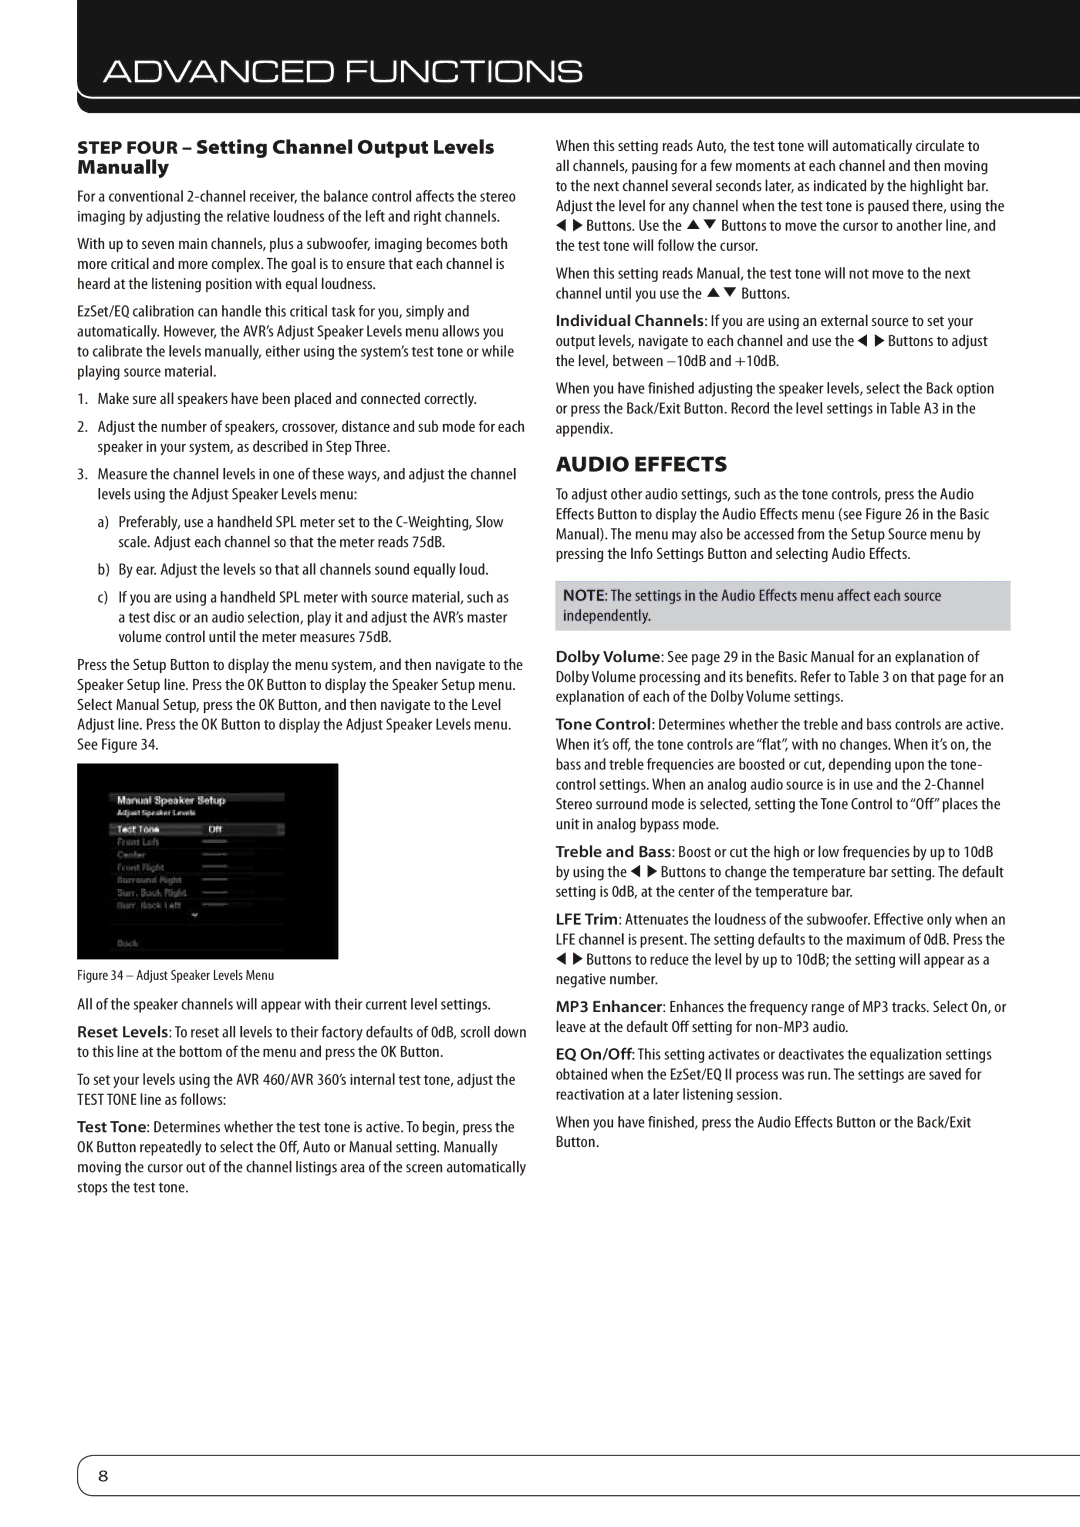
Press the Setup Button to display the menu system, and then navigate to the Speaker Setup line. Press the OK Button to display the Speaker Setup menu. Select Manual Setup, press the OK Button, and then navigate to the Level Adjust line. Press the OK Button to display the Adjust Speaker Levels menu. See Figure 34.

Figure 34 – Adjust Speaker Levels Menu

All of the speaker channels will appear with their current level settings.

Reset Levels: To reset all levels to their factory defaults of 0dB, scroll down to this line at the bottom of the menu and press the OK Button.

To set your levels using the AVR 460/AVR 360’s internal test tone, adjust the TEST TONE line as follows:

Test Tone: Determines whether the test tone is active. To begin, press the OK Button repeatedly to select the Off, Auto or Manual setting. Manually moving the cursor out of the channel listings area of the screen automatically stops the test tone.

When this setting reads Auto, the test tone will automatically circulate to all channels, pausing for a few moments at each channel and then moving to the next channel several seconds later, as indicated by the highlight bar. Adjust the level for any channel when the test tone is paused there, using the

MN Buttons. Use the KL Buttons to move the cursor to another line, and the test tone will follow the cursor.

When this setting reads Manual, the test tone will not move to the next channel until you use the KL Buttons.

Individual Channels: If you are using an external source to set your output levels, navigate to each channel and use the M N Buttons to adjust the level, between –10dB and +10dB.

When you have finished adjusting the speaker levels, select the Back option or press the Back/Exit Button. Record the level settings in Table A3 in the appendix.

Audio Effects

To adjust other audio settings, such as the tone controls, press the Audio Effects Button to display the Audio Effects menu (see Figure 26 in the Basic Manual). The menu may also be accessed from the Setup Source menu by pressing the Info Settings Button and selecting Audio Effects.

NOTE: The settings in the Audio Effects menu affect each source independently.

Dolby Volume: See page 29 in the Basic Manual for an explanation of Dolby Volume processing and its benefits. Refer to Table 3 on that page for an explanation of each of the Dolby Volume settings.

Tone Control: Determines whether the treble and bass controls are active. When it’s off, the tone controls are “flat”, with no changes. When it’s on, the bass and treble frequencies are boosted or cut, depending upon the tone- control settings. When an analog audio source is in use and the 2-Channel Stereo surround mode is selected, setting the Tone Control to “Off” places the unit in analog bypass mode.

Treble and Bass: Boost or cut the high or low frequencies by up to 10dB by using the M N Buttons to change the temperature bar setting. The default setting is 0dB, at the center of the temperature bar.

LFE Trim: Attenuates the loudness of the subwoofer. Effective only when an LFE channel is present. The setting defaults to the maximum of 0dB. Press the

MN Buttons to reduce the level by up to 10dB; the setting will appear as a negative number.

MP3 Enhancer: Enhances the frequency range of MP3 tracks. Select On, or leave at the default Off setting for non-MP3 audio.

EQ On/Off: This setting activates or deactivates the equalization settings obtained when the EzSet/EQ II process was run. The settings are saved for reactivation at a later listening session.

When you have finished, press the Audio Effects Button or the Back/Exit Button.

8

Page 8
Image 8
Harman-Kardon AVR 460, AVR 360 manual Audio Effects, Step Four Setting Channel Output Levels Manually

AVR 360, AVR 460 specifications

The Harman-Kardon AVR 460 and AVR 360 are two outstanding models from the renowned audio equipment manufacturer, both designed to deliver high-quality sound experiences for home entertainment systems. These receivers combine advanced technologies with user-friendly features, making them popular choices among audiophiles and casual listeners alike.

The Harman-Kardon AVR 460 is equipped with a robust 7.1 channel surround sound system, boasting a total power output of 100 watts per channel. This receiver supports high-definition audio formats, including Dolby TrueHD and DTS-HD Master Audio, ensuring immersive sound quality for movies and music alike. One of its standout features is the proprietary Harman Kardon Logic 7 technology, which enhances stereo sources to a multi-channel audio experience, maximizing the quality of any audio input.

On the other hand, the Harman-Kardon AVR 360 follows closely in features and audio performance, offering 7.1 channels as well but with a slightly lower power output of 80 watts per channel. It still excels in audio clarity and richness, making it suitable for any home theater setup. Both models provide extensive connectivity options, including HDMI inputs, legacy audio inputs, and built-in Bluetooth, allowing users to effortlessly stream music from their smartphones or tablets.

Another notable characteristic of the AVR 460 is its advanced video processing capabilities, enabling video upscaling to 1080p, ensuring that users can enjoy their content in the best possible resolution. Both receivers also incorporate multi-zone functionality, allowing different audio sources to be played in various rooms simultaneously. This feature makes them perfect for entertaining guests or enjoying music throughout the home.

The user interfaces for both models are designed with ease of use in mind, featuring intuitive on-screen menus and remote control functionality. They also support various audio calibration technologies, such as Harman's Room Correction, which optimizes sound output based on the specific acoustics of the listening environment.

In summary, the Harman-Kardon AVR 460 and AVR 360 are both exemplary audio/video receivers that combine advanced sound technologies, extensive connectivity options, and user-friendly features. Whether you are looking for immersive surround sound for movies or high-fidelity audio for music, these models are impressive choices that enhance any home theater setup, delivering exceptional performance for years to come.