
CDR 2 specifications
The Harman-Kardon CDR 2 is a remarkable piece of audio equipment that exemplifies the brand’s commitment to high-quality sound and advanced technology. Launched in the late 1990s as a combination CD player and digital recorder, the CDR 2 quickly garnered attention for its innovative features and user-friendly design.One of the standout characteristics of the CDR 2 is its dual functionality. It allows users to play CDs while simultaneously recording audio onto CD-R and CD-RW discs. This flexibility makes it an ideal choice for audiophiles who wish to create custom playlists or archive their favorite tracks in high fidelity. The unit boasts a built-in digital-to-analog converter that ensures excellent sound quality, preserving the integrity of the audio throughout the recording process.
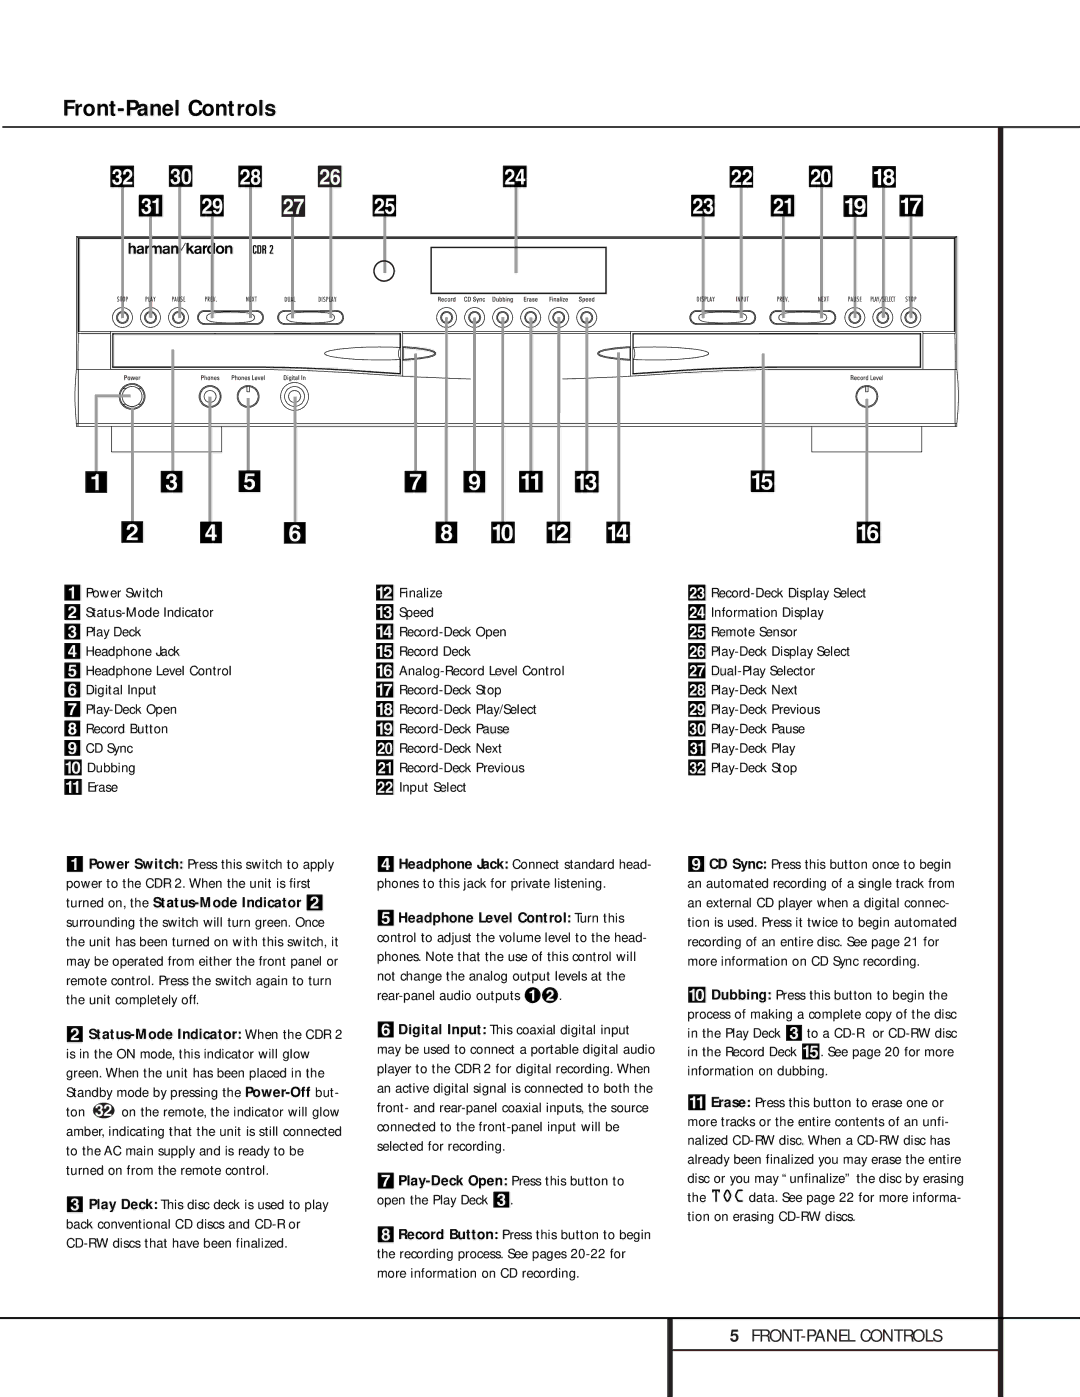
The CDR 2 features a sleek and stylish design that aligns with Harman-Kardon’s aesthetic. Its front panel displays a clear LCD screen, providing users with essential information such as track number, elapsed time, and recording status. The control layout is intuitive, enabling easy navigation through its myriad functions without the need for an extensive manual.
One of the key technological advancements found in the CDR 2 is its Advanced Digital Recording System, which minimizes jitter and enhances the overall quality of the recordings. It also offers various recording modes, including "track-at-once" and "disc-at-once," allowing users flexibility in how they wish to compile their recordings.
Additionally, the CDR 2 comes equipped with a comprehensive set of connectivity options. It features both analog and digital inputs and outputs, including optical and coaxial connections. This versatility allows users to integrate the unit seamlessly with existing audio systems, enhancing their overall listening experience.
The CDR 2 supports various disc formats and has a built-in programmability feature for easy selection and arrangement of tracks. The unit’s reliability and durability are further enhanced by its high-quality build, ensuring that users can enjoy their music for years to come.
In summary, the Harman-Kardon CDR 2 stands out in the realm of audio equipment for its combination of elegance, functionality, and superior sound quality. Its ability to serve as both a CD player and recorder, paired with its advanced recording technologies and user-friendly design, make it a treasured choice for music enthusiasts and collectors alike.