System Setup
System Defaults
The final step of the installation is to establish the system’s defaults. It is helpful to take a few minutes to familiarize yourself with these settings, as they may require change before the first use and later from time to time.
General Functionality of the OSD Menu The complete setup and control of the HS 150 takes place in an advanced user-guided On Screen Display (OSD) menu system. The OSD can be activated by pressing the OSD button 8 on the remote control. Pressing this button again de-activates the OSD.
The main menu consists of a PLAYER Menu, RADIO Menu, TV Menu, AUX Menu, DIGITAL Menu, USB Menu and a SET-UP Menu.
The PLAYER Menu will show all information and options available for the disc currently playing. The RADIO Menu will show radio and RDS options. The TV, AUX and DIGITAL Menus show the surround options for these specific audio inputs. The USB Menu will show all information and options available when USB thumb devices or portable hard disks are connected. The SET-UP Menu will help you configure all audio and video settings which are normally only made once.
Depending on how your HS system is connected to your TV set, two different On Screen Displays are available. When the HS is connected via any of the standard definition connections (SCART, S-Video, Composite Video or standard Component Video) the OSD will be icon-based. When the HS is connected via any of the high- definition connections (HDMI or high definition Component Video), the OSD will be text based. In the next chapters we will show both the standard definition version and the high definition version to make the initial setup as easy as possible.
Many Menu's contain Submenus or text lines. These submenus are shown as icons on the left side of the menu, depending on whether you are watching the standard definition OSD or high- definition OSD. They can be highlighted by a white square around the icon or text by moving the cursor with the ARROW 9 buttons. Icons or text can be activated by pressing ENTER 6 when they are highlighted. When ENTER 6 has been pressed, the color of the icon or the circle behind the text will change to dark blue and you will see that the current settings of this submenu will appear on the right side of the menu. Although some Menus have various Submenus and Settings, they are all navigated in the same way. All submenus, settings and options can be accessed with the help of the ARROW (KLNM 9) and ENTER 6 buttons on the remote control.
To change a setting, simply move the cursor to the setting you wish to change. This setting will be highlighted in a white square, and a brief explanation will appear in the Upper Menu Line on the bottom of your screen, together with the
18SYSTEM SETUP
available options for this setting on the Lower Menu Line.
Once the setting is highlighted, pressing ENTER will show an M and N icon next to the current setting to indicate that the setting can be changed by pressing the left or right ARROW Button 9. Press the ARROW Buttons 9 until the requested setting is shown, and confirm this setting by pressing ENTER 6. Note that when you cycle though the options for this setting, the cursor cycles though the options on the Lower Menu Line, and the rest of the Display fades out.
(A)
(E)(D)
(A)
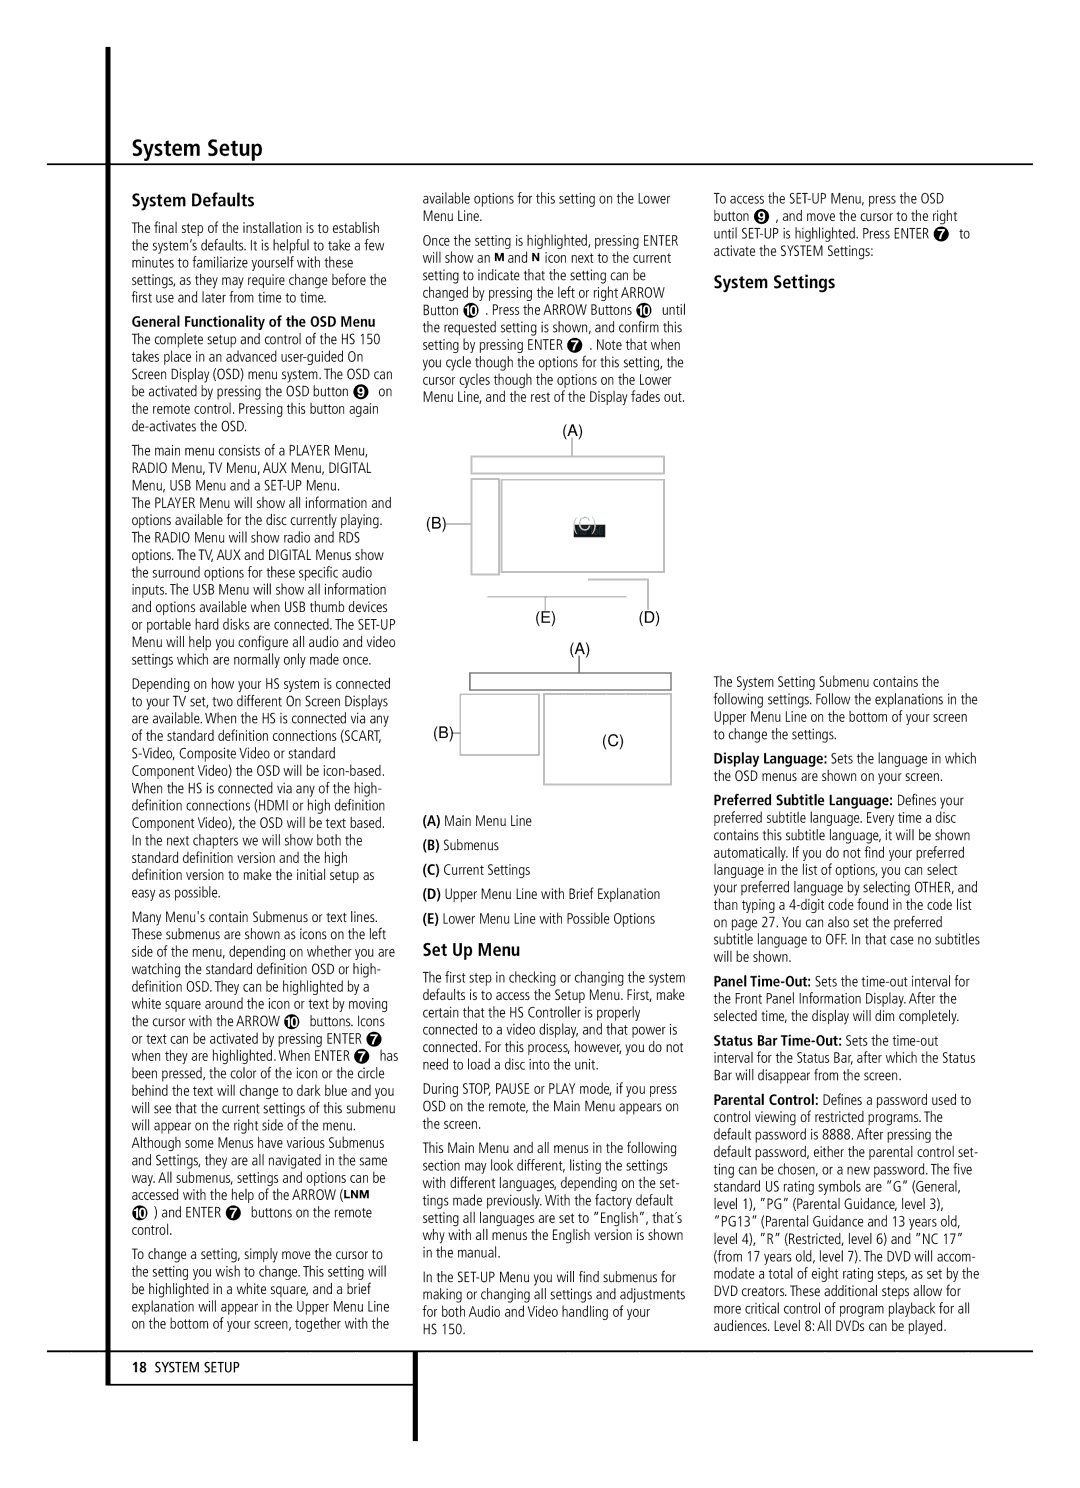
(A)Main Menu Line
(B)Submenus
(C)Current Settings
(D)Upper Menu Line with Brief Explanation
(E)Lower Menu Line with Possible Options
Set Up Menu
The first step in checking or changing the system defaults is to access the Setup Menu. First, make certain that the HS Controller is properly connected to a video display, and that power is connected. For this process, however, you do not need to load a disc into the unit.
During STOP, PAUSE or PLAY mode, if you press OSD on the remote, the Main Menu appears on the screen.
This Main Menu and all menus in the following section may look different, listing the settings with different languages, depending on the set- tings made previously. With the factory default setting all languages are set to ”English”, that´s why with all menus the English version is shown in the manual.
In the SET-UP Menu you will find submenus for making or changing all settings and adjustments for both Audio and Video handling of your
HS 150.
To access the SET-UP Menu, press the OSD button 8, and move the cursor to the right until SET-UP is highlighted. Press ENTER 6 to activate the SYSTEM Settings:
System Settings
The System Setting Submenu contains the following settings. Follow the explanations in the Upper Menu Line on the bottom of your screen to change the settings.
Display Language: Sets the language in which the OSD menus are shown on your screen.
Preferred Subtitle Language: Defines your preferred subtitle language. Every time a disc contains this subtitle language, it will be shown automatically. If you do not find your preferred language in the list of options, you can select your preferred language by selecting OTHER, and than typing a 4-digit code found in the code list on page 27. You can also set the preferred subtitle language to OFF. In that case no subtitles will be shown.
Panel Time-Out:Sets the time-out interval for the Front Panel Information Display. After the selected time, the display will dim completely.
Status Bar Time-Out: Sets the time-out interval for the Status Bar, after which the Status Bar will disappear from the screen.
Parental Control: Defines a password used to control viewing of restricted programs. The default password is 8888. After pressing the default password, either the parental control set- ting can be chosen, or a new password. The five standard US rating symbols are ”G” (General, level 1), ”PG” (Parental Guidance, level 3), ”PG13” (Parental Guidance and 13 years old, level 4), ”R” (Restricted, level 6) and ”NC 17” (from 17 years old, level 7). The DVD will accom- modate a total of eight rating steps, as set by the DVD creators. These additional steps allow for more critical control of program playback for all audiences. Level 8: All DVDs can be played.