INSTALLING THE SATELLITES
For Shelf Placement
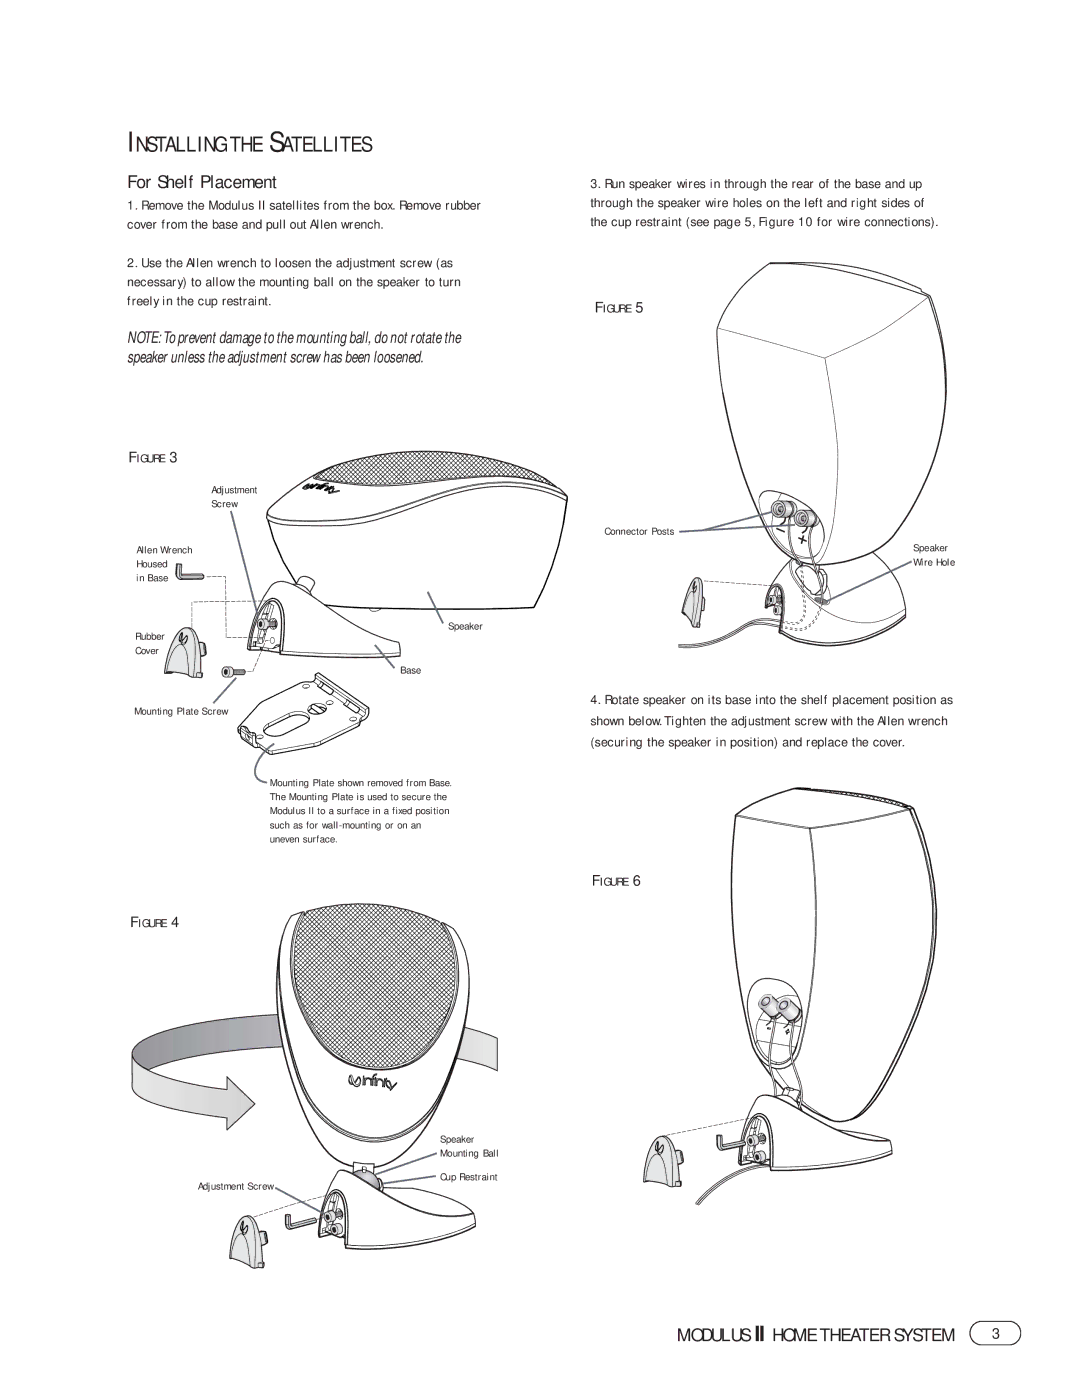
1.Remove the Modulus II satellites from the box. Remove rubber cover from the base and pull out Allen wrench.
2.Use the Allen wrench to loosen the adjustment screw (as necessary) to allow the mounting ball on the speaker to turn freely in the cup restraint.
NOTE: To prevent damage to the mounting ball, do not rotate the speaker unless the adjustment screw has been loosened.
FIGURE 3
Adjustment
Screw
Allen Wrench
Housed
in Base
Speaker
Rubber
Cover
Base
Mounting Plate Screw
Mounting Plate shown removed from Base. The Mounting Plate is used to secure the Modulus II to a surface in a fixed position such as for
FIGURE 4
Speaker
Mounting Ball
Cup Restraint
Adjustment Screw
3.Run speaker wires in through the rear of the base and up through the speaker wire holes on the left and right sides of the cup restraint (see page 5, Figure 10 for wire connections).
FIGURE 5
Connector Posts
Speaker
Wire Hole
4.Rotate speaker on its base into the shelf placement position as shown below. Tighten the adjustment screw with the Allen wrench (securing the speaker in position) and replace the cover.
FIGURE 6
MODULUS II HOME THEATER SYSTEM | 3 |