GETTING STARTED |
|
| |
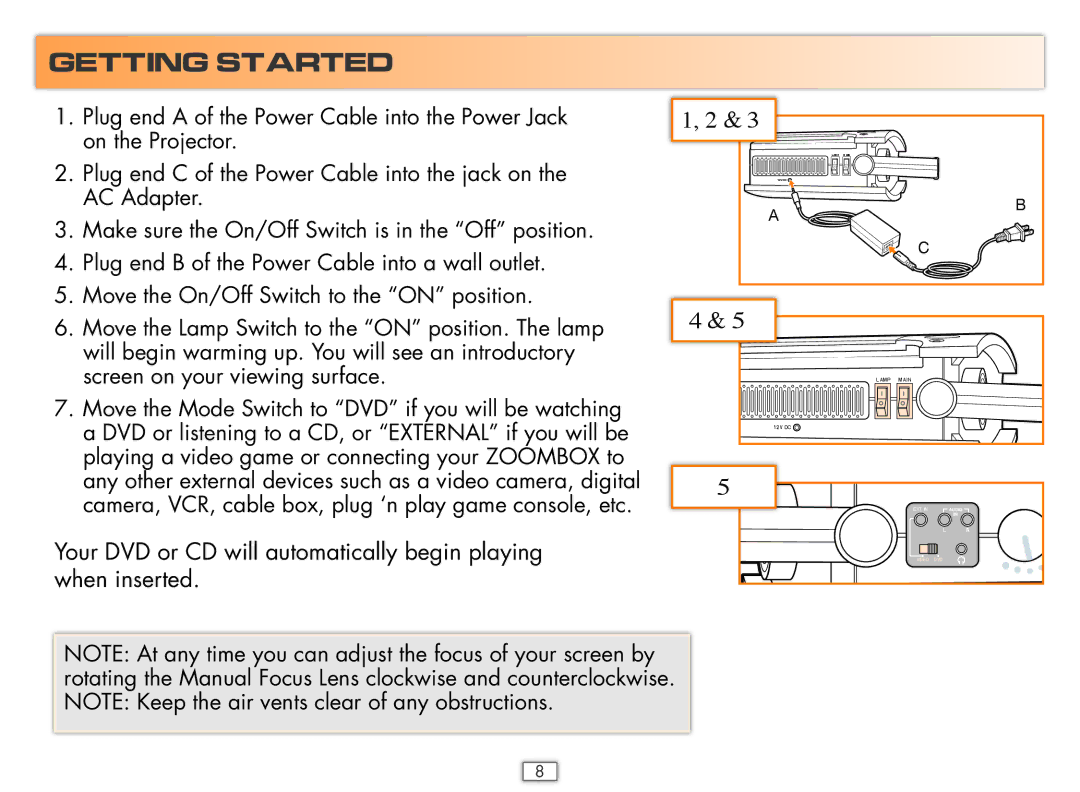
1. | Plug end A of the Power Cable into the Power Jack | 1, 2 & 3 |
|
| on the Projector. |
| LAMP MAIN |
2. | Plug end C of the Power Cable into the jack on the | 12V DC |
|
| AC Adapter. | A | B |
3. | Make sure the On/Off Switch is in the “Off” position. |
| |
| C | ||
4. | Plug end B of the Power Cable into a wall outlet. |
| |
|
| ||
5. | Move the On/Off Switch to the “ON” position. | 4 & 5 |
|
6. | Move the Lamp Switch to the “ON” position. The lamp |
| |
| will begin warming up. You will see an introductory |
|
|
| screen on your viewing surface. |
| LAMP MAIN |
7. Move the Mode Switch to “DVD” if you will be watching |
|
a DVD or listening to a CD, or “EXTERNAL” if you will be | 12V DC |
| |
playing a video game or connecting your ZOOMBOX to | 5 |
any other external devices such as a video camera, digital | |
camera, VCR, cable box, plug ‘n play game console, etc. | EXT. IN |
Your DVD or CD will automatically begin playing | VIDEO DVD |
when inserted. |
|
NOTE: At any time you can adjust the focus of your screen by rotating the Manual Focus Lens clockwise and counterclockwise. NOTE: Keep the air vents clear of any obstructions.
8
