INSTALLATION
ALL MODELS
Booster Heaters are shipped with most components
1.Remove unit from box.
2.Remove information packet. To prevent delay in obtaining warranty coverage, fill out and mail in the warranty card to Hatco.
3.Remove tape and protective packaging from all surfaces of unit.
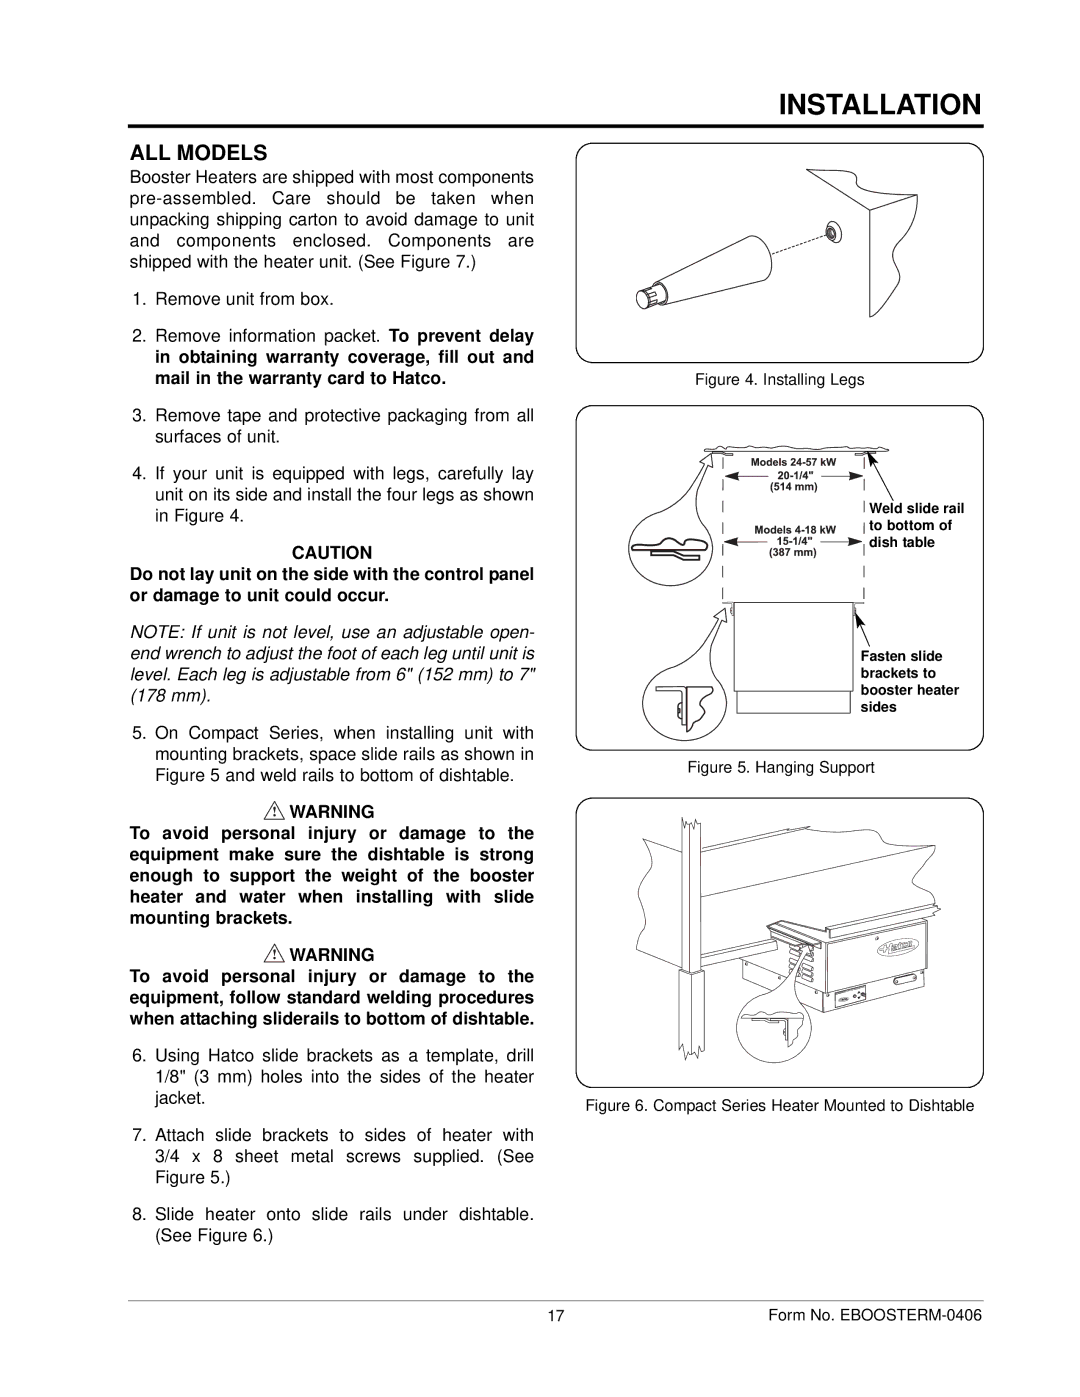
4.If your unit is equipped with legs, carefully lay unit on its side and install the four legs as shown in Figure 4.
CAUTION
Do not lay unit on the side with the control panel or damage to unit could occur.
NOTE: If unit is not level, use an adjustable open- end wrench to adjust the foot of each leg until unit is level. Each leg is adjustable from 6" (152 mm) to 7" (178 mm).
5.On Compact Series, when installing unit with mounting brackets, space slide rails as shown in Figure 5 and weld rails to bottom of dishtable.
![]() WARNING
WARNING
To avoid personal injury or damage to the equipment make sure the dishtable is strong enough to support the weight of the booster heater and water when installing with slide mounting brackets.
![]() WARNING
WARNING
To avoid personal injury or damage to the equipment, follow standard welding procedures when attaching sliderails to bottom of dishtable.
6.Using Hatco slide brackets as a template, drill 1/8" (3 mm) holes into the sides of the heater jacket.
7.Attach slide brackets to sides of heater with 3/4 x 8 sheet metal screws supplied. (See Figure 5.)
8.Slide heater onto slide rails under dishtable. (See Figure 6.)
Figure 4. Installing Legs
Weld slide rail ![]()
![]()
![]()
![]()
![]()
![]()
![]() to bottom of
to bottom of ![]()
![]()
![]()
![]()
![]()
![]()
![]()
![]()
![]() dish table
dish table
Fasten slide brackets to booster heater sides
Figure 5. Hanging Support
Figure 6. Compact Series Heater Mounted to Dishtable
17 | Form No. |
