ASSEMBLY
Assembly requires two persons. Set the treadmill in a cleared area and remove all packing materials; do not dispose of the packing materials until assembly is completed. Note: The underside of the treadmill walking belt is coated with
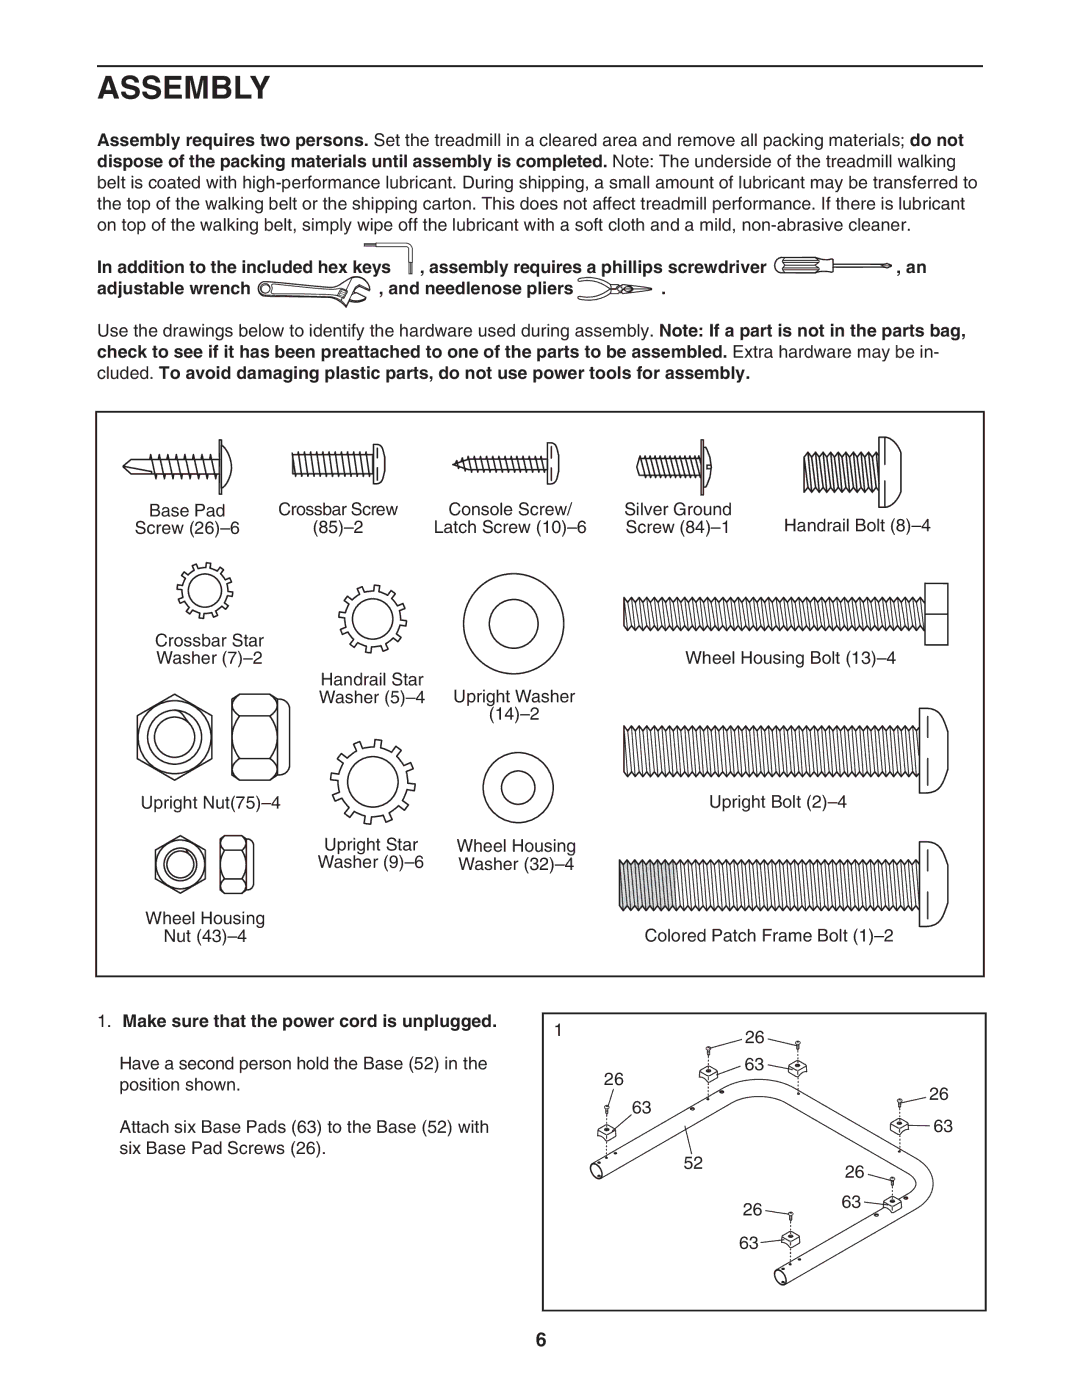
In addition to the included hex keys , assembly requires a phillips screwdriver | , an | ||
adjustable wrench | , and needlenose pliers | . |
|
Use the drawings below to identify the hardware used during assembly. Note: If a part is not in the parts bag, check to see if it has been preattached to one of the parts to be assembled. Extra hardware may be in- cluded. To avoid damaging plastic parts, do not use power tools for assembly.
Base Pad | Crossbar Screw | Console Screw/ | Silver Ground | Handrail Bolt |
Screw | Latch Screw | Screw | ||
Crossbar Star |
|
| Wheel Housing Bolt | |
Washer |
|
| ||
| Handrail Star | Upright Washer |
|
|
| Washer |
|
| |
|
|
|
| |
Upright |
| Upright Bolt | ||
| Upright Star | Wheel Housing |
|
|
| Washer | Washer |
|
|
Wheel Housing |
|
| Colored Patch Frame Bolt | |
Nut |
|
| ||
1.Make sure that the power cord is unplugged.
Have a second person hold the Base (52) in the position shown.
Attach six Base Pads (63) to the Base (52) with six Base Pad Screws (26).
1 |
| 26 |
|
|
|
| |
| 26 | 63 |
|
|
| 26 | |
| 63 |
| |
|
| 63 | |
|
|
| |
| 52 |
| 26 |
|
|
| |
|
| 26 | 63 |
|
|
| |
|
| 63 |
|
6 |
|
|
|