10

D i s a s s e m b l y o f 3 - P o s t S y s t e m

BEFORE USING THE EASYTRACK SYSTEM GO THROUGH THE FOLLOWING CHECKLIST:

Make sure the red zone on top of all posts are not visible.

Make sure the posts are straight. (Did you use the clip-on level?)

Make sure the rail is locked into place (see step 15) and that it looks level.

Make sure the stopper is snug (see step 22b).

Make sure the pivoting rail slides smoothly from side to side.

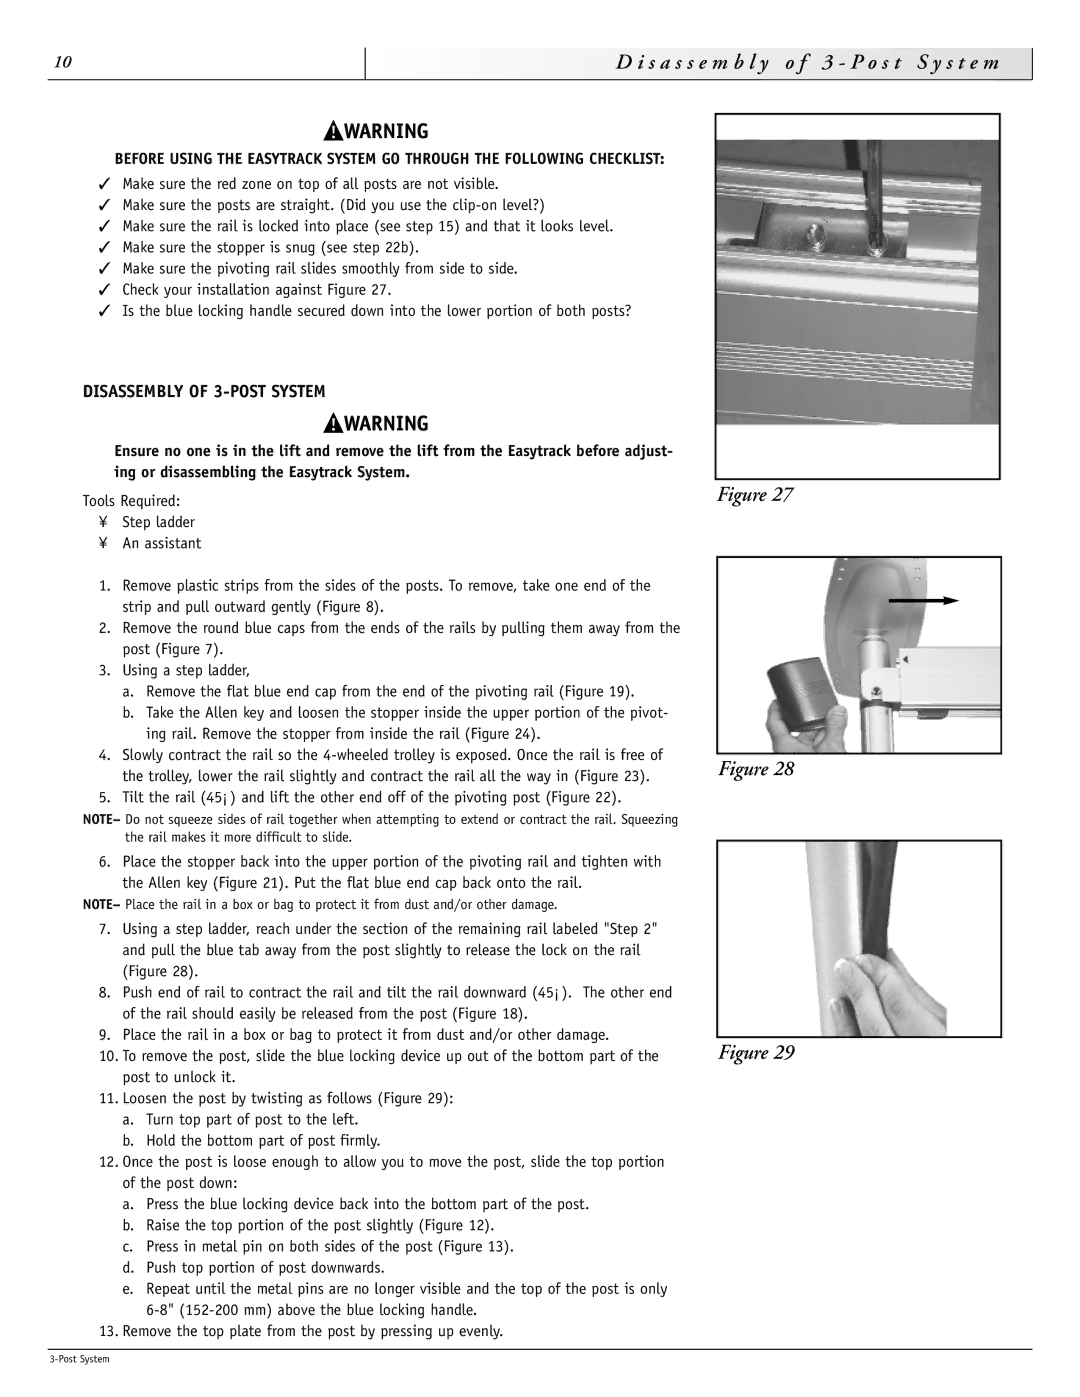
Check your installation against Figure 27.

Is the blue locking handle secured down into the lower portion of both posts?

DISASSEMBLY OF 3-POST SYSTEM

Ensure no one is in the lift and remove the lift from the Easytrack before adjust- ing or disassembling the Easytrack System.

Tools Required:

Step ladder

An assistant

1.Remove plastic strips from the sides of the posts. To remove, take one end of the strip and pull outward gently (Figure 8).

2.Remove the round blue caps from the ends of the rails by pulling them away from the post (Figure 7).

3.Using a step ladder,

a.Remove the flat blue end cap from the end of the pivoting rail (Figure 19).

b.Take the Allen key and loosen the stopper inside the upper portion of the pivot- ing rail. Remove the stopper from inside the rail (Figure 24).

4.Slowly contract the rail so the 4-wheeled trolley is exposed. Once the rail is free of the trolley, lower the rail slightly and contract the rail all the way in (Figure 23).

5.Tilt the rail (45°) and lift the other end off of the pivoting post (Figure 22).

NOTE– Do not squeeze sides of rail together when attempting to extend or contract the rail. Squeezing the rail makes it more difficult to slide.

6.Place the stopper back into the upper portion of the pivoting rail and tighten with the Allen key (Figure 21). Put the flat blue end cap back onto the rail.

NOTE– Place the rail in a box or bag to protect it from dust and/or other damage.

7.Using a step ladder, reach under the section of the remaining rail labeled "Step 2" and pull the blue tab away from the post slightly to release the lock on the rail (Figure 28).

8.Push end of rail to contract the rail and tilt the rail downward (45°). The other end of the rail should easily be released from the post (Figure 18).

9.Place the rail in a box or bag to protect it from dust and/or other damage.

10.To remove the post, slide the blue locking device up out of the bottom part of the post to unlock it.

11.Loosen the post by twisting as follows (Figure 29):

a.Turn top part of post to the left.

b.Hold the bottom part of post firmly.

12.Once the post is loose enough to allow you to move the post, slide the top portion of the post down:

a.Press the blue locking device back into the bottom part of the post.

b.Raise the top portion of the post slightly (Figure 12).

c.Press in metal pin on both sides of the post (Figure 13).

d.Push top portion of post downwards.

e.Repeat until the metal pins are no longer visible and the top of the post is only 6-8" (152-200 mm) above the blue locking handle.

13.Remove the top plate from the post by pressing up evenly.

Figure 27

Figure 28

Figure 29

3-Post System

Page 10
Image 10
Sunrise Medical 93000 instruction manual S a s s e m b l y o f 3 P o s t S y s t e m, Disassembly of 3-POST System

93000 specifications

Sunrise Medical 93000 is a premier mobility solution designed to enhance the quality of life for individuals with limited mobility. This wheelchair model combines advanced engineering and user-centered design, resulting in an exceptional user experience.

One of the standout features of the Sunrise Medical 93000 is its lightweight aluminum frame. This material offers the perfect balance of durability and portability, making it easy for users to transport and maneuver. The adjustable armrests and footrests contribute to the personalized comfort of each user, allowing for optimal positioning and support.

Another significant characteristic is the wheelchair's modular design, which allows for easy customization. Users can easily modify the chair to fit their specific needs, whether that means adjusting seat height, changing wheel types, or adding accessories. This versatility makes the 93000 suitable for a broad range of users, from those requiring basic mobility aids to more demanding applications.

In terms of technology, the Sunrise Medical 93000 incorporates an innovative wheel and tire system that enhances grip and stability on various terrains. The lightweight wheels reduce overall weight without sacrificing performance, allowing users to navigate both indoor and outdoor environments with ease.

The chair also features advanced braking systems that ensure safety during use. The intuitive design allows for easy operation of the hand brakes, giving users confidence in their ability to control their mobility. Additionally, the wheelchair is equipped with puncture-resistant tires, ensuring longevity and reliability.

Comfort is a priority in the 93000 model, evident in its cushioned seat and backrest. The upholstery is designed to be breathable and easy to clean, promoting hygiene and comfort during extended use. Furthermore, the wheelchair comes with ergonomic designs that reduce pressure points and enhance user comfort.

Lastly, Sunrise Medical emphasizes user independence with the 93000 through its thoughtful design. The wheelchair is designed to be easily operated by the user themselves, fostering a sense of autonomy and confidence. This commitment to user-centric innovation truly makes the Sunrise Medical 93000 an exemplary choice for those seeking an effective and comfortable mobility solution.