9 Appliance Setup
A. Clean the Appliance
Clean/vacuum any sawdust that may have accumulated in- side the firebox or underneath in the control cavity.
![]() WARNING
WARNING
Shock Risk
Fire Risk
Use ONLY optional accessories approved for this appliance.
•Using
•Using
•Only Hearth & Home Technologies approved accessories may be used safely.
B.Grate Assembly Placement
•Ensure grate assembly is over burner assembly, centered from left to right, and back legs are in grate brackets (see Figure 9.1)
Back Legs in Grate Brackets
Figure 9.1 Back Legs in Grate Brackets
C. Positioning the Logs
•See Section 13.B. for log descriptions and illustrations.
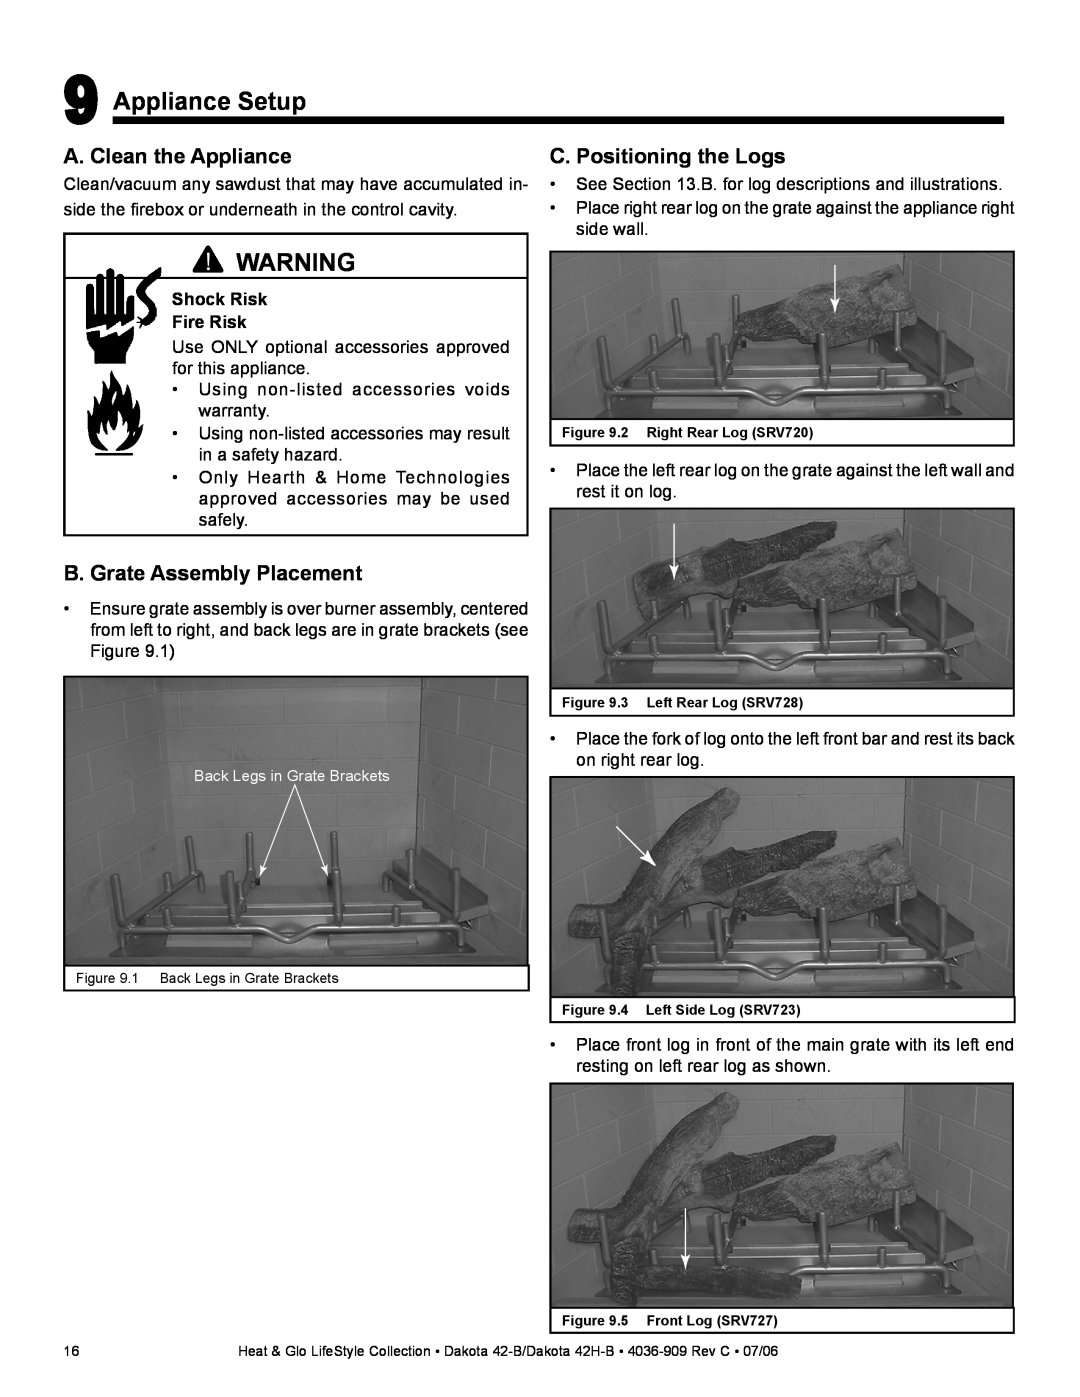
•Place right rear log on the grate against the appliance right side wall.
Figure 9.2 Right Rear Log (SRV720)
•Place the left rear log on the grate against the left wall and rest it on log.
Figure 9.3 Left Rear Log (SRV728)
•Place the fork of log onto the left front bar and rest its back on right rear log.
Figure 9.4 Left Side Log (SRV723)
•Place front log in front of the main grate with its left end resting on left rear log as shown.
Figure 9.5 Front Log (SRV727)
16 | Heat & Glo LifeStyle Collection • Dakota |