Clutch Housing
Removal
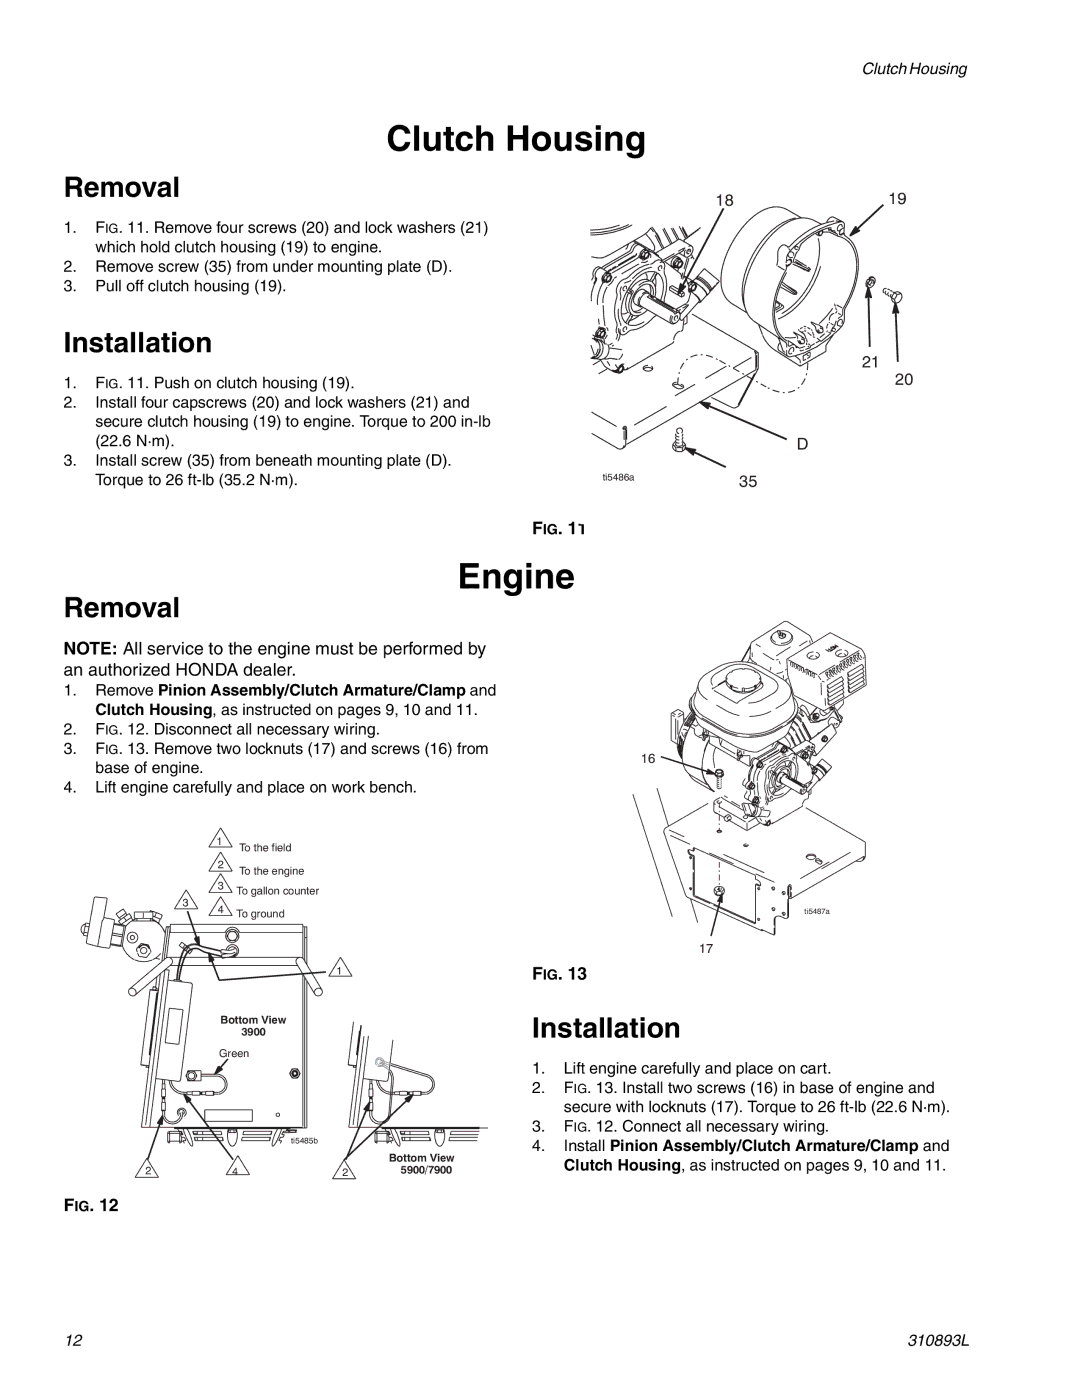
1.FIG. 11. Remove four screws (20) and lock washers (21) which hold clutch housing (19) to engine.
2.Remove screw (35) from under mounting plate (D).
3.Pull off clutch housing (19).
Installation
1.FIG. 11. Push on clutch housing (19).
2.Install four capscrews (20) and lock washers (21) and secure clutch housing (19) to engine. Torque to 200 in-lb (22.6 N·m).
3.Install screw (35) from beneath mounting plate (D).
Torque to 26 | ti5486a |
|
Clutch Housing
1819
21
20
D
35
FIG. 11
Engine
Removal
NOTE: All service to the engine must be performed by an authorized HONDA dealer.
1.Remove Pinion Assembly/Clutch Armature/Clamp and Clutch Housing, as instructed on pages 9, 10 and 11.
2.FIG. 12. Disconnect all necessary wiring.
3.FIG. 13. Remove two locknuts (17) and screws (16) from base of engine.
4.Lift engine carefully and place on work bench.
1
To the field
2
To the engine
3To gallon counter
3 | 4 | To ground |
| ||
|
|
1
Bottom View
3900
Green
|
| ti5485b |
|
|
|
| Bottom View |
2 | 4 | 2 | 5900/7900 |
16
ti5487a
17
FIG. 13
Installation
1.Lift engine carefully and place on cart.
2.FIG. 13. Install two screws (16) in base of engine and secure with locknuts (17). Torque to 26 ft-lb (22.6 N·m).
3.FIG. 12. Connect all necessary wiring.
4.Install Pinion Assembly/Clutch Armature/Clamp and Clutch Housing, as instructed on pages 9, 10 and 11.
FIG. 12
12 | 310893L |