FRONT PANEL CONTROLS
FRONT VIEW
42”
DISPLAY MONITOR
STANDBY (RED) ON (GREEN) | MAIN POWER |
ghf
k h
55” |
DISPLAY |
MONITOR |
STANDBY (RED) ON (GREEN)
hgf
FIRST TIME USE
(AVC)
AUDIO VIDEO CONTROL CENTER ![]()
PULL
AUDIO VIDEO CONTROL CENTER
POWER | STANDBY (RED) ON (GREEN) VOL- | VOL+ | CH- | CH+ INPUT/EXIT |
f
g e d c
PHOTO INPUT
MENU/SELECT |
|
|
|
PHONES | INPUT 5 | ||
| VIDEO | L/(MONO) R | |
|
|
| AUDIO |
b a j |
|
|
i | ||
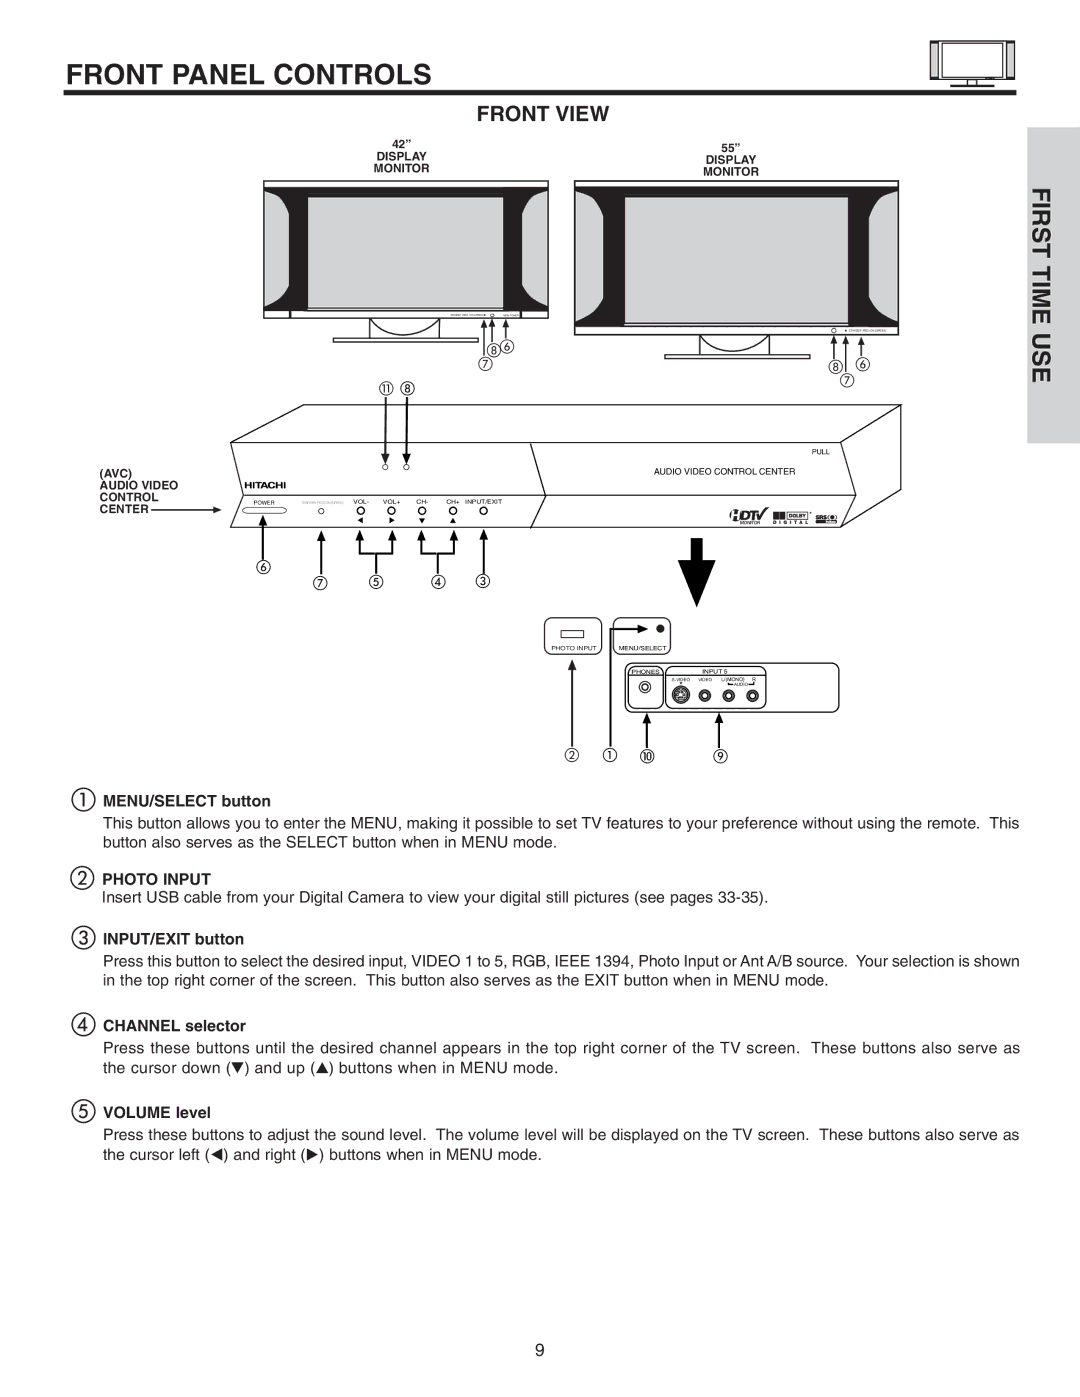
aMENU/SELECT button
This button allows you to enter the MENU, making it possible to set TV features to your preference without using the remote. This button also serves as the SELECT button when in MENU mode.
b c
d
e
PHOTO INPUT
Insert USB cable from your Digital Camera to view your digital still pictures (see pages
INPUT/EXIT button
Press this button to select the desired input, VIDEO 1 to 5, RGB, IEEE 1394, Photo Input or Ant A/B source. Your selection is shown in the top right corner of the screen. This button also serves as the EXIT button when in MENU mode.
CHANNEL selector
Press these buttons until the desired channel appears in the top right corner of the TV screen. These buttons also serve as the cursor down (H) and up (G) buttons when in MENU mode.
VOLUME level
Press these buttons to adjust the sound level. The volume level will be displayed on the TV screen. These buttons also serve as the cursor left (F) and right (E) buttons when in MENU mode.
9