3.Turn off the computer properly through the operating system, then turn off any external devices.
4.Disconnect the power cord from the power outlet and disconnect any external devices.
![]() CAUTION: Regardless of the
CAUTION: Regardless of the
5.Remove the computer access panel.
6.Install four
![]() NOTE: The hard drive uses
NOTE: The hard drive uses
If you are replacing a drive, transfer the guides screws from the old drive to the new one.
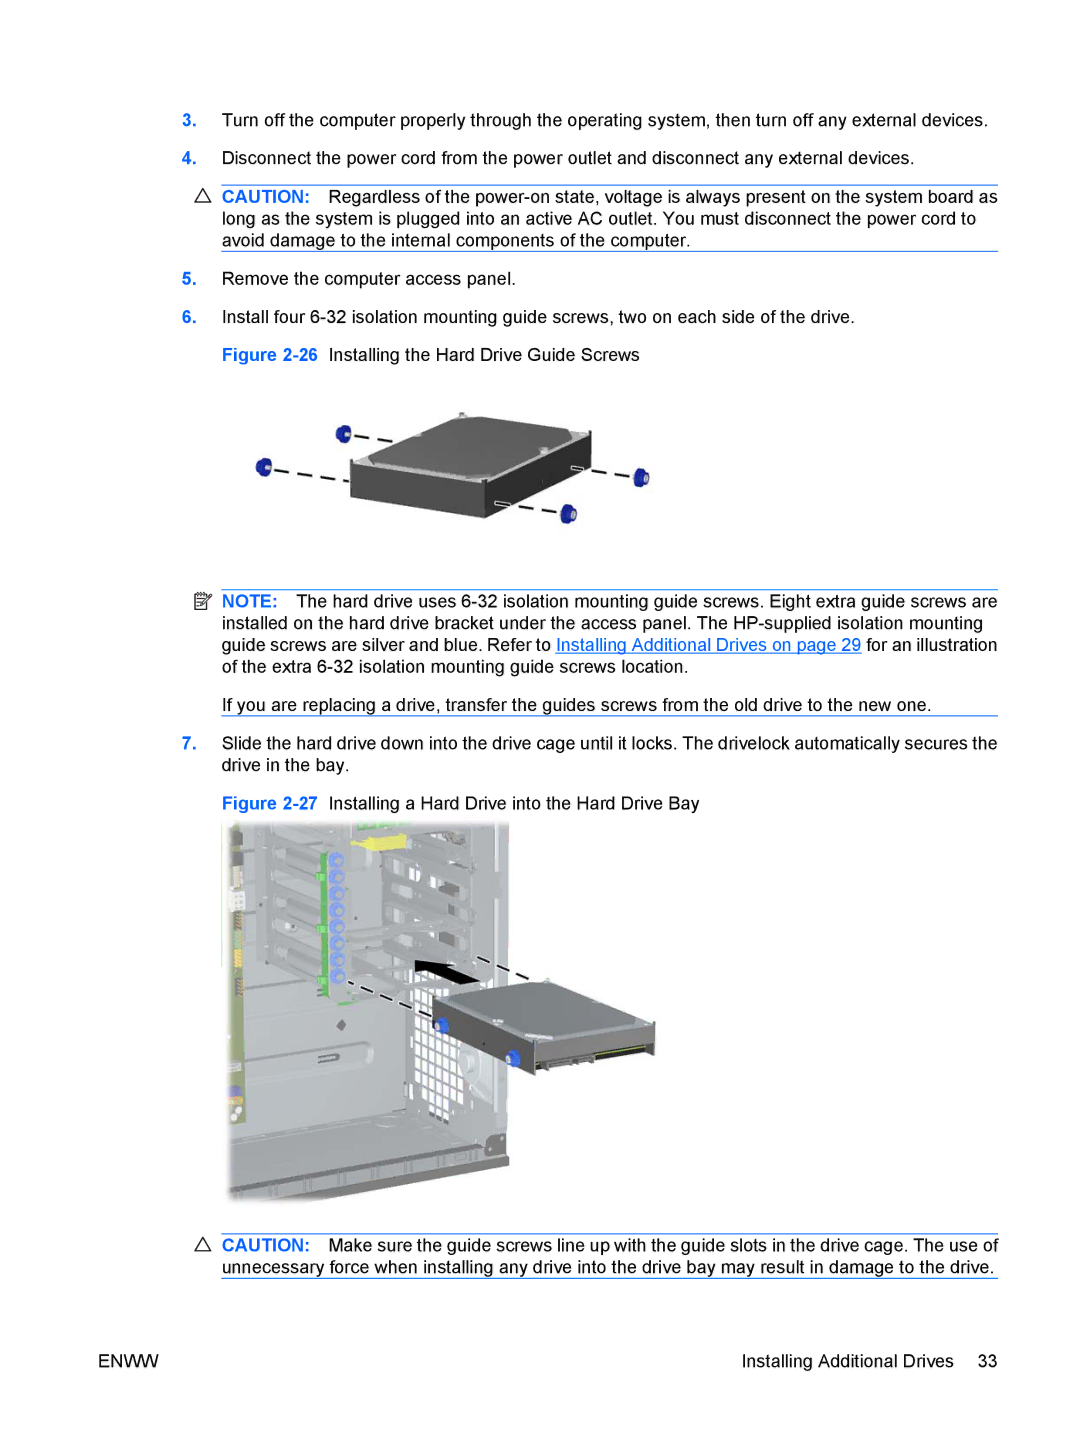
7.Slide the hard drive down into the drive cage until it locks. The drivelock automatically secures the drive in the bay.
Figure 2-27 Installing a Hard Drive into the Hard Drive Bay
![]() CAUTION: Make sure the guide screws line up with the guide slots in the drive cage. The use of unnecessary force when installing any drive into the drive bay may result in damage to the drive.
CAUTION: Make sure the guide screws line up with the guide slots in the drive cage. The use of unnecessary force when installing any drive into the drive bay may result in damage to the drive.
ENWW | Installing Additional Drives 33 |