Hitachi 8000 Elite manual Hardware Upgrades, Enww

Models: 8000 Elite

1 64
Download 64 pages 7.46 Kb
Page 48
Image 48
42 Chapter 2 Hardware Upgrades

8.To release the drives from the 5.25-inch drive bay, press down on the short yellow drivelock as shown (1). While pressing the drivelock, pull the drives out of the drive bay (2).

Figure 2-40Releasing the 5.25-inch Drives from the Drive Bays (Desktop)

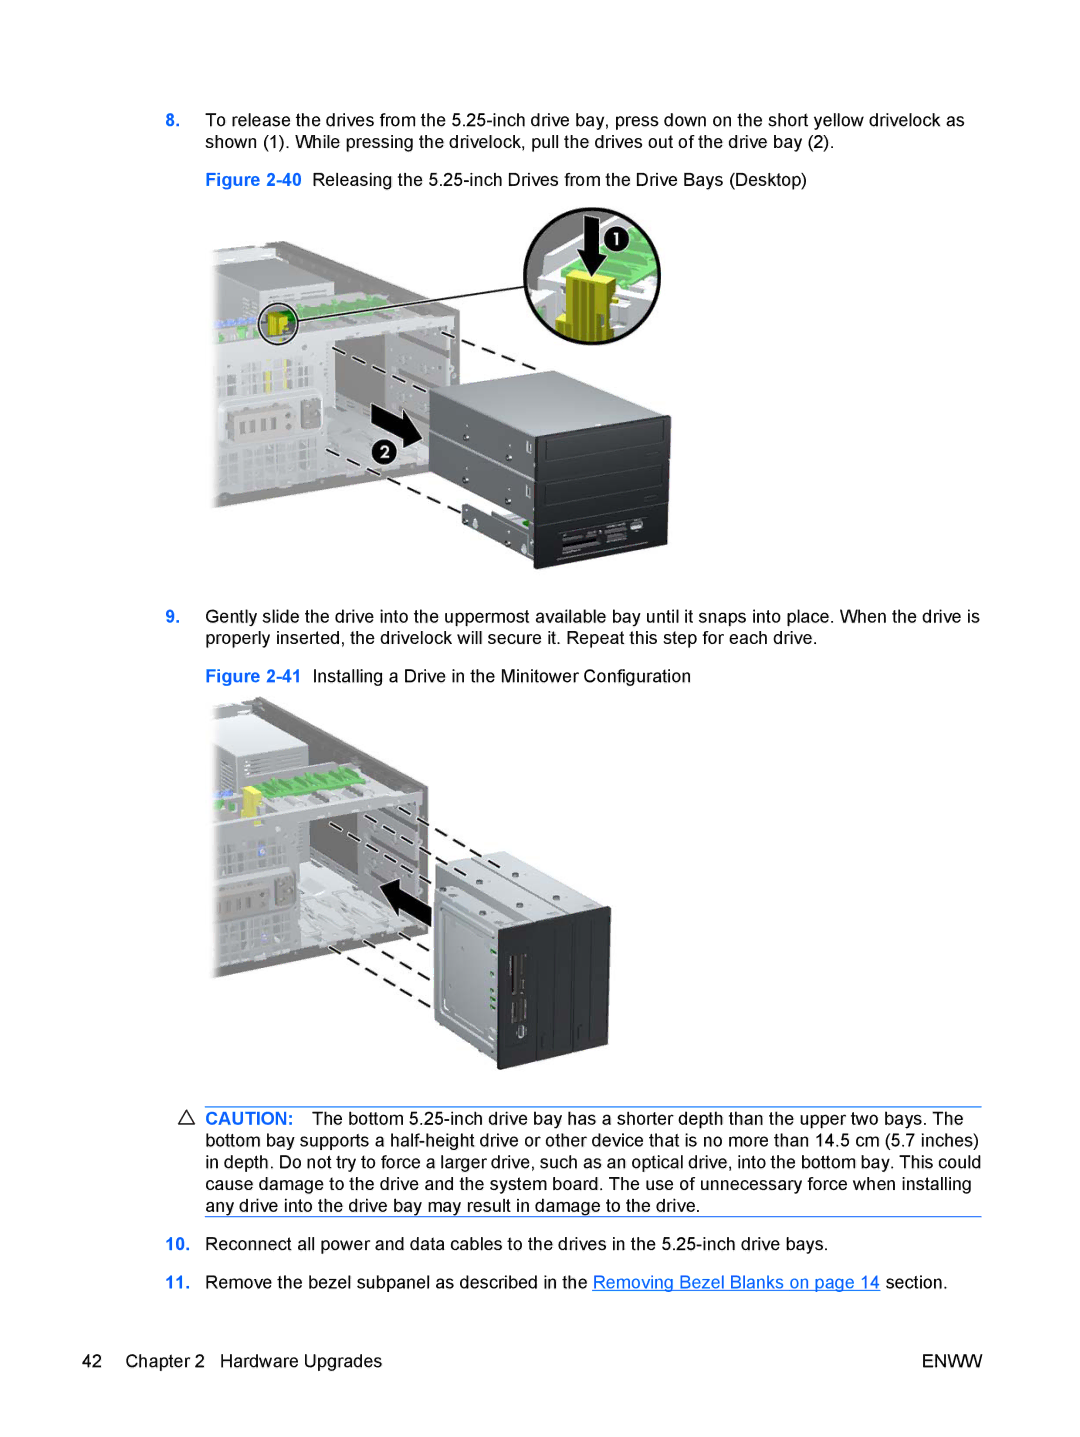
9.Gently slide the drive into the uppermost available bay until it snaps into place. When the drive is properly inserted, the drivelock will secure it. Repeat this step for each drive.

Figure 2-41Installing a Drive in the Minitower Configuration

Manual background CAUTION: The bottom 5.25-inch drive bay has a shorter depth than the upper two bays. The bottom bay supports a half-height drive or other device that is no more than 14.5 cm (5.7 inches) in depth. Do not try to force a larger drive, such as an optical drive, into the bottom bay. This could cause damage to the drive and the system board. The use of unnecessary force when installing any drive into the drive bay may result in damage to the drive.

10.Reconnect all power and data cables to the drives in the 5.25-inch drive bays.

11.Remove the bezel subpanel as described in the Removing Bezel Blanks on page 14 section.

42 Chapter 2 Hardware Upgrades

ENWW

Page 48
Image 48
Hitachi 8000 Elite manual Hardware Upgrades, Enww