Español

INSTALACION DE LA BATERIA PARA LA GUIA LASER (Fig. C-1))

1.Abra la tapa (1) del compartimiento de las baterías deslizando la tapa hacia el interruptor.

2.Instale 2 baterías de 1,5V en el compartimiento de las baterías haciendo corresponder la polaridad con el diagrama que aperece en el compartimiento.

3.Cierre la tapa.

4.Encienda el interruptor (3) para comprobar la OPERACION DE LA GUIA LASER.

Fig. C-1

3

1

2

AVISO: Reemplace las baterías con baterías de 1,5 voltios (Serie número 4 y tamaño AAA o equivalentes). Se recomienda limpiar completamente la guía láser cuando reemplace las baterías de la misma. Utilice un pincel suave o un dispositivo similar para eliminar todo el aserrín y todos los residuos.

INSTALACION DEL CABEZAL (Fig. D)

ADVERTENCIA

El cabezal de la Prensa taladradora pesa mucho y DEBE levantarse con la ayuda de DOS O MAS PERSONAS, para montar en forma segura el cabezal de la Prensa taladradora en la columna.

1.Levante cuidadosamente el cabezal (1) por encima de la columna (2) y deslícelo sobre la columna. Asegúrese que el cabezal se deslice hacia abajo sobre la columna la mayor distancia que sea posible. Alinee el cabezal con la base.

2.Con la llave hexagonal, apriete los dos tornillos de fijación del cabezal (3).

Fig. D

1

3

2

INSTALACION DE LOS MANGOS DE ALIMENTACION (Fig. E)

1.Extraiga los tres mangos de alimentación de la bolsa de piezas sueltas.

2.Atornille los mangos de alimentación (1) en los agujeros roscados (2) del cubo (3). Apriételos.

Fig. E

2

3

1

INSTALACION DEL PORTABROCAS (Fig. F y G)

ADVERTENCIA

Antes de montar el portabrocas y el árbol en el cabezal de la prensa taladradora, limpie todas las superficies de contacto con un producto sin base de petróleo, como alcohol o un disolvente de lacas. Debe eliminarse el aceite y la grasa utilizados en el embalaje de estas piezas, ya que de lo contrario el portabrocas podría aflojarse durante el funcionamiento de la unidad.

1.Gire la manga del portabrocas hacia la derecha para abrir las mordazas del portabrocas (1). Para evitar daños, asegúrese que las mordazas estén completamente retiradas en el portabrocas.

Fig. F

2

1

2.(Fig. G) Monte el portabrocas (1) en el husillo (2).

AVISO: Limpie el adaptador cónico con un limpiador sin base de alcohol antes de insertarlo en el portabrocas.

3.Con un mazo de goma, un martillo con punta de plástico o un bloque de madera y un martillo, golpee firmemente el portabrocas hacia arriba para montarlo en el eje.

Fig. G

– 46 –

Page 46
Image 46
Hitachi B13F instruction manual Instalacion DE LA Bateria Para LA Guia Laser Fig. C-1, Instalacion DEL Cabezal Fig. D

B13F specifications

The Hitachi B13F is a versatile and robust benchtop drill press designed to meet the demands of both professionals and hobbyists in various applications. Known for its reliability and precision, the B13F combines advanced technology with practical features that make it a popular choice among woodworkers, metalworkers, and those involved in DIY projects.

One of the standout features of the Hitachi B13F is its powerful 350-watt motor, which provides sufficient torque for a wide range of drilling operations. This motor is designed to handle heavier materials, ensuring that users can work with wood, metal, and plastics without compromising on performance. Additionally, the drill press offers a variable speed control system, allowing users to select from a speed range of 580 to 3,050 RPM, making it suitable for drilling different materials with ease and precision.

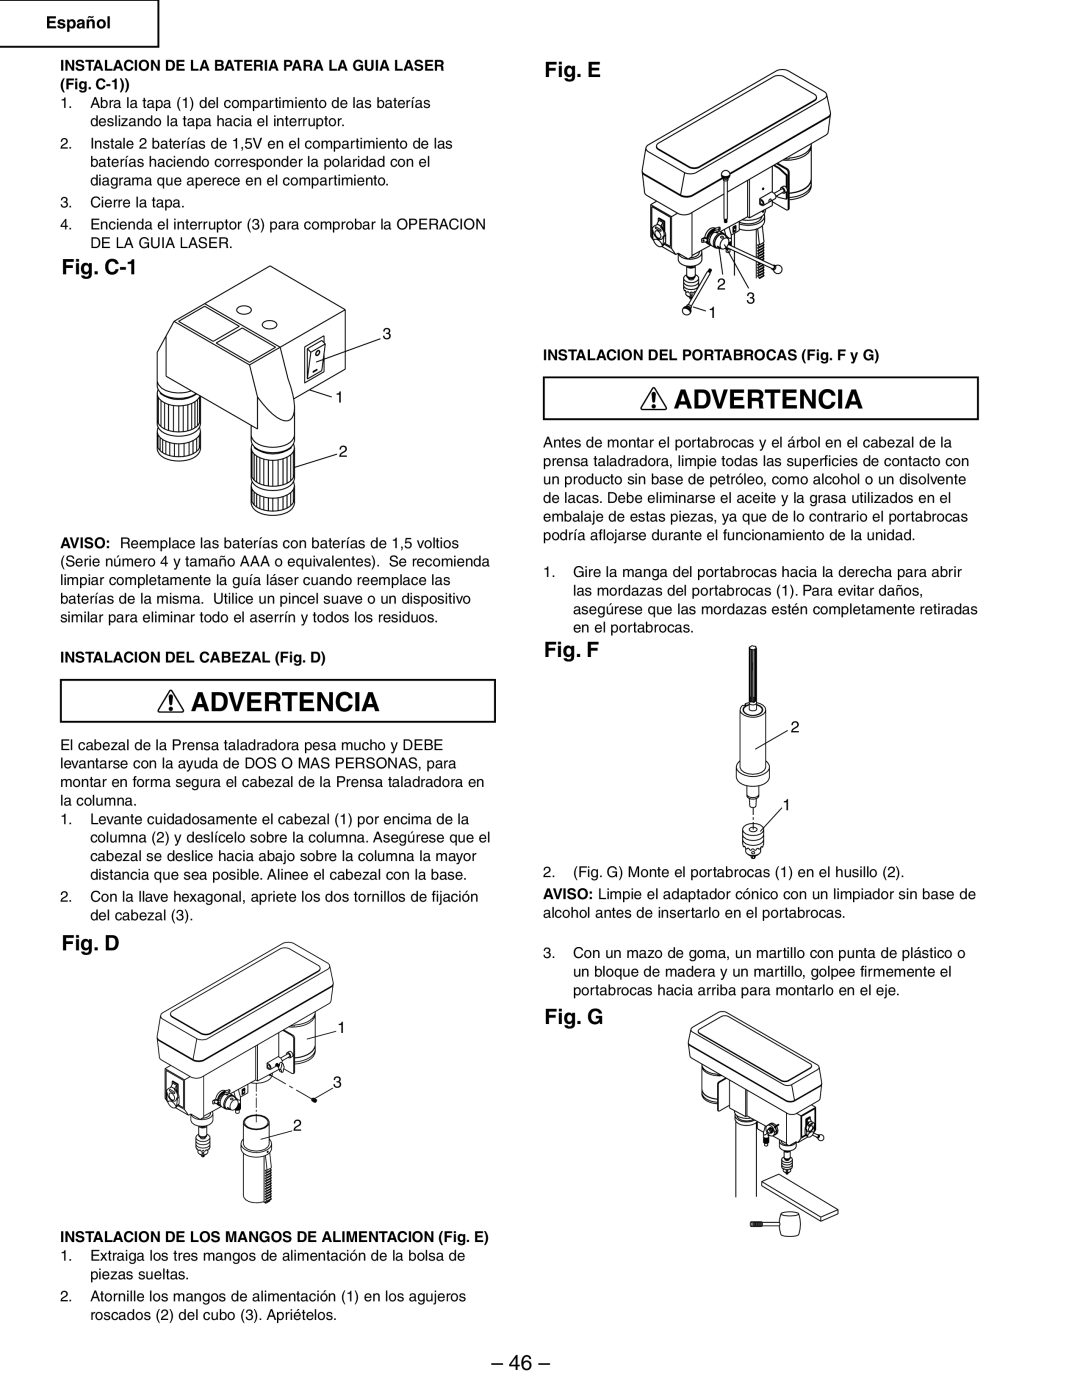
The B13F's 13mm keyless chuck provides convenience and quick tool changes, reducing setup time and enhancing productivity. This feature allows users to effortlessly switch between drill bits without the need for additional tools, which is especially beneficial for those who require frequent bit changes on the job site or in their workshops.

Precision is a hallmark of the Hitachi B13F, thanks in part to its laser guide system that aids in aligning the drill bit with the target material. This ensures accurate and clean holes, minimizing the risk of error in drilling. The drill press is equipped with an adjustable depth stop, enabling users to set the maximum drilling depth for consistent results across multiple holes.

The construction of the B13F is another highlight, with a sturdy cast iron base that provides stability during operation. This solid foundation minimizes vibrations, contributing to a smoother drilling experience and enhancing the overall accuracy of the tool. The height-adjustable work table also adds flexibility, allowing users to accommodate various workpiece sizes effortlessly.

Moreover, safety features such as the emergency stop switch and a built-in work light further enhance the usability of the Hitachi B13F, ensuring that operators can work efficiently while prioritizing safety.

In summary, the Hitachi B13F benchtop drill press combines power, precision, and convenience in a compact design. With advanced technologies such as variable speed control, a keyless chuck, and laser guiding capabilities, it stands out as a reliable tool for a wide range of drilling tasks, making it an excellent investment for both professional workshops and home garages.