English

6.If the quill moves up and down as easily as you desire, tighten the inner nut (4) with the adjustable wrench. If too loose, repeat steps 2 through 4 to tighten. If too tight, reverse steps 3 and 4. DO NOT OVERTIGHTEN and restrict quill movement.

7.Replace the jam nut (3) and tighten against the inner nut

(4) to prevent the inner nut from reversing.

WARNING

To avoid injury from an accidental start, ALWAYS make sure the switch is in the OFF position, the switch key is removed, and the plug is not connected to the power source outlet before making belt adjustments.

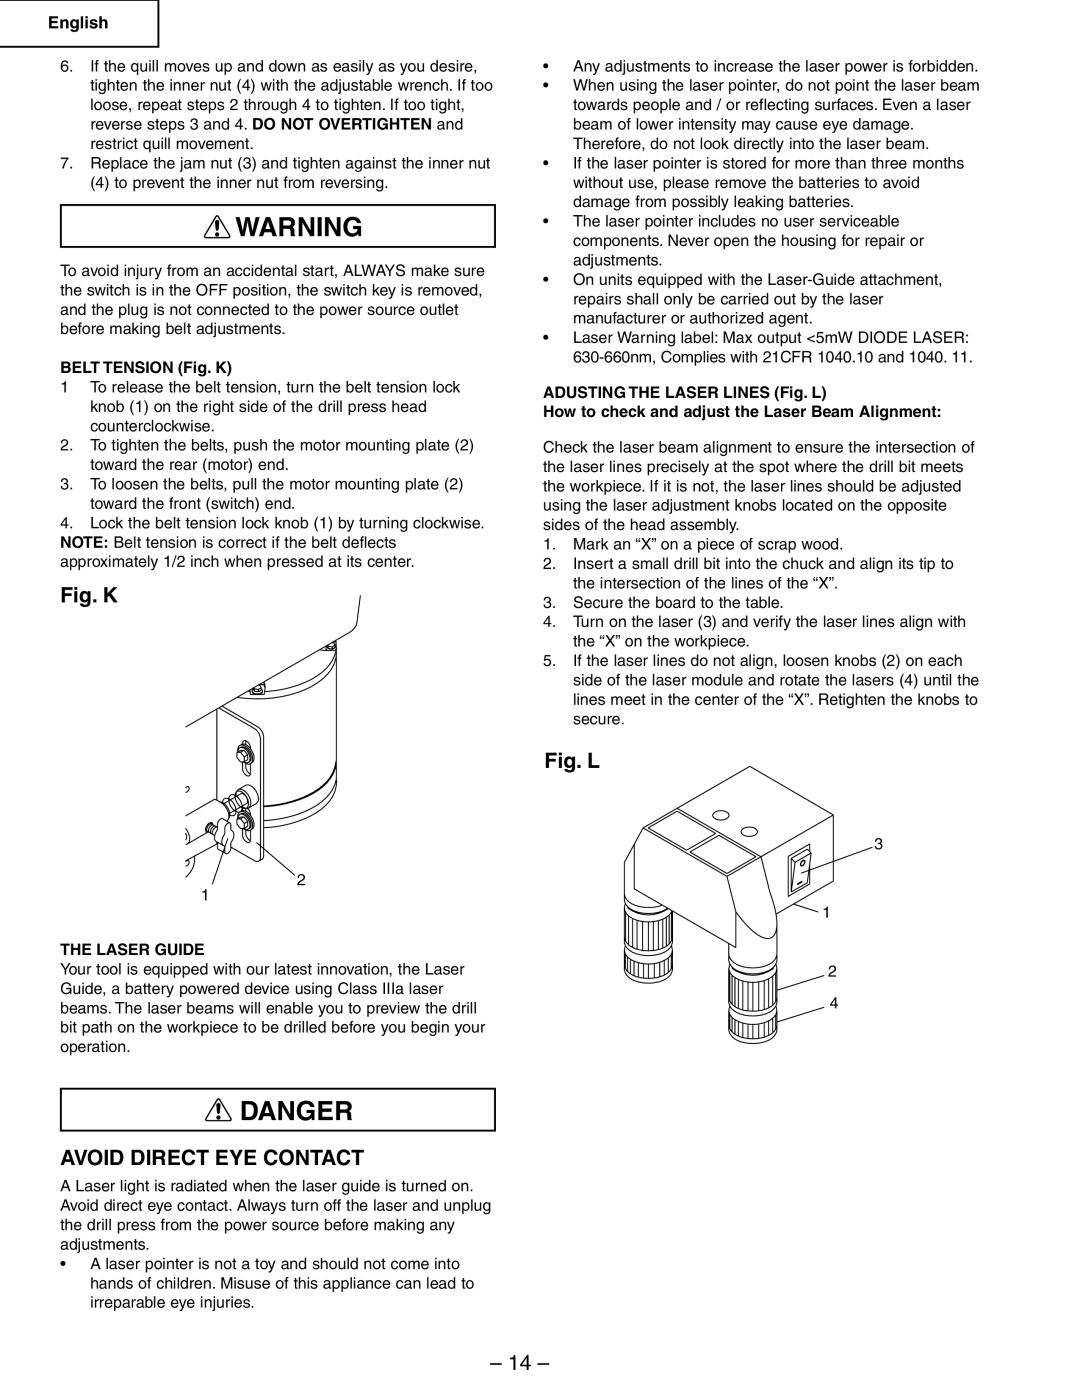
BELT TENSION (Fig. K)

1To release the belt tension, turn the belt tension lock knob (1) on the right side of the drill press head

counterclockwise.

2.To tighten the belts, push the motor mounting plate (2) toward the rear (motor) end.

3.To loosen the belts, pull the motor mounting plate (2) toward the front (switch) end.

4.Lock the belt tension lock knob (1) by turning clockwise. NOTE: Belt tension is correct if the belt deflects approximately 1/2 inch when pressed at its center.

Fig. K

2

1

THE LASER GUIDE

Your tool is equipped with our latest innovation, the Laser Guide, a battery powered device using Class IIIa laser beams. The laser beams will enable you to preview the drill bit path on the workpiece to be drilled before you begin your operation.

DANGER

AVOID DIRECT EYE CONTACT

A Laser light is radiated when the laser guide is turned on. Avoid direct eye contact. Always turn off the laser and unplug the drill press from the power source before making any adjustments.

A laser pointer is not a toy and should not come into hands of children. Misuse of this appliance can lead to irreparable eye injuries.

Any adjustments to increase the laser power is forbidden.

When using the laser pointer, do not point the laser beam towards people and / or reflecting surfaces. Even a laser beam of lower intensity may cause eye damage. Therefore, do not look directly into the laser beam.

If the laser pointer is stored for more than three months without use, please remove the batteries to avoid damage from possibly leaking batteries.

The laser pointer includes no user serviceable components. Never open the housing for repair or adjustments.

On units equipped with the Laser-Guide attachment, repairs shall only be carried out by the laser manufacturer or authorized agent.

Laser Warning label: Max output <5mW DIODE LASER: 630-660nm, Complies with 21CFR 1040.10 and 1040. 11.

ADUSTING THE LASER LINES (Fig. L)

How to check and adjust the Laser Beam Alignment:

Check the laser beam alignment to ensure the intersection of the laser lines precisely at the spot where the drill bit meets the workpiece. If it is not, the laser lines should be adjusted using the laser adjustment knobs located on the opposite sides of the head assembly.

1.Mark an “X” on a piece of scrap wood.

2.Insert a small drill bit into the chuck and align its tip to the intersection of the lines of the “X”.

3.Secure the board to the table.

4.Turn on the laser (3) and verify the laser lines align with the “X” on the workpiece.

5.If the laser lines do not align, loosen knobs (2) on each side of the laser module and rotate the lasers (4) until the lines meet in the center of the “X”. Retighten the knobs to secure.

Fig. L

3

1

2

4

– 14 –

Page 14
Image 14
Hitachi B13F instruction manual Avoid Direct EYE Contact, Belt Tension Fig. K, Laser Guide

B13F specifications

The Hitachi B13F is a versatile and robust benchtop drill press designed to meet the demands of both professionals and hobbyists in various applications. Known for its reliability and precision, the B13F combines advanced technology with practical features that make it a popular choice among woodworkers, metalworkers, and those involved in DIY projects.

One of the standout features of the Hitachi B13F is its powerful 350-watt motor, which provides sufficient torque for a wide range of drilling operations. This motor is designed to handle heavier materials, ensuring that users can work with wood, metal, and plastics without compromising on performance. Additionally, the drill press offers a variable speed control system, allowing users to select from a speed range of 580 to 3,050 RPM, making it suitable for drilling different materials with ease and precision.

The B13F's 13mm keyless chuck provides convenience and quick tool changes, reducing setup time and enhancing productivity. This feature allows users to effortlessly switch between drill bits without the need for additional tools, which is especially beneficial for those who require frequent bit changes on the job site or in their workshops.

Precision is a hallmark of the Hitachi B13F, thanks in part to its laser guide system that aids in aligning the drill bit with the target material. This ensures accurate and clean holes, minimizing the risk of error in drilling. The drill press is equipped with an adjustable depth stop, enabling users to set the maximum drilling depth for consistent results across multiple holes.

The construction of the B13F is another highlight, with a sturdy cast iron base that provides stability during operation. This solid foundation minimizes vibrations, contributing to a smoother drilling experience and enhancing the overall accuracy of the tool. The height-adjustable work table also adds flexibility, allowing users to accommodate various workpiece sizes effortlessly.

Moreover, safety features such as the emergency stop switch and a built-in work light further enhance the usability of the Hitachi B13F, ensuring that operators can work efficiently while prioritizing safety.

In summary, the Hitachi B13F benchtop drill press combines power, precision, and convenience in a compact design. With advanced technologies such as variable speed control, a keyless chuck, and laser guiding capabilities, it stands out as a reliable tool for a wide range of drilling tasks, making it an excellent investment for both professional workshops and home garages.