Basic operations
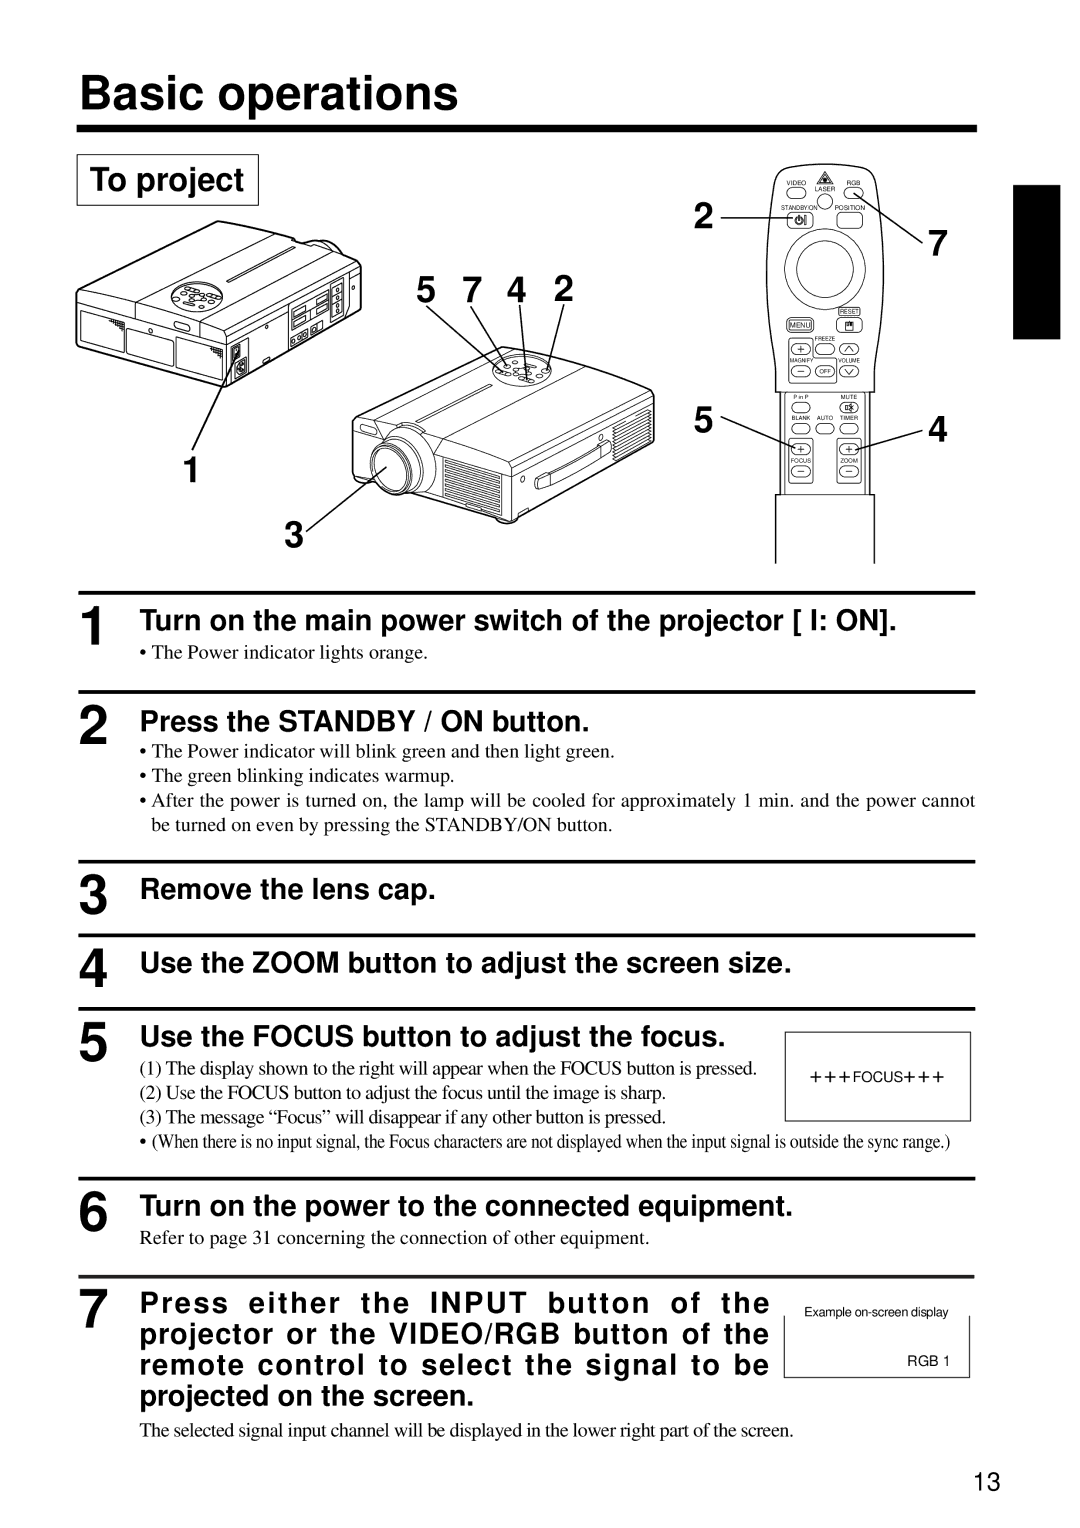
To project
1
2
5 7 4 2
5
3
VIDEO ![]() RGB
RGB
LASER
STANDBY/ON POSITION
RESET
MENU
FREEZE
MAGNIFY VOLUME
OFF
P in P | MUTE |
BLANK AUTO TIMER
FOCUSZOOM
7
4
1 | Turn on the main power switch of the projector [ I: ON]. | ||||
• The Power indicator lights orange. |
|
| |||
|
|
|
|
|
|
2 | Press the STANDBY / ON button. |
|
| ||
• The Power indicator will blink green and then light green. |
|
| |||
|
| • The green blinking indicates warmup. |
|
| |
|
| • After the power is turned on, the lamp will be cooled for approximately 1 min. and the power cannot | |||
|
| be turned on even by pressing the STANDBY/ON button. |
|
| |
|
|
|
|
| |
| 3 | Remove the lens cap. |
|
| |
|
|
|
|
| |
4 | Use the ZOOM button to adjust the screen size. |
|
| ||
|
|
|
|
| |
5 | Use the FOCUS button to adjust the focus. |
|
|
| |
|
|
| |||
|
| (1) The display shown to the right will appear when the FOCUS button is pressed. |
| +++FOCUS+++ |
|
|
| (2) Use the FOCUS button to adjust the focus until the image is sharp. |
|
|
|
|
| (3) The message “Focus” will disappear if any other button is pressed. |
|
|
|
|
|
|
|
| |
|
| • (When there is no input signal, the Focus characters are not displayed when the input signal is outside the sync range.) | |||
|
|
|
|
|
|
6 | Turn on the power to the connected equipment. |
|
| ||
Refer to page 31 concerning the connection of other equipment. |
|
| |||
7 Press either the INPUT button of the projector or the VIDEO/RGB button of the remote control to select the signal to be projected on the screen.
Example
RGB 1
The selected signal input channel will be displayed in the lower right part of the screen.
13