SPECIFICATIONS
NOTE • This specifications are subject to change without notice.
| Item |
| Specification |
| |
|
|
|
|
|
|
Product name | Liquid crystal projector |
|
|
| |
|
|
|
|
|
|
Liquid | Panel size | 1.8 cm (0.7 type) |
|
|
|
|
|
|
|
| |
Drive system | TFT active matrix |
|
|
| |
crystal |
|
|
| ||
|
|
|
|
| |
panel | Pixels |
| |||
|
| ||||
|
|
| |||
|
|
|
| ||
Lens |
| Zoom lens F=1.7 ~ 2.1 f=36.8 ~ 47.8 mm |
| ||
|
|
|
|
|
|
Lamp |
| 150 W UHB |
|
|
|
|
|
|
|
|
|
Speaker |
| 1.0W |
|
|
|
|
|
|
| ||
Power supply | AC100 ~ 120V, 2.7A / AC220 ~ 240V, 1.3A |
| |||
|
|
|
|
|
|
Power consumption | 240W |
|
|
| |
|
|
|
|
|
|
Temperature range | 0 ~ 35°C (Operating) |
|
|
| |
|
|
|
|
| |
Size |
| 295 (W) x 87.5 (H) x237 (D) mm |
|
| |
|
|
|
|
|
|
Weight (mass) | 2.7 kg |
|
|
| |
|
|
|
|
|
|
|
| RGB Terminal |
| AUDIO Terminal |
|
|
| RGB IN(1, 2) | 2 | AUDIO IN(R, L) | 1 |
|
| VIDEO Terminal |
| OUT Terminal |
|
Terminal |
| VIDEO IN | 1 | RGB OUT | 1 |
|
| 1 | CONTROL Terminal |
| |
|
| COMPONENT VIDEO |
| CONTROL | 1 |
|
| (Y, CB/PB,CR/PR) | 1 | USB | 1 |
|
|
|
|
|
|
Optional Parts | Lamp: DT00511 |
|
|
| |
Air Filter: MU01691 |
|
|
| ||
|
| * For others, consult your dealer. |
|
| |
|
|
|
|
|
|
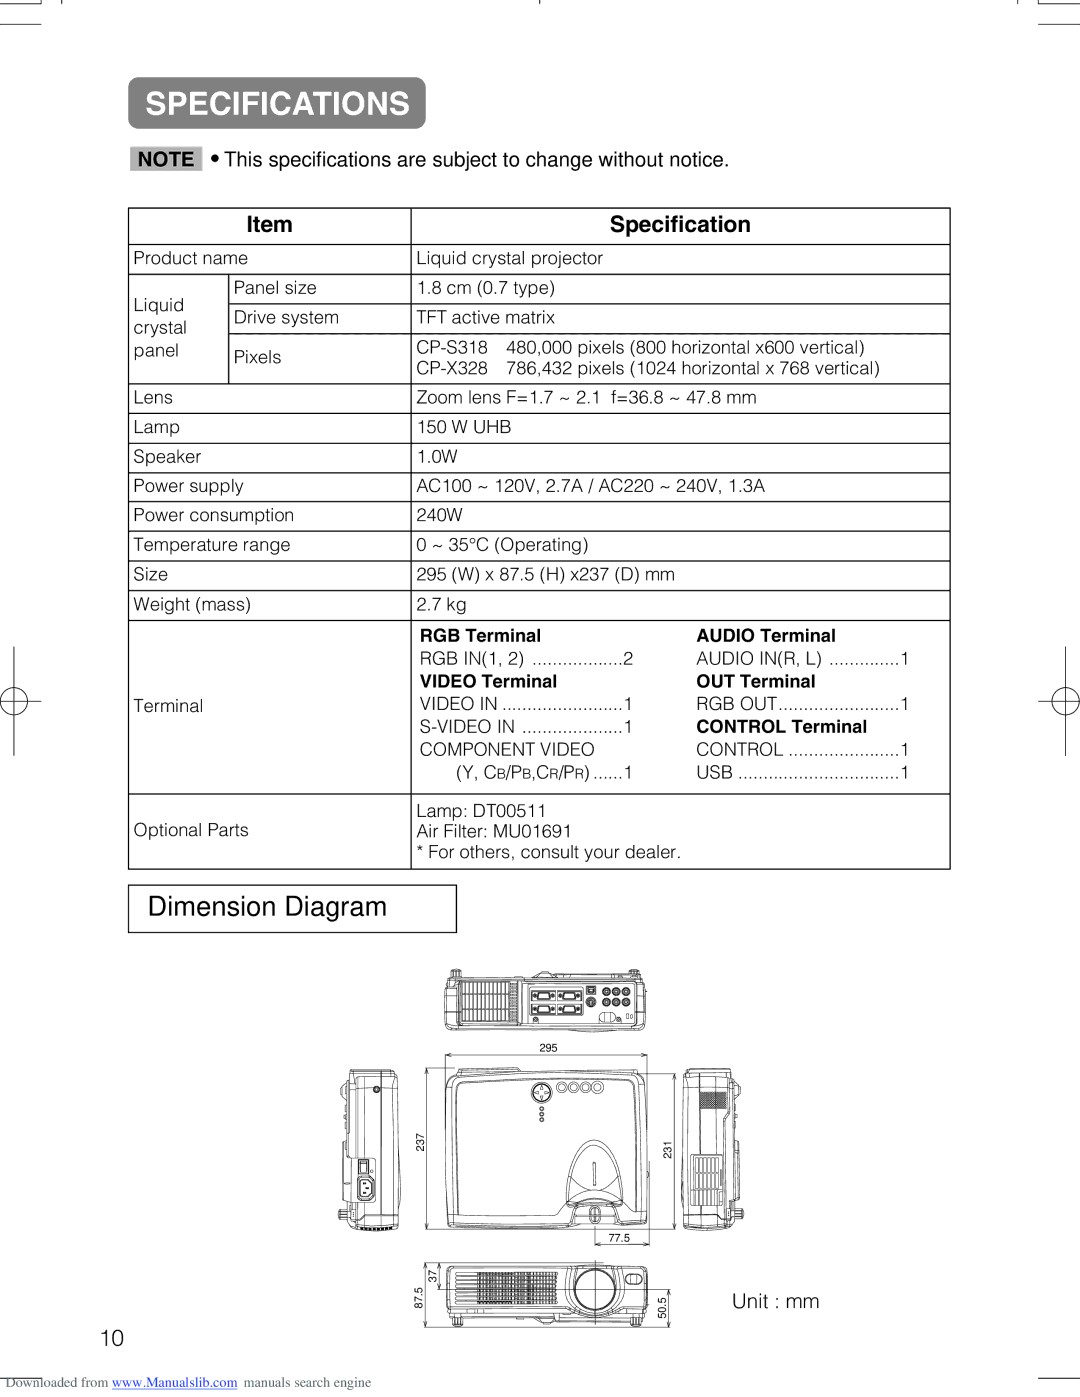
Dimension Diagram
295
237 | 231 |
| 77.5 |
| 37 |
87.5 | 50.5 |
10
Unit : mm
Downloaded from www.Manualslib.com manuals search engine