
L26D205 specifications
The Hitachi L26D205 is a compact and high-quality LCD television that epitomizes the blend of innovation and user-centric design. Geared towards consumers seeking an excellent viewing experience in smaller spaces, this model features a 26-inch screen, making it perfect for bedrooms, kitchens, or cozy living rooms.One of the standout features of the L26D205 is its high-definition display. With a resolution of 1366 x 768 pixels, the television provides sharp, vibrant images that bring content to life. Whether watching a movie or playing video games, users can appreciate the clarity and detail that the screen offers, enhancing their overall viewing experience.
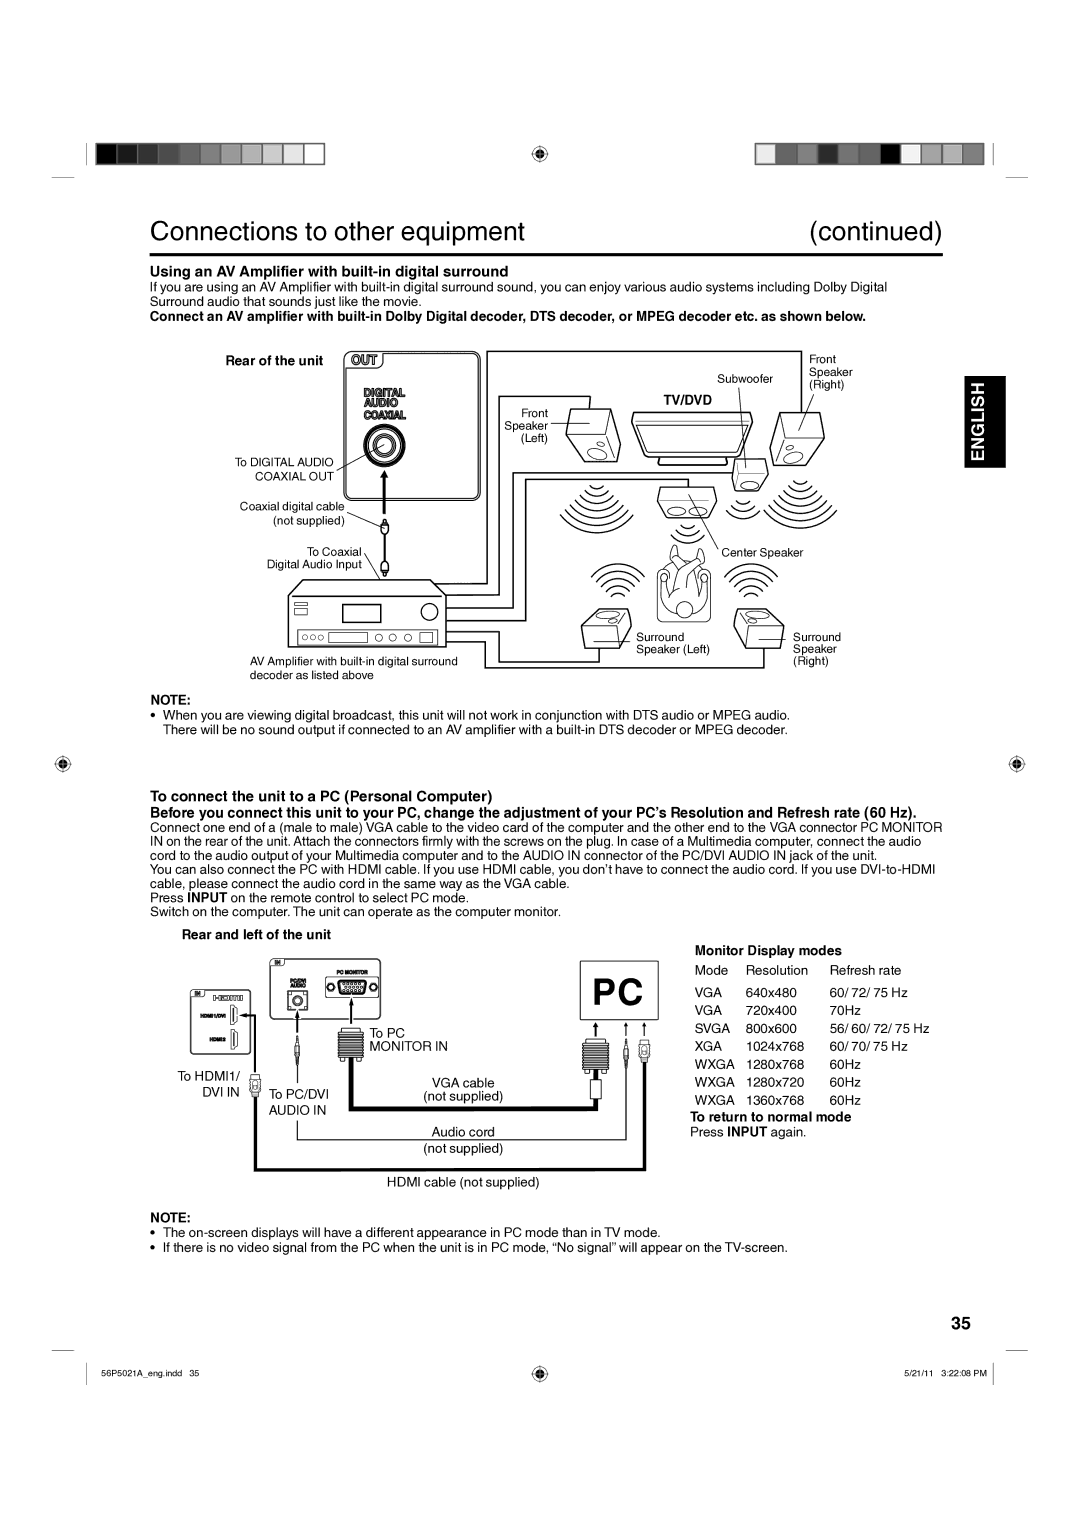
In terms of connectivity, the Hitachi L26D205 is equipped with multiple input options. It includes HDMI ports for connecting HD devices, such as gaming consoles and Blu-ray players, as well as USB ports to facilitate the playback of multimedia content directly from compatible devices. This versatility ensures that users can enjoy a wide range of entertainment options without hassle.
The television also features integrated digital tuning, allowing viewers to access various digital channels without needing an external set-top box. This capability simplifies the setup process and provides users with a seamless viewing experience as they navigate through available content.
Hitachi takes pride in delivering clear sound quality alongside impressive visuals in the L26D205. The television incorporates built-in speakers that provide clear audio, enhancing the overall experience when watching films or listening to music. This feature is especially beneficial for users who prefer not to invest in external audio systems.
Moreover, the L26D205 showcases an energy-efficient design, complying with modern environmental standards. This attention to energy use is crucial for consumers looking to reduce their carbon footprint while also saving on electricity bills.
With its combination of features, performance, and energy efficiency, the Hitachi L26D205 stands out as a reliable choice for those seeking a dependable LCD television. Its compact size, exceptional image quality, and user-friendly design make it a suitable addition to any home entertainment setup. As technology continues to evolve, the L26D205 exemplifies Hitachi's commitment to enhancing the viewing experience for all users.