Getting Started
Determine how you want to set up your Soundbar and Wireless Subwoofer Audio System.
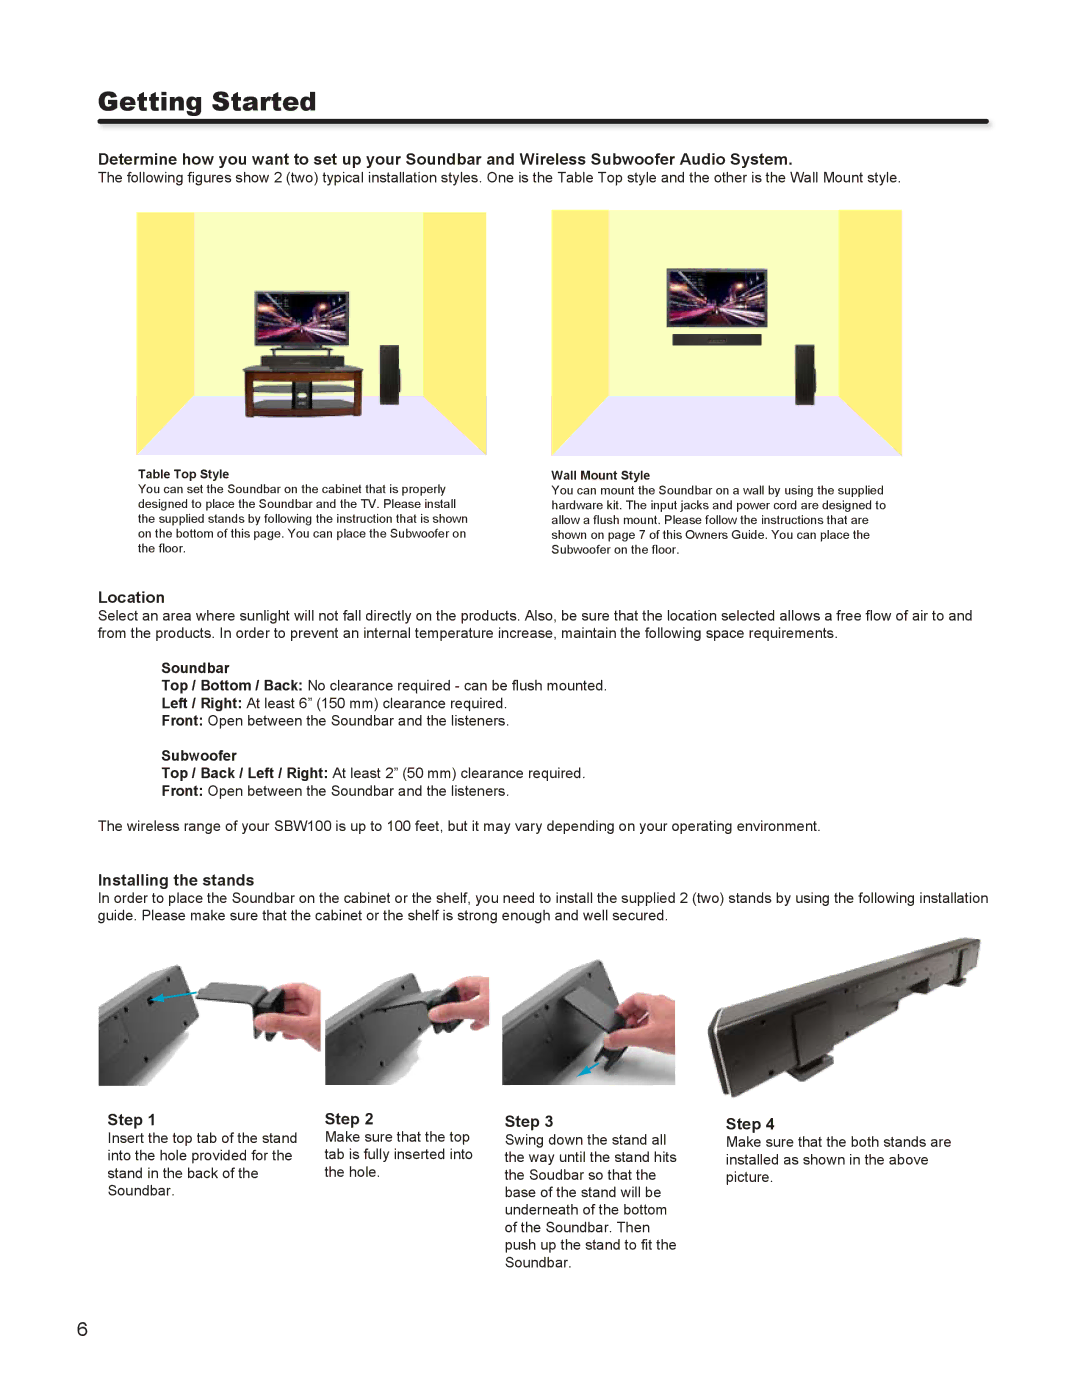
The following figures show 2 (two) typical installation styles. One is the Table Top style and the other is the Wall Mount style.
Table Top Style
You can set the Soundbar on the cabinet that is properly designed to place the Soundbar and the TV. Please install the supplied stands by following the instruction that is shown on the bottom of this page. You can place the Subwoofer on the floor.
Wall Mount Style
You can mount the Soundbar on a wall by using the supplied hardware kit. The input jacks and power cord are designed to allow a flush mount. Please follow the instructions that are shown on page 7 of this Owners Guide. You can place the Subwoofer on the floor.
Location
Select an area where sunlight will not fall directly on the products. Also, be sure that the location selected allows a free flow of air to and from the products. In order to prevent an internal temperature increase, maintain the following space requirements.
Soundbar
Top / Bottom / Back: No clearance required - can be flush mounted.
Left / Right: At least 6” (150 mm) clearance required.
Front: Open between the Soundbar and the listeners.
Subwoofer
Top / Back / Left / Right: At least 2” (50 mm) clearance required.
Front: Open between the Soundbar and the listeners.
The wireless range of your SBW100 is up to 100 feet, but it may vary depending on your operating environment.
Installing the stands
In order to place the Soundbar on the cabinet or the shelf, you need to install the supplied 2 (two) stands by using the following installation guide. Please make sure that the cabinet or the shelf is strong enough and well secured.
Step 1
Insert the top tab of the stand into the hole provided for the stand in the back of the Soundbar.
Step 2
Make sure that the top tab is fully inserted into the hole.
Step 3
Swing down the stand all the way until the stand hits the Soudbar so that the base of the stand will be underneath of the bottom of the Soundbar. Then push up the stand to fit the Soundbar.
Step 4
Make sure that the both stands are installed as shown in the above picture.
6