English
WOOL BONNET ASSEMBLY AND DISASSEMBLY
![]() WARNING: Never attempt to assemble or disassemble the wool bonnet while the polisher is capable of being turned “ON”.
WARNING: Never attempt to assemble or disassemble the wool bonnet while the polisher is capable of being turned “ON”.
Be sure power switch is in the “OFF” position and the electrical cord has been disconnected from the receptacle.
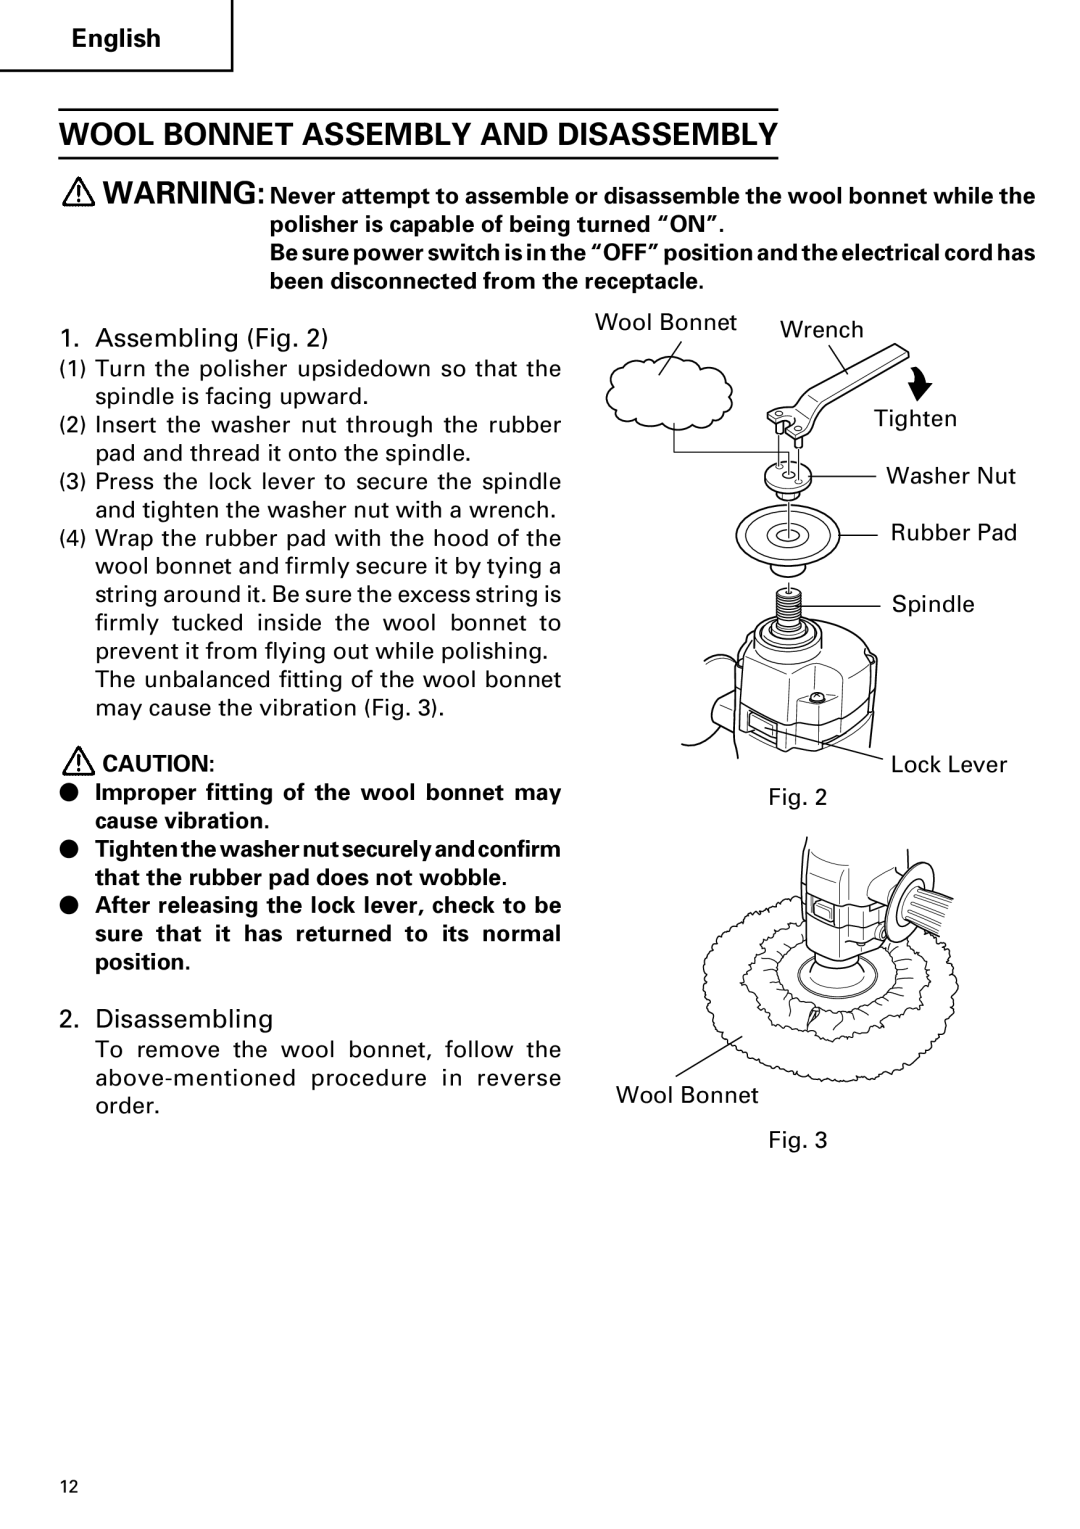
1. Assembling (Fig. 2)
(1)Turn the polisher upsidedown so that the spindle is facing upward.
(2)Insert the washer nut through the rubber pad and thread it onto the spindle.
(3)Press the lock lever to secure the spindle and tighten the washer nut with a wrench.
(4)Wrap the rubber pad with the hood of the wool bonnet and firmly secure it by tying a string around it. Be sure the excess string is firmly tucked inside the wool bonnet to prevent it from flying out while polishing.
The unbalanced fitting of the wool bonnet may cause the vibration (Fig. 3).
![]() CAUTION:
CAUTION:
⬤Improper fitting of the wool bonnet may cause vibration.
⬤Tighten the washer nut securely and confirm that the rubber pad does not wobble.
⬤After releasing the lock lever, check to be sure that it has returned to its normal position.
2.Disassembling
To remove the wool bonnet, follow the
Wool Bonnet | Wrench |
|
Tighten
Washer Nut
Rubber Pad
Spindle
Lock Lever
Fig. 2
Wool Bonnet
Fig. 3
12