ASSEMBLY
WARNING: | HANDLE KNOBS |
Never operate the mower without the proper safety devices in place and working. Never operate the mower with damaged safety devices. Failure to heed this warning can result in serious personal injury.
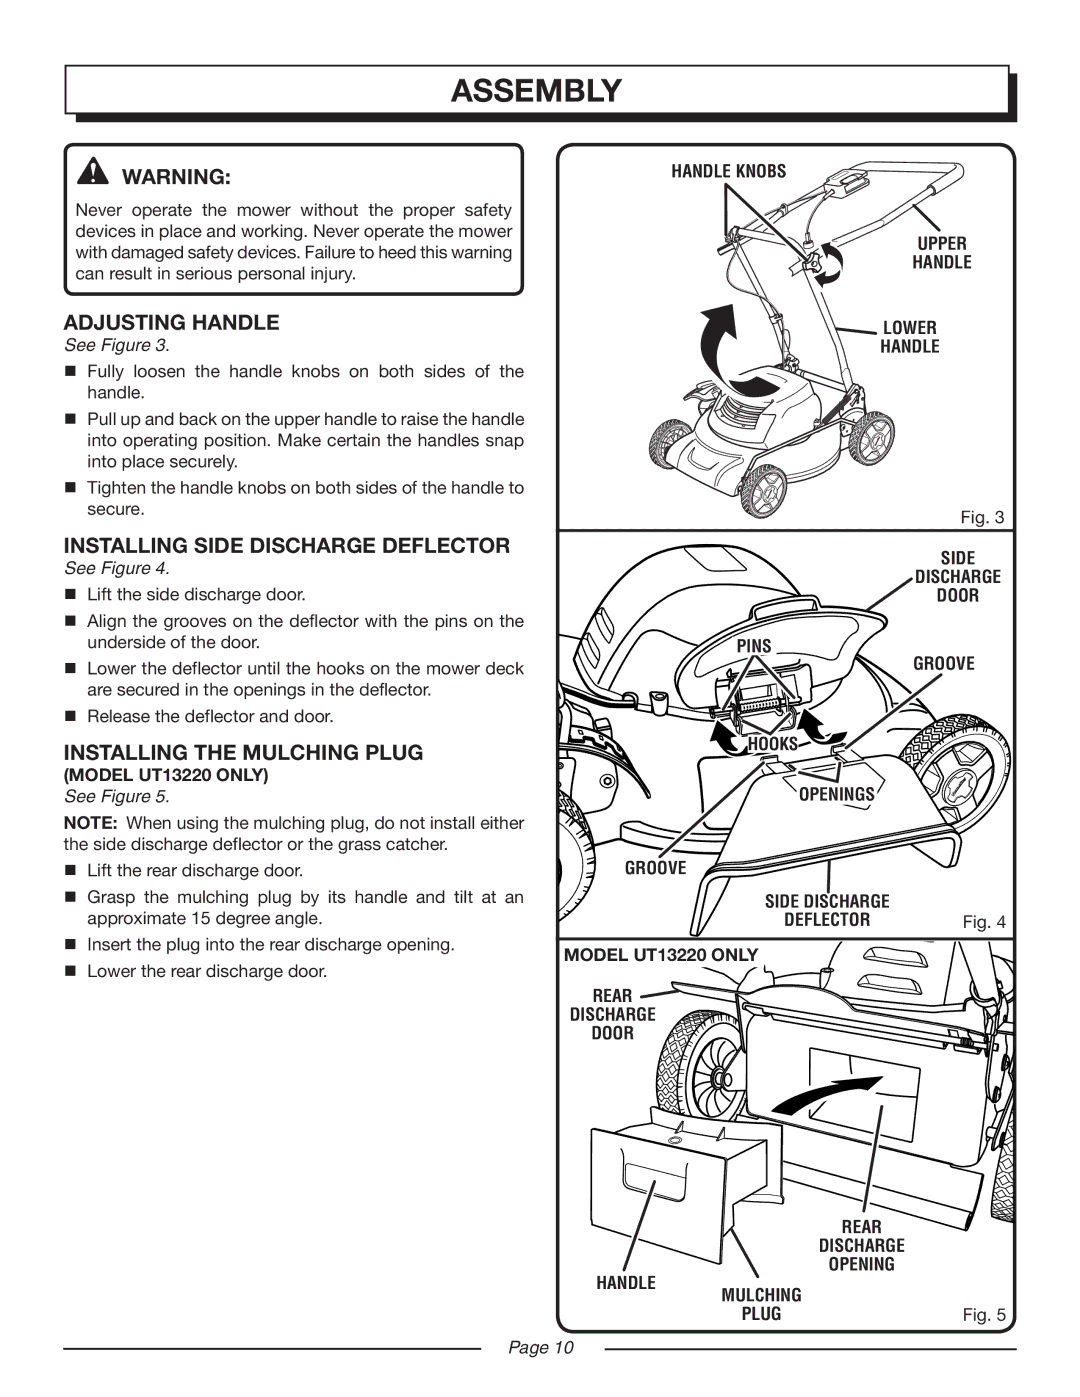
ADJUSTING HANDLE
See Figure 3.
Fully loosen the handle knobs on both sides of the handle.
Pull up and back on the upper handle to raise the handle into operating position. Make certain the handles snap into place securely.
Tighten the handle knobs on both sides of the handle to secure.
UPPER
HANDLE
![]() LOWER
LOWER
HANDLE
Fig. 3
INSTALLING SIDE DISCHARGE DEFLECTOR
See Figure 4.
Lift the side discharge door. |
Align the grooves on the deflector with the pins on the |
underside of the door. |
Lower the deflector until the hooks on the mower deck |
are secured in the openings in the deflector. |
PINS
SIDE
DISCHARGE
DOOR
GROOVE
Release the deflector and door. |
INSTALLING THE MULCHING PLUG
(MODEL UT13220 ONLY)
See Figure 5.
NOTE: When using the mulching plug, do not install either the side discharge deflector or the grass catcher.
Lift the rear discharge door.
Grasp the mulching plug by its handle and tilt at an approximate 15 degree angle.
Insert the plug into the rear discharge opening.
Lower the rear discharge door.
HOOKS![]()
OPENINGS
GROOVE
SIDE DISCHARGE |
|
DEFLECTOR | Fig. 4 |
MODEL UT13220 ONLY
REAR ![]()
DISCHARGE
DOOR
|
| REAR |
|
| DISCHARGE |
HANDLE |
| OPENING |
MULCHING |
| |
|
| |
| PLUG | Fig. 5 |
Page 10