
L2310 specifications
The Hoover L2310 is a versatile and powerful vacuum cleaner designed to meet the diverse cleaning needs of households. Known for its lightweight and agile design, the L2310 is particularly appealing for users seeking ease of use without sacrificing performance.One of the standout features of the Hoover L2310 is its impressive suction power. Equipped with a robust motor, this vacuum delivers strong suction across various surfaces, including carpets, hardwood floors, and tiled areas. Its ability to switch between different floor types seamlessly is a significant advantage, allowing users to maintain clean surfaces with minimal hassle.
The L2310 also incorporates advanced filtration technology, specifically a HEPA filter that traps allergens and fine dust particles. This feature is particularly beneficial for allergy sufferers, as it significantly improves indoor air quality by preventing allergens from being released back into the environment. The filter is washable and reusable, promoting sustainability and reducing the need for frequent replacements.
The vacuum's ergonomic design includes a comfortable handle and a lightweight build, making it easy to maneuver around furniture and into tight spaces. Users will appreciate the convenience of its compact size, which allows for easy storage in small areas without compromising its operational efficiency.
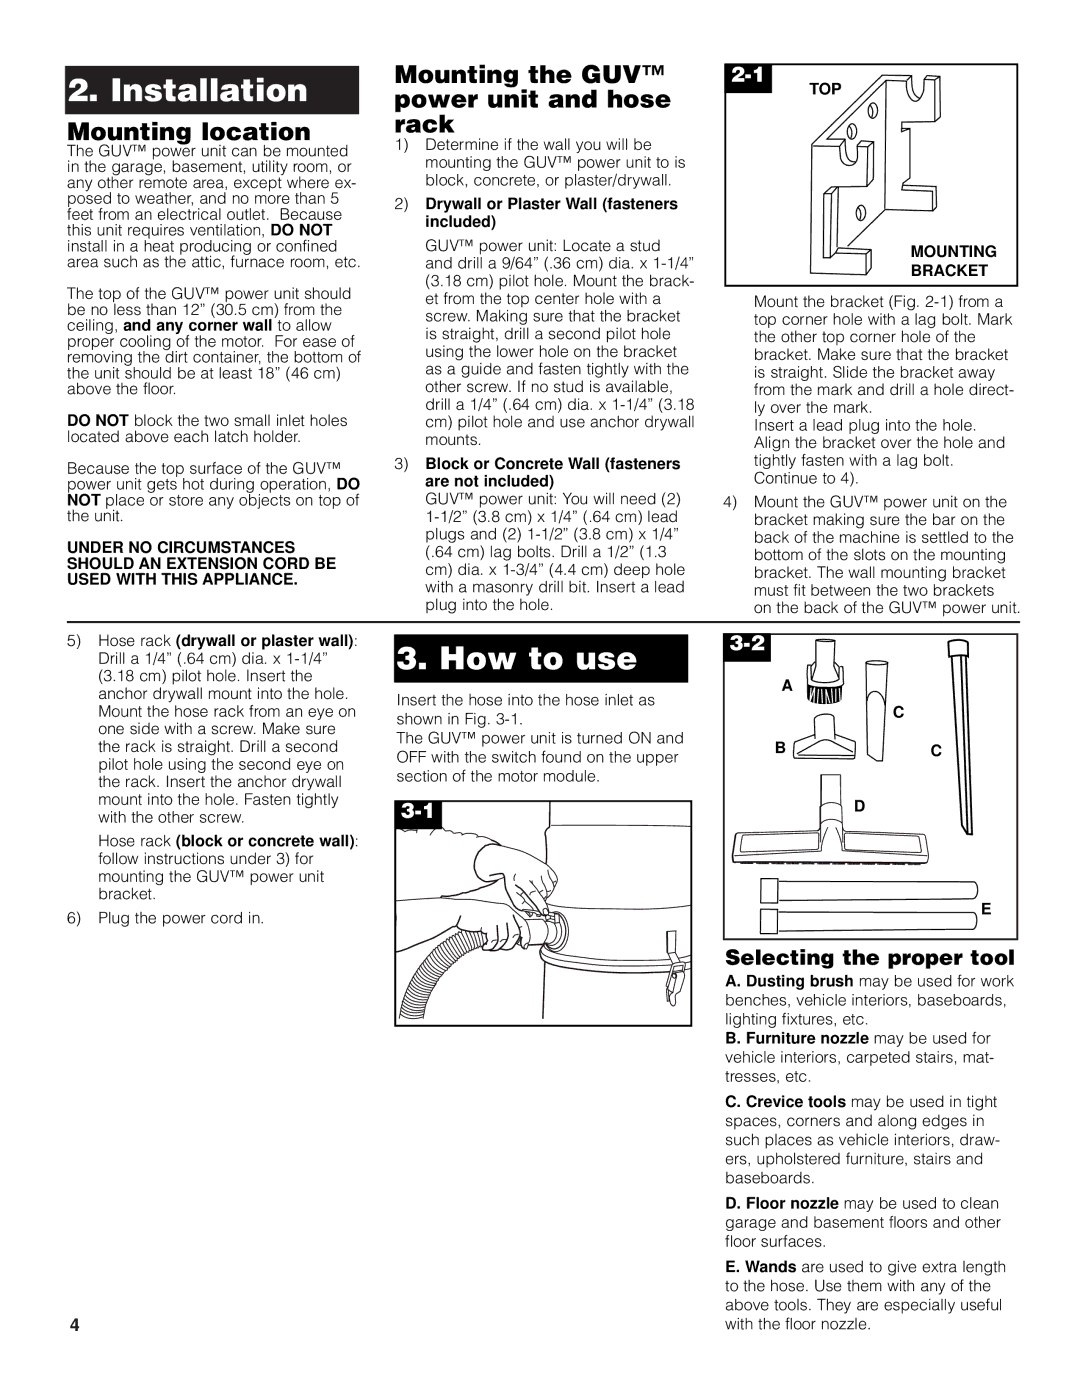
A key characteristic of the Hoover L2310 is its array of cleaning tools. The vacuum comes with various attachments, such as a crevice tool for tight spots, an upholstery brush for furniture, and a dusting brush for delicate surfaces. These accessories enhance the vacuum’s versatility, making it suitable for a wide range of cleaning tasks beyond just floor surfaces.
The corded design ensures that the vacuum maintains a consistent power supply without the limitations of battery life. This makes it an excellent choice for larger spaces, enabling users to clean extensive areas without having to stop and recharge. With a long power cord, users can navigate rooms without constantly changing outlets.
In conclusion, the Hoover L2310 is a well-rounded vacuum cleaner that combines powerful suction with advanced filtration technology, lightweight design, and versatile cleaning attachments. Its thoughtful features cater to the needs of various users, making it a reliable choice for anyone looking to maintain a clean and healthy living environment. With the Hoover L2310, effective cleaning is just a few simple steps away.