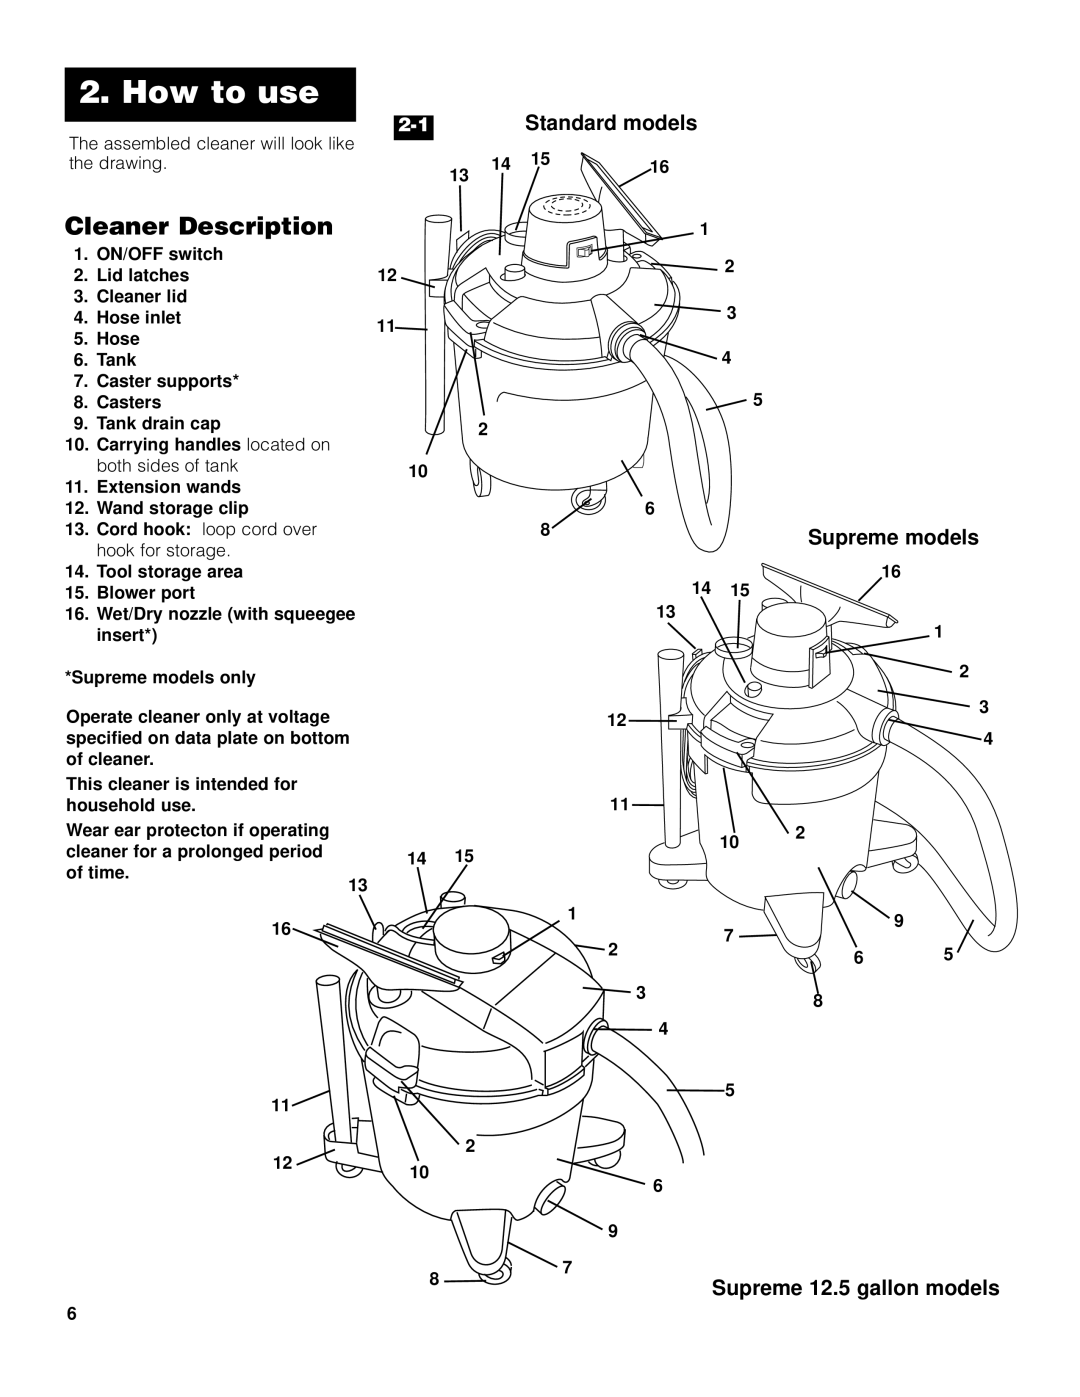
Wet/Dry Vacuum cleaner specifications
The Hoover Wet/Dry Vacuum Cleaner is a versatile cleaning tool that combines power and convenience to tackle a range of messes, both wet and dry. Designed for homeowners and professionals alike, this vacuum cleaner stands out due to its innovative features, robust technologies, and user-friendly characteristics.One of the key features of the Hoover Wet/Dry Vacuum is its powerful suction capability. Equipped with a high-performance motor, it provides strong suction that effectively lifts dirt, debris, liquids, and even larger particles from various surfaces. This makes it perfect for cleaning garages, workshops, basements, and outdoor areas, where traditional vacuums often fall short.
Another notable characteristic is its large tank capacity. Most models come with a generous tank that allows for extended cleaning sessions without frequent emptying. This is particularly beneficial for tackling larger messes, such as spills from machinery or extensive debris clearance after DIY projects. Additionally, the tank is often designed for easy removal and cleaning, ensuring that maintenance is a breeze.
The Hoover Wet/Dry Vacuum features advanced filtration systems, which help trap dust, allergens, and debris, ensuring a healthier environment. Many models come equipped with HEPA filters, which are capable of capturing microscopic particles, making these vacuums ideal for users with allergies or sensitivities.
Portability is another strongpoint of the Hoover Wet/Dry Vacuum. With a lightweight design and ergonomic handle, this vacuum is easy to maneuver and transport. Many models also include convenient onboard storage for attachments and accessories, keeping everything organized and ready for use.
Additionally, the vacuum often boasts multiple attachment options, such as specialized nozzles, wands, and brushes. These accessories enhance cleaning efficiency, allowing users to switch easily between tasks, whether they are cleaning floors, upholstery, or tight corners.
Another noteworthy feature is the dual-functionality of these vacuums. Many Hoover Wet/Dry Vacs are equipped to handle both wet and dry cleaning tasks seamlessly. Users can quickly switch from vacuuming up spills to cleaning up dirt, making this machine a time-saving tool in any cleaning arsenal.
In summary, the Hoover Wet/Dry Vacuum Cleaner stands out with its powerful suction, large tank capacity, advanced filtration, lightweight design, and versatile attachments. This combination of features makes it an essential tool for handling both everyday messes and challenging cleanup tasks, ensuring that homes and workspaces remain spotless with minimal effort.