ENGLISH
IMPORTANT
1. In order to carry out safe and proper installation of the product, please read this booklet carefully beforehand and follow the instructions contained within.
2. On completion of the installation, start up the icemaker to check for any abnormalities, and instruct the user on how to use and maintain the icemaker in accordance with the Instruction Manual.
3. This booklet should be handed over to the user after the installation and be preserved by the user together with the Instruction Manual for any further consultation that may be necessary.
WARNING
The installation must be carried out by qualified personnel, in accordance with current regulations, according to the manufacturer’s instructions.
3) Remove the package of accessories, and check the contents: | ||
a) Installation Kit |
| |
| Inlet Hose | 1 |
| Outlet Hose | 1 |
Installation Kit |
| |
| Inlet Hose | 2 |
| Outlet Hose | 2 |
| 2 | |
b) Scoop |
| 1 |
c) Ice Chute | 1 | |
d) Drain Pipe Collar | 1 | |
e) Packing | 1 | |
f) Mounting Bracket | 2 | |
4)Remove the shipping tape holding the Bin Control Switch.
5)Remove the protective plastic film from the exterior. If the icemaker is exposed to the sun or to heat, remove the film after the icemaker cools.
1.UNPACKING
WARNING
Children should not be allowed in reach of the packaging elements (plastic bags and expanded polystyrene) as they are potential sources of danger.
CAUTION
Remove shipping carton, tape(s) and packing. If packing material is left in the icemaker, it will not work properly.
Power Cord
Top Panel
Front Panel
Fig. 1
Note: This icemaker needs a Storage Bin. The recommended Storage Bin is HOSHIZAKI ICE STORAGE BIN, Model
2. LOCATION
IMPORTANT
1. This icemaker is not intended for outdoor use. Normal operating ambient temperature should be within 1°C to 40°C. Normal operating water temperature should be within 5°C to 35°C. Operation of the icemaker, for extended periods, outside of these normal temperature ranges may affect production capacity.
2. The icemaker should not be located next to ovens, grills or other high heat producing equipment.
3. The location should provide a firm and level foundation for the equipment.
4. Allow 60 cm clearance at rear and top for proper air circulation and ease of maintenance and/or service should they be required.
5. This appliance is not suitable for installation in an area where a water jet could be used and where dripping is not allowed.
6. Do not place anything on top of the icemaker or in front of the Louver.
7. This icemaker will not work at subfreezing temperatures. To prevent damage to the water supply line, drain the icemaker when air temperature is below zero.
1)After removing the packaging, make sure that the icemaker and the Storage Bin are in good condition. If in doubt, please do not use the equipment but apply to professionally qualified personnel. See the instruction sheet attached to the Storage Bin for its unpacking and installation guidelines.
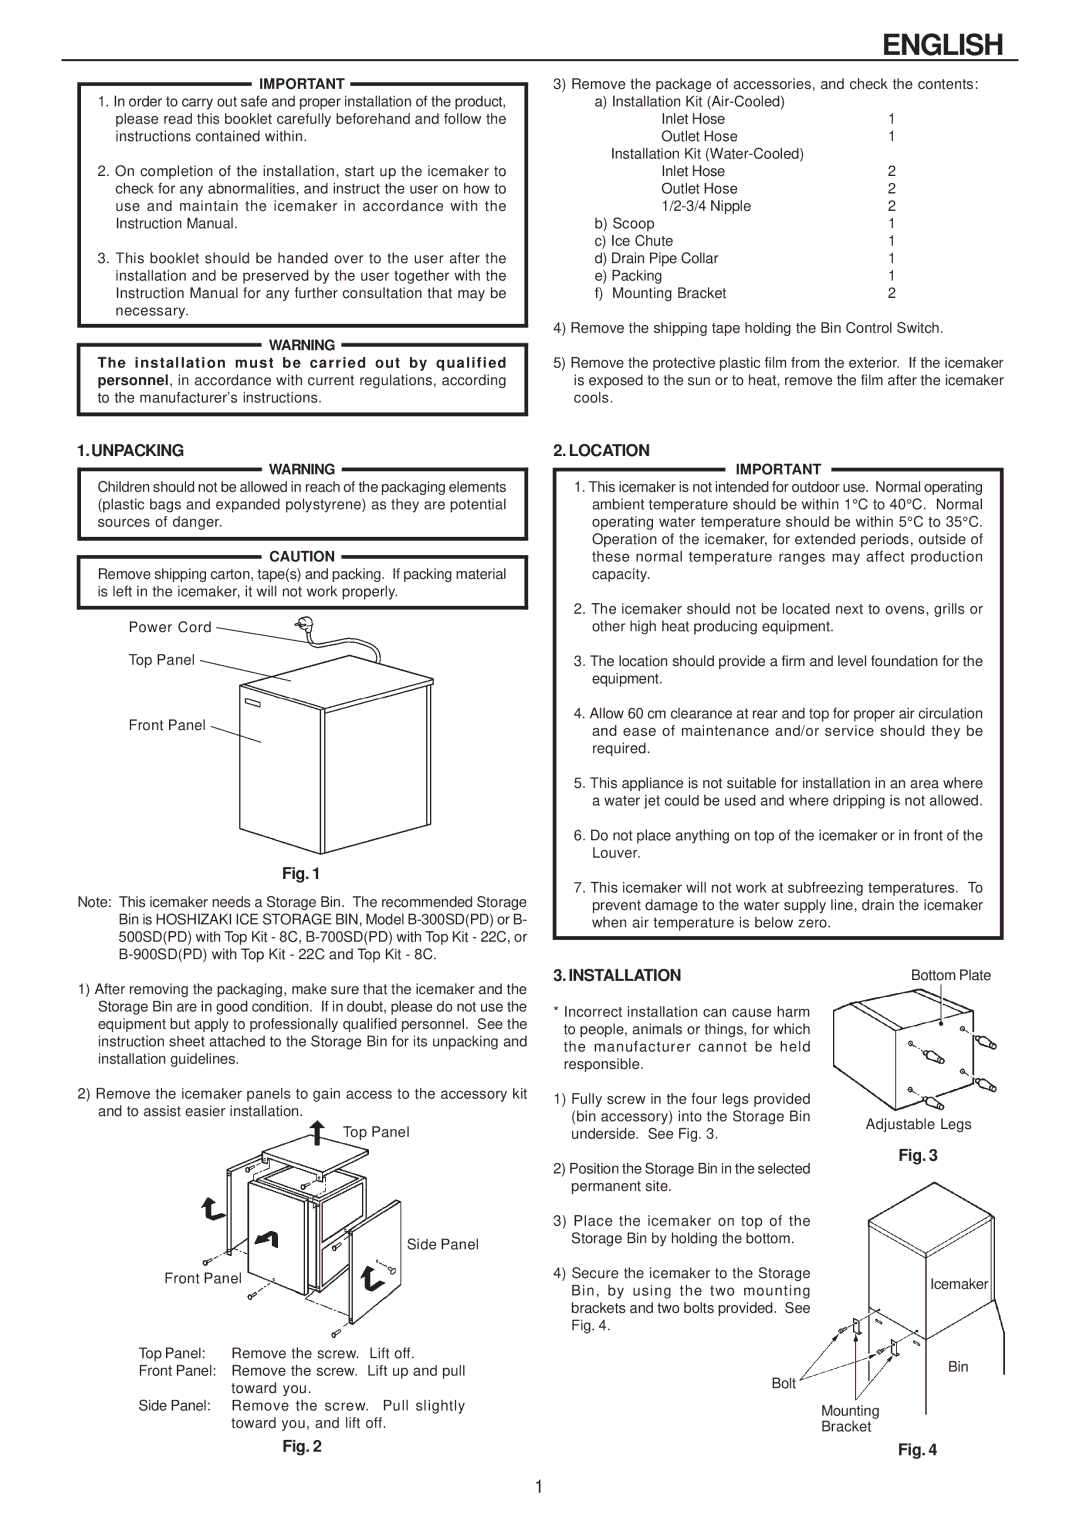
2)Remove the icemaker panels to gain access to the accessory kit and to assist easier installation.
Top Panel
Side Panel |
Front Panel |
Top Panel: Remove the screw. Lift off. |
3. INSTALLATION
*Incorrect installation can cause harm to people, animals or things, for which the manufacturer cannot be held responsible.
1)Fully screw in the four legs provided (bin accessory) into the Storage Bin underside. See Fig. 3.
2)Position the Storage Bin in the selected permanent site.
3)Place the icemaker on top of the Storage Bin by holding the bottom.
4)Secure the icemaker to the Storage Bin, by using the two mounting brackets and two bolts provided. See Fig. 4.
Bottom Plate
Adjustable Legs
Fig. 3
Icemaker
Front Panel: Remove the screw. Lift up and pull |
toward you. |
Bolt
Bin
Side Panel: Remove the screw. Pull slightly |
toward you, and lift off. |
Fig. 2
Mounting
Bracket
Fig. 4
1