Grill Pan and Handle
Using the grill pan kit
The grill pan handle is detachable from the pan to facilitate cleaning and storage. Fix the pan handle securely before use:
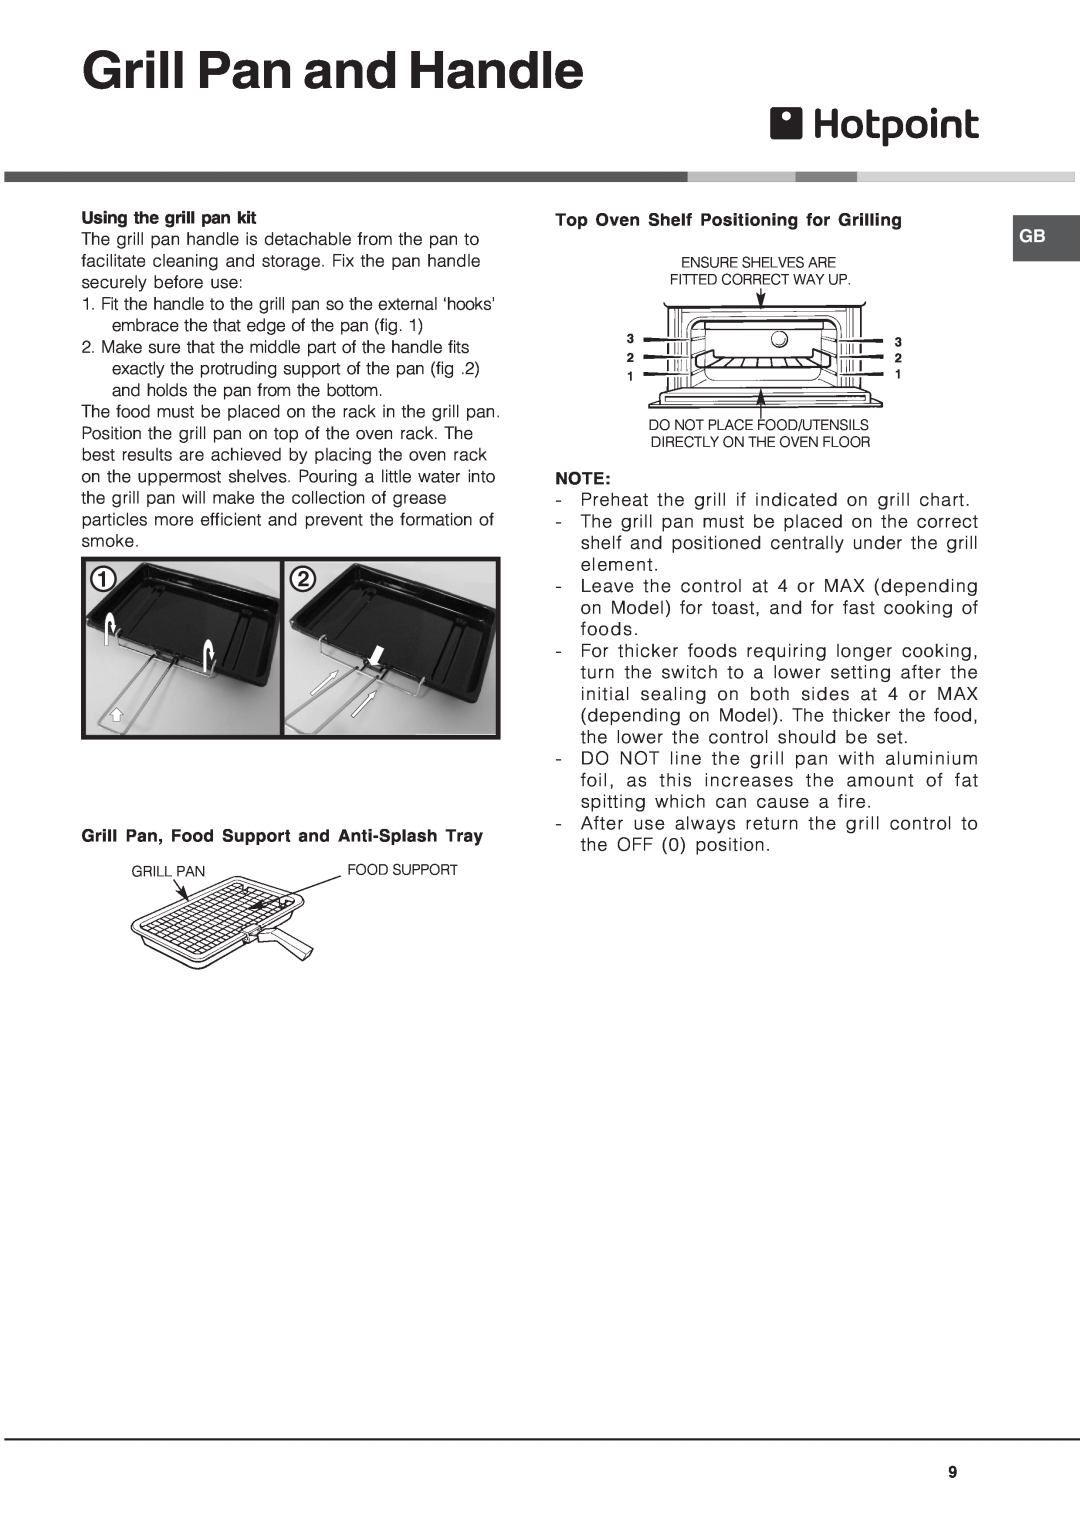
1. Fit the handle to the grill pan so the external ‘hooks’ embrace the that edge of the pan (fig. 1)
2. Make sure that the middle part of the handle fits exactly the protruding support of the pan (fig .2) and holds the pan from the bottom.
The food must be placed on the rack in the grill pan. Position the grill pan on top of the oven rack. The best results are achieved by placing the oven rack on the uppermost shelves. Pouring a little water into the grill pan will make the collection of grease particles more efficient and prevent the formation of smoke.
1 | 2 |
Grill Pan, Food Support and
GRILL PAN | FOOD SUPPORT |
Top Oven Shelf Positioning for Grilling
GB
ENSURE SHELVES ARE
FITTED CORRECT WAY UP.
33
22
11
DO NOT PLACE FOOD/UTENSILS
DIRECTLY ON THE OVEN FLOOR
NOTE:
-Preheat the grill if indicated on grill chart.
-The grill pan must be placed on the correct shelf and positioned centrally under the grill element.
-Leave the control at 4 or MAX (depending on Model) for toast, and for fast cooking of foods.
-For thicker foods requiring longer cooking, turn the switch to a lower setting after the initial sealing on both sides at 4 or MAX (depending on Model). The thicker the food, the lower the control should be set.
-DO NOT line the grill pan with aluminium foil, as this increases the amount of fat spitting which can cause a fire.
-After use always return the grill control to the OFF (0) position.
9